
Running Windows 98 today seems like a strange thing to do. First of all, it can’t run natively on a modern 64 bit CPU and definitely not on an M1-based Mac. Secondly, it’s seriously outdated and is considered useless for today’s productivity. Thinking about it further, you will see that it opens a whole new old world. There are so much high quality applications and especially games out there, which you can’t run directly on a modern PC and for sure not on a Mac. By using emulation with UTM and QEMU, we can install Windows 98 SE on a new Mac and are able to revive that past experience and fun you had before. This article covers installing and configuring Windows 98 SE on a MacBook M1 by using UTM.
YouTube Video
If you are interested, I also created a YouTube video from this blogpost. If you prefer classic text, you can just follow the rest of this article:
Introduction
If you let the idea of using such an old OS and the purpose of doing so sink in, you might ask yourself why specifically Windows 98 and not 95, Me or XP for example. The main reason for this choice is that it contains some nice improvements over 95, like USB support, but is not too modern to still have a fully working DOS environment for older games.
To get Windows 98 SE operational on a modern Mac with an Intel x86-64 CPU or M1 SOC, as mentioned above, I’ll be using UTM (https://github.com/utmapp/UTM).
UTM is using QEMU under the hood and is capable of emulating different processor architectures, which includes x86 or i386 which was the architecture of the era where Windows 98 was new. It will also allow us to configure the required hardware like a video card and sound card, compatible with the old OS version.
For this article, I’ll be using a Macbook Air M1 but the exact same instructions work on any other Mac as well. Both with an Intel CPU or M1-variant.
Step 1) get a Windows 98 (SE) ISO file
The first thing we need to get is a copy of the Windows 98 SE installation media.
It shouldn’t be very hard to get your hands on a proper Windows 98 SE ISO file. The first hit I had when searching for the term on Google got me one. Just pay attention that you get an OEM version as that is the version that is bootable from the CD/ISO.

Together with the ISO you will need a product key as well, which I found in the same place as I found the ISO :)
I’m not sure if you can see Windows 98 SE as abandonware yet and it’s a gray area anyway to distribute such software, hence why I don’t provide a direct link here.
Step 2) Downlad and install UTM
After you get your hands on an ISO which we will use to get Windows installed, we first need to install UTM on our Mac if you haven’t done so.
You can download UTM from Github using: https://github.com/utmapp/UTM/releases/latest/download/UTM.dmg
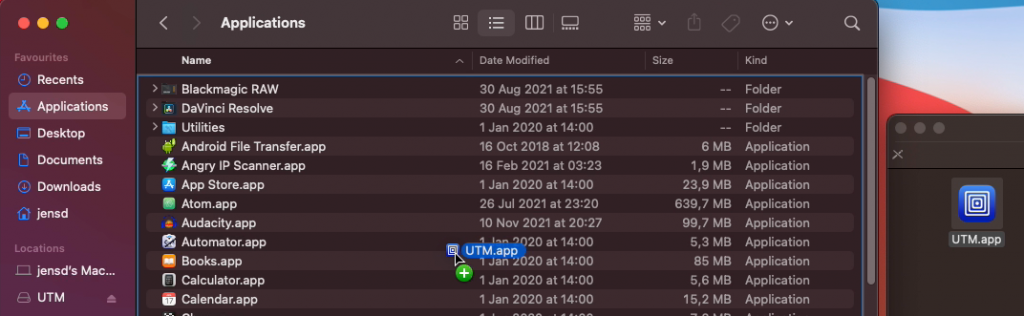
Once downloaded, simply open the .dmg file by double clicking on it and move UTM.app to your Applications folder using Finder:
Then start UTM, simply by launching it as any other application on your Mac.
Step 3) Create a VM for your Windows 98 SE installation
At this point we have both the ISO file for installing Windows and we have our hypervisor/emulator, UTM, ready. Now we need to create a new virtual machine with UTM for use with the next step. It took a lot of time of testing to figure out what was the best match for maximum compatibility.
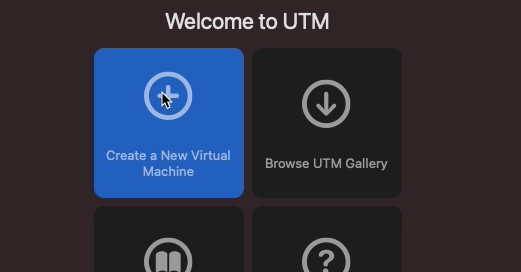
Start UTM and click on “Create a New Virtual Machine”:
In the first tab: Information:
- Give the VM a name, I chose “Win98SE”
- Optionally choose an icon for the VM:

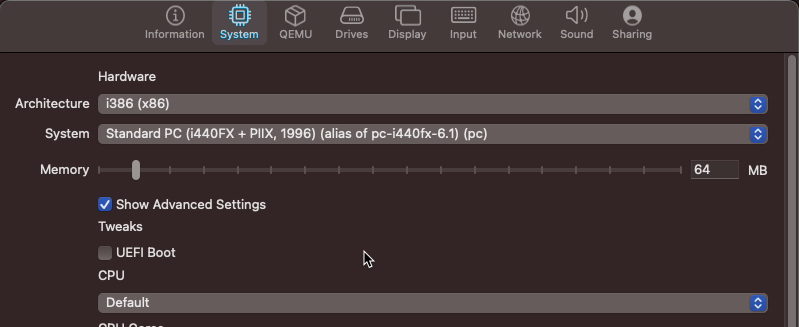
In the second tab: System:
- Select i386 (x86) as architecture
- As system, choose Standard PC (i440FX + PIIX, 1996) (alias of pc-i440fx-6.1) (pc)
- Lower the RAM to anything under 512MB, I chose 64MB which should be plenty for most of the things.
- Click “Show Advanced Settings” and uncheck UEFI Boot
The QEMU tab can stay as is. In the Drives tab:
- Click “New Drive”, leave the 10GB and IDE interface and click Create. This will be the hard disk where we will install Windows 98SE.
- Click “New Drive” again, check the removable option and IDE interface and click Create. This is the CD drive where we can mount the earlier mentioned ISO.
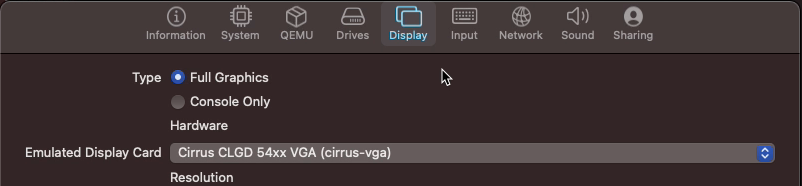
In the Display tab:
- Change the emulated display card to Cirrus CLGD 54xx VGA (cirrus-vga)
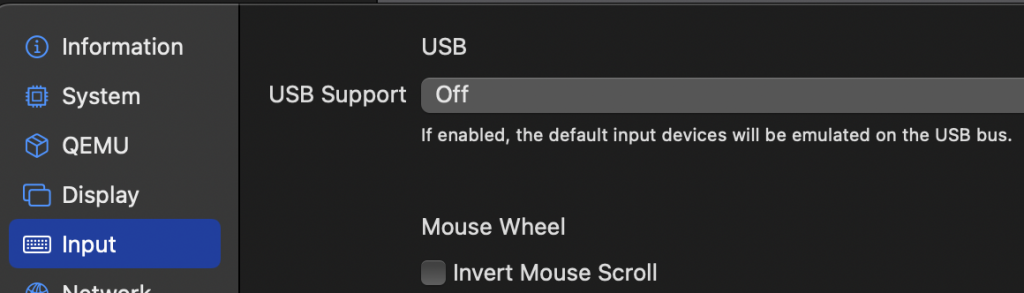
In the Input tab:
- Check the Legacy (PS/2) Mode

For newer versions of UTM, instead of PS/2 mode, set USB support for input to Off:
The networking tab can stay as is and finally, in the Sound tab:
- Change the emulated audio card to Creative Sound Blaster 16 (sb16)

Then click Save, the create the VM
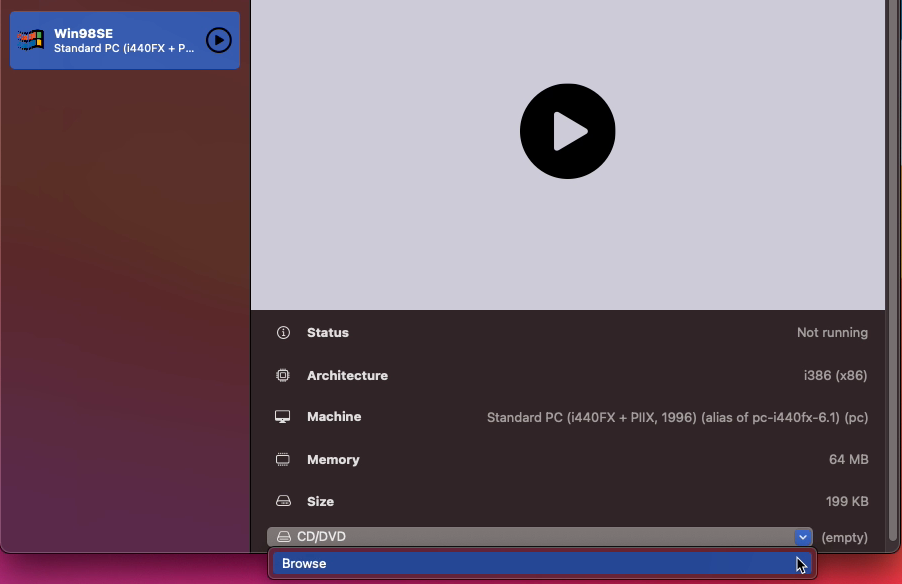
One final thing we need to do before we can move to the next step is to mount the installation ISO to the virtual CD drive. To do so, select the VM with the name you gave it on the left in UTM (Win98SE for me), then on the CD/DVD section, choose Browse:
Select the Windows 98 SE ISO at the location where you downloaded it and click open. This will be like we would physically insert that CD in the CD-drive on a real machine.
Step 4) Install Windows 98 SE
All preparation is done and we can now finally launch the VM and get Windows 98 SE installed. Just click the large play button after selecting the VM in the left column in order to do so.
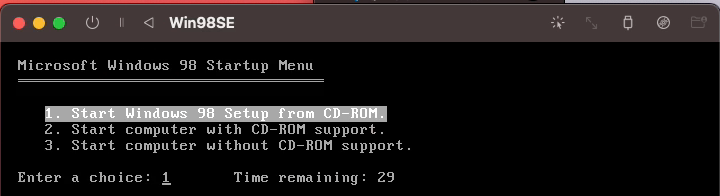
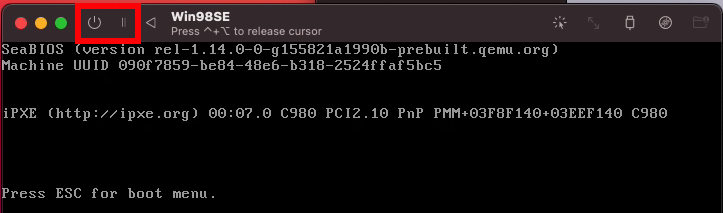
As soon as the VM boots, it will boot from that mounted ISO and you should see the following menu pop up:

Here, go for the second option: “Boot from CD-ROM”, using the arrow keys or by entering the number and press enter. This menu is just to prevent people from running into issues with booting their PC when they would leave the Windows 98 CD in the drive.
In the next menu, choose to “Start Windows 98 Setup from CD-ROM” (first option):
This will load some drivers (like the one for the CD drive) and will load a tool that checks if there is a partition created to install Windows onto, which is not the case as it’s the first time we do this:
Just press enter here and in the next screen choose to use all unallocated space for Windows:

In the next screen, choose “Yes, enable large disk support”. As we have what is considered a “large” disk in the VM:

After doing this, the system must reboot. And we need to repeat the first steps here again in order to continue the setup: Choose Boot From CD-ROM and then Start Windows 98 Setup from CD-ROM. Exactly the same as before.
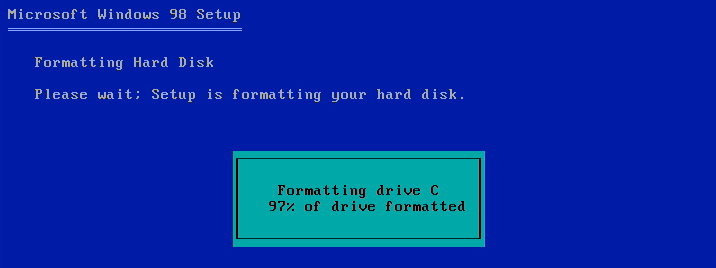
This time, the setup program will format the hard drive (or at least the disk image which we assigned to the VM). This might take some time:
Once the format process is done, there will still be a quick disk integrity check with Microsoft Scandisk. I even forgot that tool existed although I spent hours of my time looking at it in the past :)
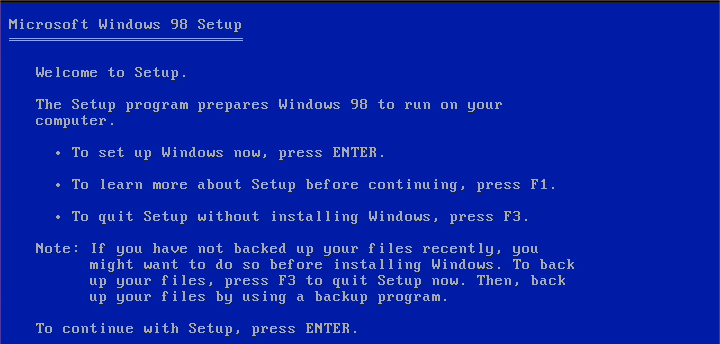
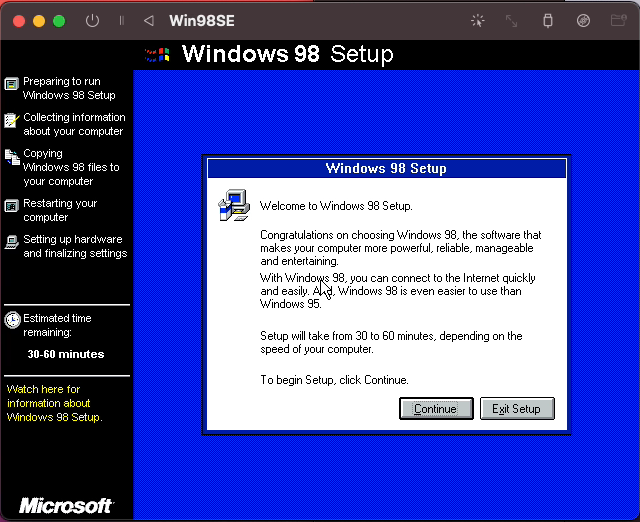
If all goes well, you will end up at the graphical interface of the Windows 98 Setup:
In case you have issues with the mouse pointer, click the mouse-pointer icon in the top bar of the UTM VM. This will allow you to better control the mouse in the VM. You can press Control+Alt to release the mouse back to macOS:

Click on Continue in the welcome screen and choose the default installation location (C:\Windows) as destination. After the installer checked if there is enough space etc., you can choose what to install:
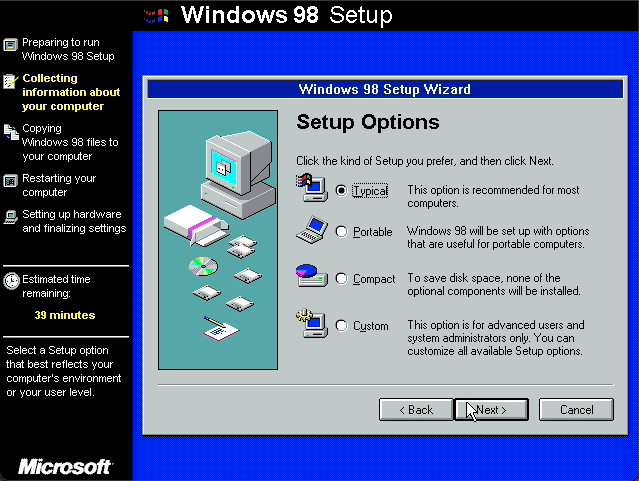
I went for a custom install and selected as good as everything I could install but it shouldn’t really matter much as all of these components can be removed or added later as well.
Once you’re done, click Next and give the VM a name. Not very important for the way how we’ll be using the VM. Then click Next. Choose the keyboard layout, locale settings and location in the next screens and click Next to start the actual installation:

This will copy the required files to the virtual hard disk and will again take some time. After that step is done, the VM will restart.
I noticed that in some cases, the VM gets stuck while restarting. If that’s the case, just turn off the VM, then start it again using the buttons on top of the VM window in UTM. It can be pretty annoying but unfortunately that’s how it is.
After the reboot, you should be presented with the first boot screen of your fresh Windows 98 SE installation:
This brings back some memories for sure!
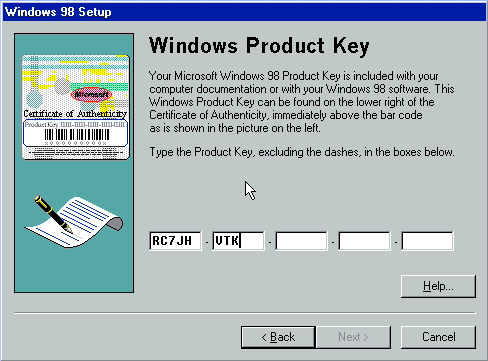
Once the VM is fully booted, the setup process will continue and you can enter your name,, organisation and product key:
The next stage of the installation tries to install drivers for the (virtual) hardware in the system.
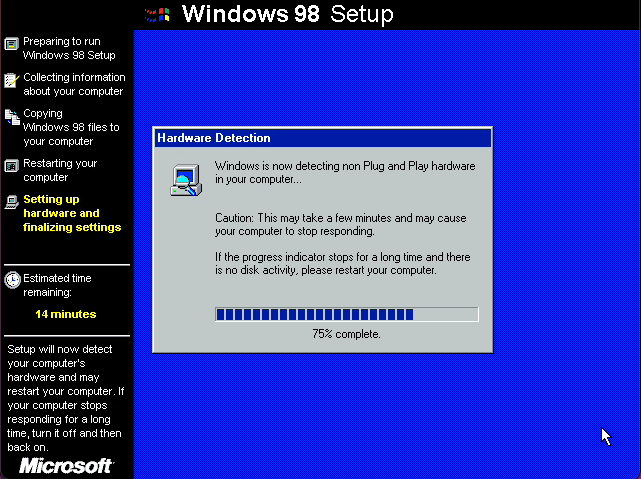
During this process, one or more reboots are required which might result in a stuck VM again. In case that happens, just power it off and on as explained above. Eventually we end up with the last stage:

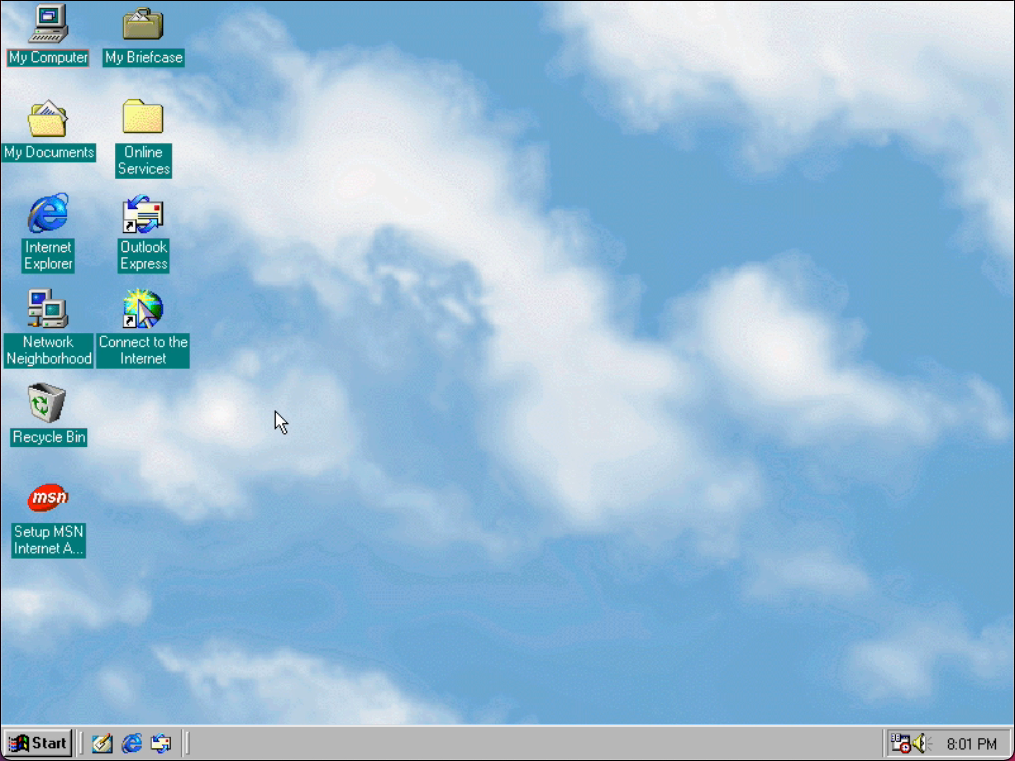
This again can take quite some time but in the end, and off course after another reboot, you will end up with a nice and clean retro Windows 98 desktop:

Pure nostalgia to see this if you ask me…
This is the end of the installation step and you now have a working Windows 98SE installation on your Mac.
Step 5) Post-installation steps and drivers
At this point, the installation already works pretty well. Especially since we chose specific virtual hardware that is fairly compatible with Windows 98. For example. if your sound was on, you could already heard that nostalgic Windows 98 boot sound.
Let’s first have a look at the system properties:
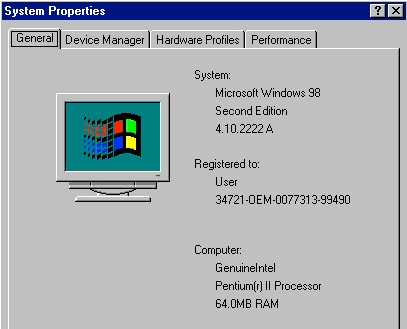
A Pentium II, at least that’s what the VM thinks it is running on, and 64MB of RAM.
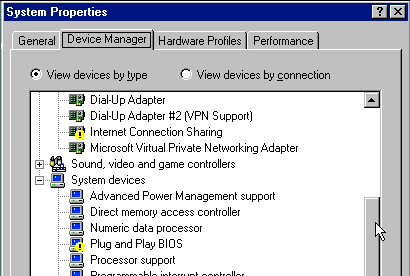
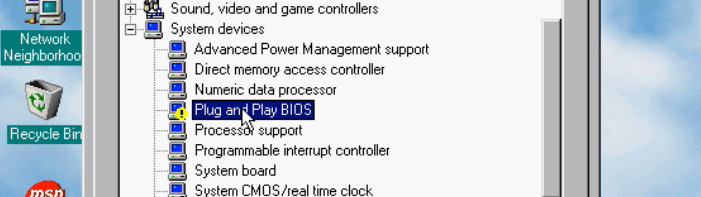
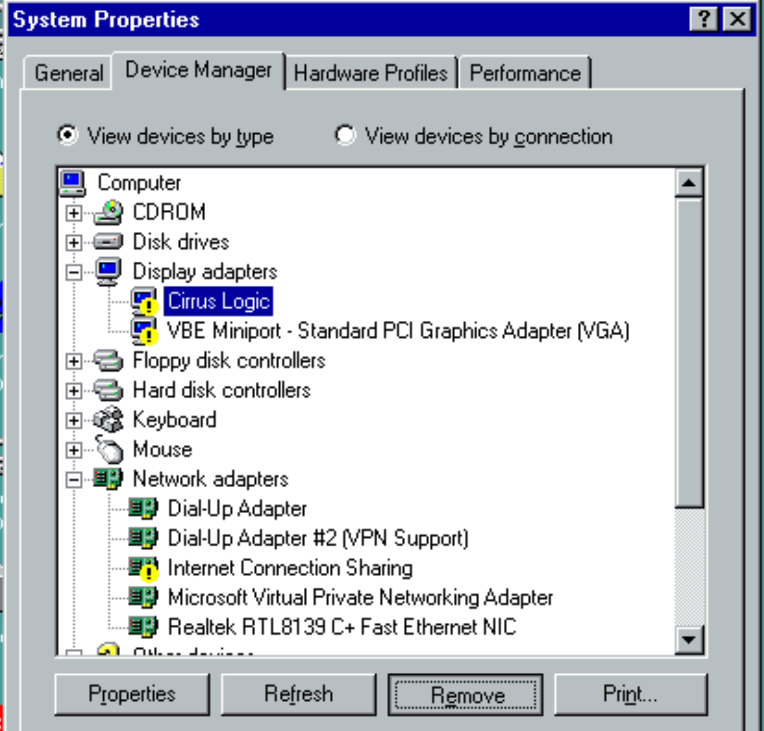
Device Manager shows us that there is still some work to do:
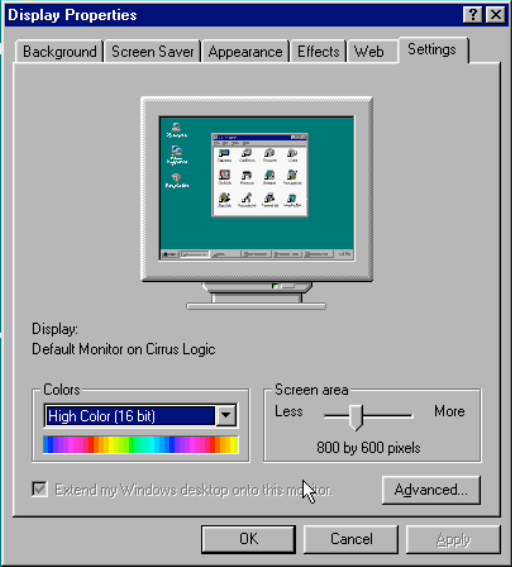
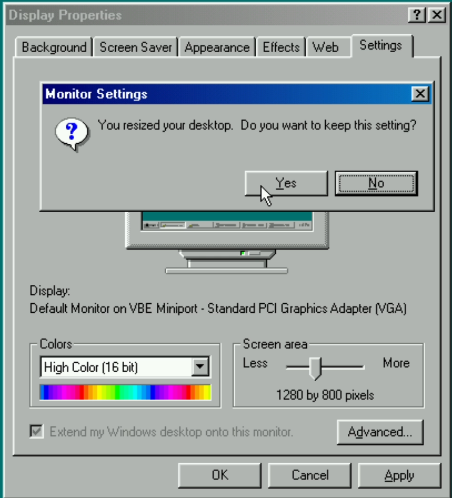
Changing the resolution and color depth
As the drivers for the video card are present, this should allow you to change the resolution and color depth to a better value. To do so, right click on the desktop and choose Display settings. Then set this to your preference:
We can also choose a nice background/wallpaper to make the experience complete. This is just beautiful if you ask me…
Prepare to Install missing drivers
We still have a few drivers and devices (like the network card) missing as we could see in Device Manager above. The network card is an important component in case you want to easily copy files back and forth to the VM. To fix this, we will first need to tell Windows that the Plug and Play BIOS system device is actually the PCI bus. This will allow the OS to detect the components connected to it (like the network card).
Before we continue, it is also a good idea to copy the network drivers to the PC itself. The card selected in UTM is a Realtek RTL8193 and Windows 98 SE doesn’t have drivers for it by default.
I prepared an ISO file, which you can download here (https://jensd.be/download/win98tools.iso) that contains these drivers and some other small tools which are very useful for use on this kind of Windows VM on Mac.
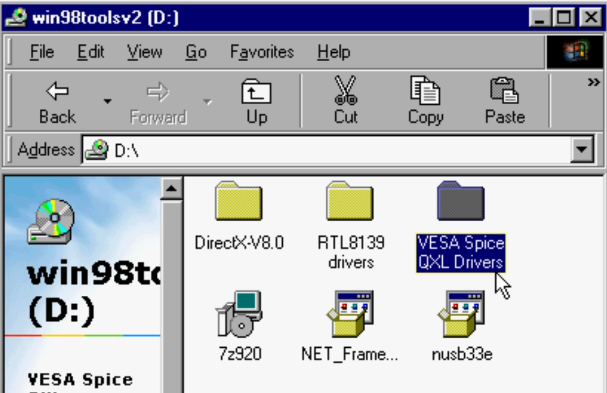
So release the mouse of your VM (Control + Alt), download the win98tools.iso and swap the ISO file to the win98tools.iso in UTM for which I provided the link above:

In your Windows 98 VM, navigate again to your CD drive and this time, copy the RTL8139 drivers folder to your desktop:

Then we can also run nusb33e to install missing USB drivers, these will be used in a later step:
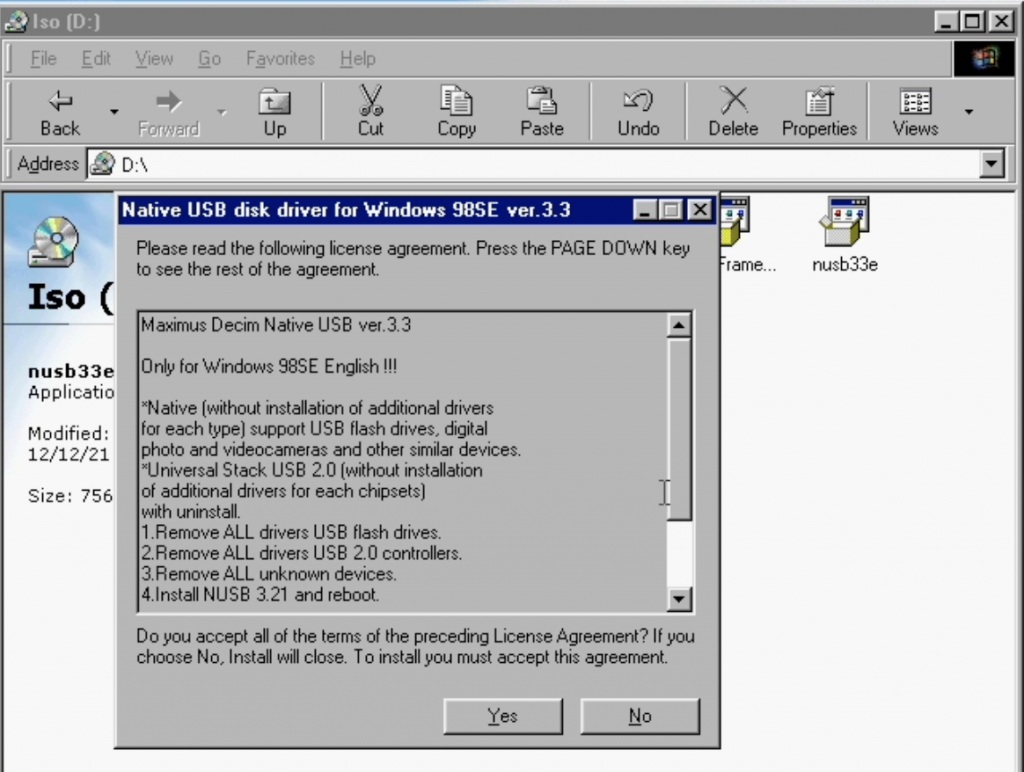
Don’t reboot when asked to after installing this.
Before moving on, we now need to mount back the Windows 98 SE installation ISO to the VM. This goes in the same way as we did the first time in UTM:

Install the driver for the PCI bus
Now we can go to Device Manager (right click on My Computer -> Properties -> Device Manager) again and double-click on the Plug and Play BIOS system device with the exclamation mark on it:
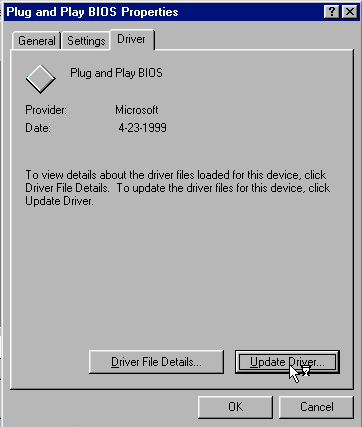
In the dialog, choose the Driver tab and click Update Driver:
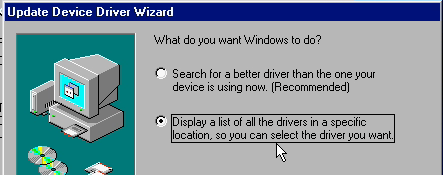
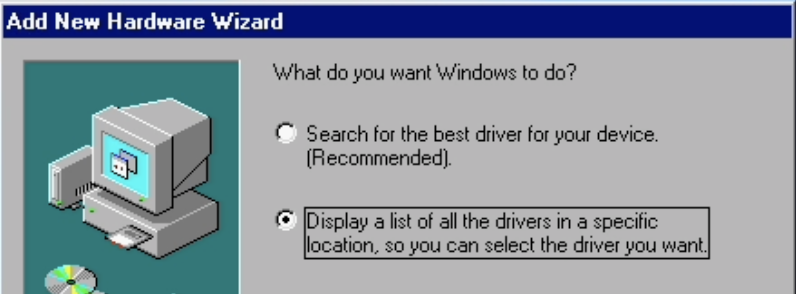
Click Next and choose to display a list of drivers:
Choose “Show all hardware” and in the right list select PCI bus:
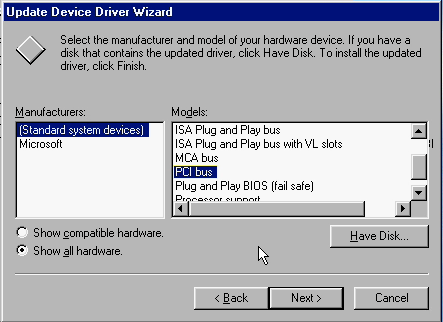
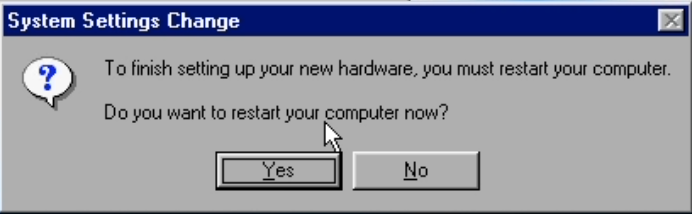
Click Next, finish the steps and reboot the VM when asked to do so.
Install the rest of the drivers
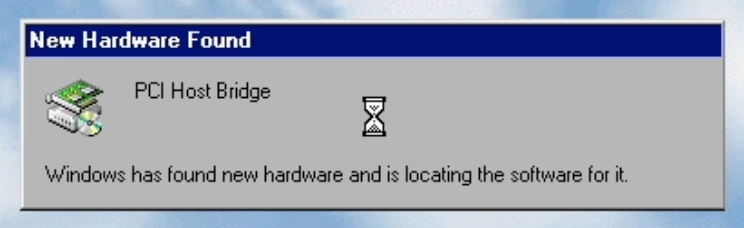
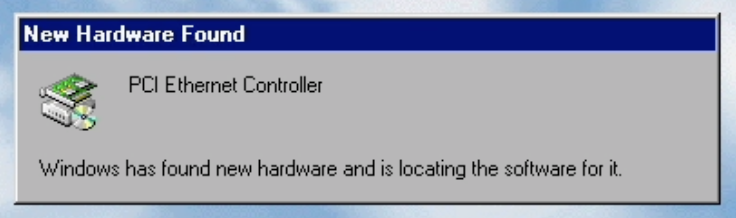
When Windows is getting started after this, a lot of new hardware is being detected:
For each of these components, go through the following steps. Only take a different approach when Windows is detecting the network card, as explained further.
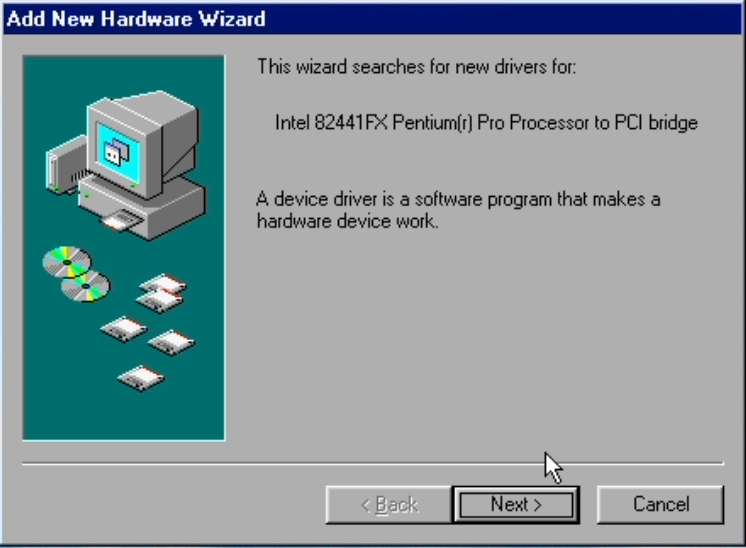
Click Next at the start of the Add new Hardware Wizard:
Select the first option: to search for the best driver and click Next
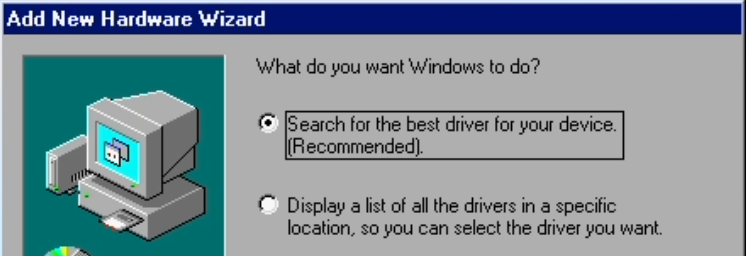
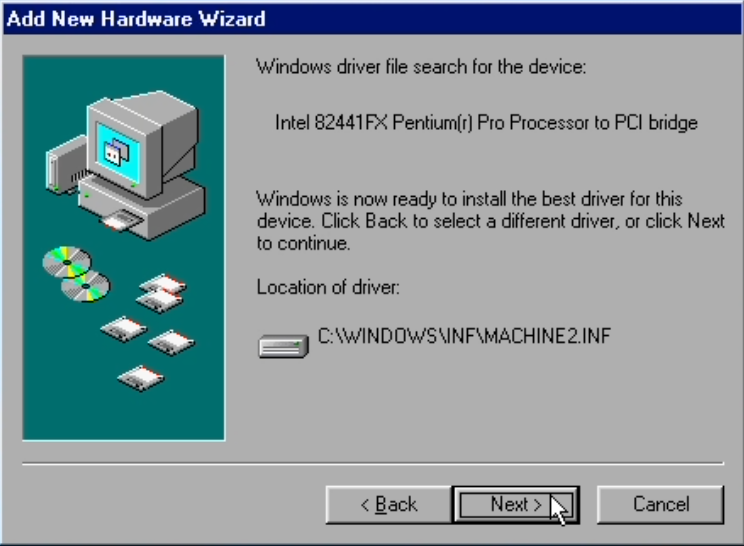
In the following step, uncheck all places where to search and click Next again. In most cases, Windows will find the correct driver.
After installing the driver for a specific component is finished and Windows asks to restart, choose for it to not restart:
When you see that the new hardware is called PCI Ethernet Controller, we need to take a little different approach as that is the network card for which we need to point to the RTL8193 drivers which we copied earlier:
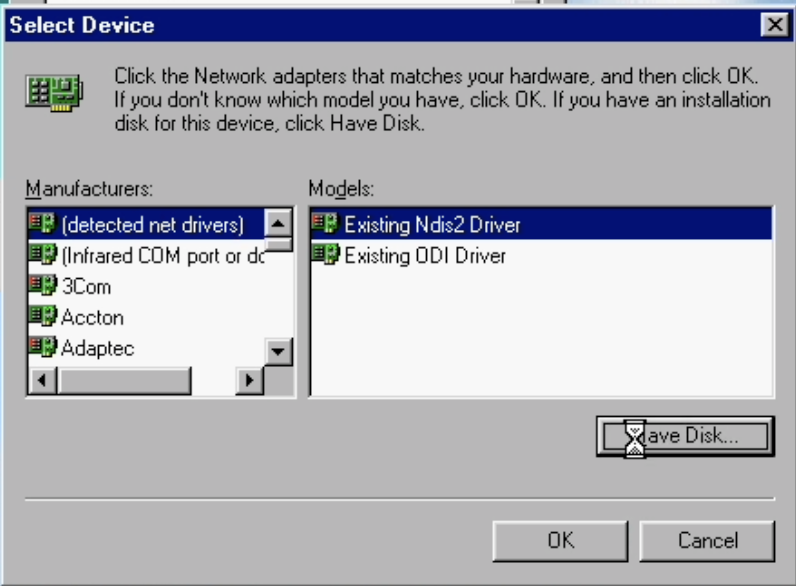
For this, in the first screen, just click Next but then select to display a list of all the drivers instead:
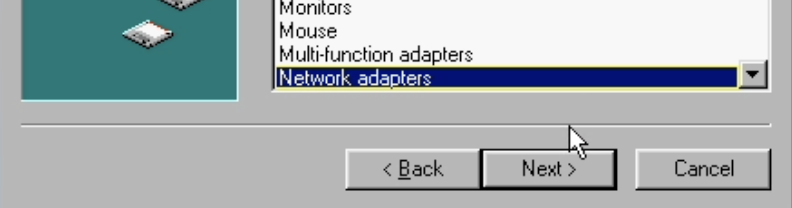
In the list that comes up, choose Network Adapters and click Next again:
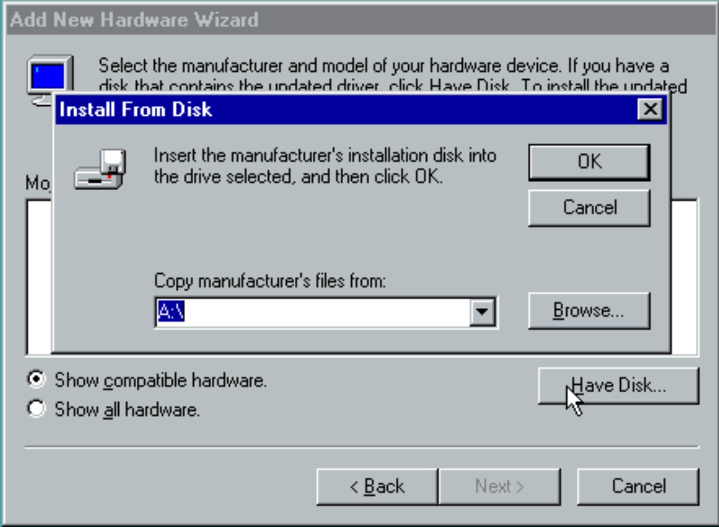
Click ‘Have Disk’ in the next screen:
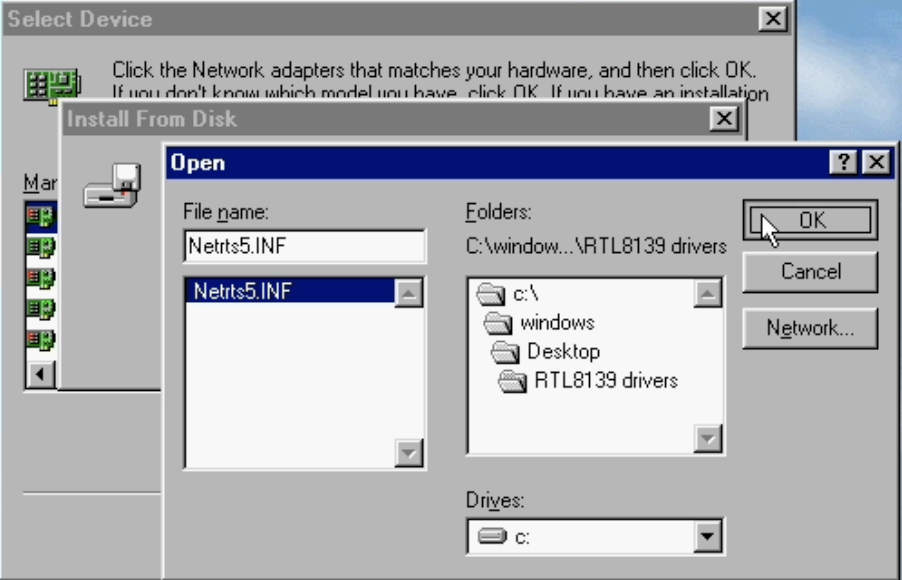
Navigate to the location where we copied the drivers for the network card: (C:\Windows\Desktop\RTL8139 drivers) and click OK:
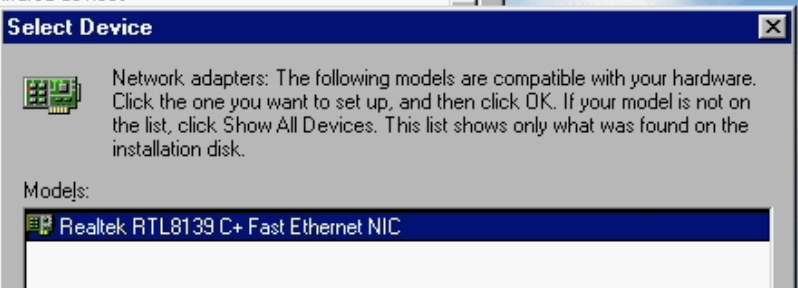
Select the only option in the list of proposed hardware and continue with the installation of the driver:
Repeat the earlier steps as explained above for the rest of the hardware. When you eventually end up on your desktop, restart the VM.
When the system comes back, more hardware, like the IDE controller is getting detected and another reboot is required…
EDIT: Change the emulated video card and install drivers for improved graphics
While playing around with the VM, I noticed some issues related to graphics. As a virtual video card, I chose the cirrus CLGD 54xx. A good reason for that was because that card had drivers included in the standard Windows 98 driver database.
When trying to set the resolution higher, for example 1024×768 you can see that things do not look as expected:
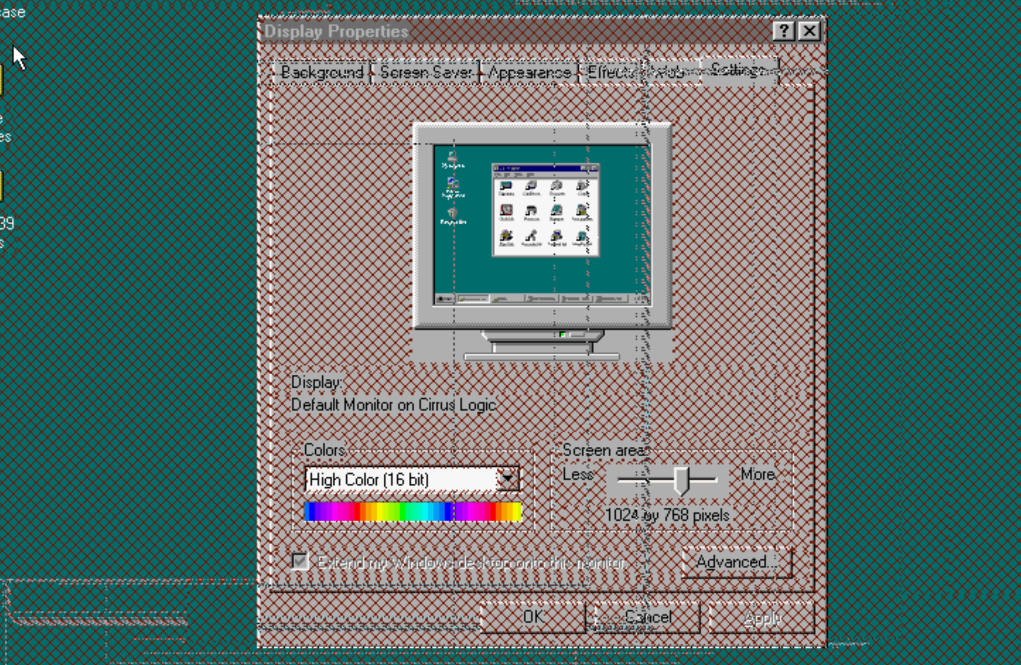
But even though 800×600 looked fine at first sight, I noticed strange issues over time. Another disadvantage, even if a higher resolution like 1024×768 would work fine, is the aspect ratio. At the time 4 by 3 was definitely the standard while today it is 16 by 9 or 16 by 10. and as a result you end up with black borders when running the VM fullscreen.
To overcome these issues, I found a project called VBEMP 9x: https://bearwindows.zcm.com.au/vbe9x.htm. The outcome is a generic VBE driver for older windows versions like windows 98.
VBE or VESA BIOS extension defines an improved interface that can be used by software to access video cards. The VBEMP project basically backported the generic Windows XP VBE driver to something that works on Windows 95, 98 and so on.
Even better is that the driver has good support for emulated video cards like the ones available in QEMU. And on top of that adds support for resolutions which have a modern 16 by 9 or 16 by 10 ratio.
To make it easy to use this, I included the driver on an updated version of the win98tools.iso:
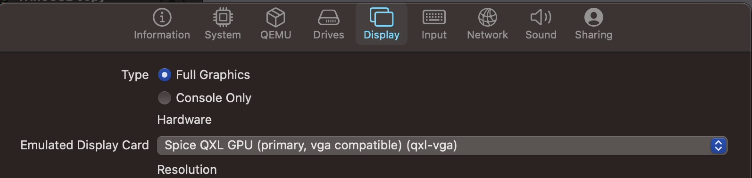
Now to change the emulated video card and to use the drivers, first shut down the VM.
Then, in UTM, right click on your VM in the list and choose Edit. In the Display tab, change the emulated video card to Spice QXL and save the changes:
Before booting the VM again, mount the updated win98tools.iso as explained before. Then start it.
Once the VM is booted, you will see that Windows detected the changed video card. As we have the drivers on the virtual CD drive, choose to display a list of drivers and then choose Have disk:
Browse for the drivers on the CD and click OK:
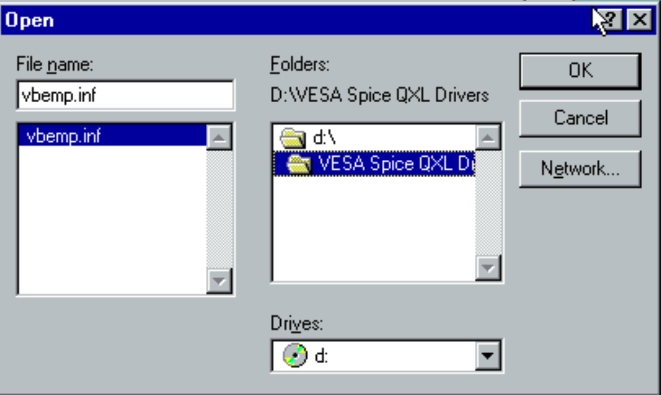
In the upcoming list, the only option shown is what we need. Click ok and continue the installation
and choose to reboot when asked.
After the reboot, things do not look as expected. We clearly can’t use VBE yet. In device manager we can see that the old virtual video card is still there, causing a conflict with the new one.
To resolve this, let’s remove that cirrus logic card and, you might have guessed it, perform another reboot.
Once rebooted, you will see that you have now a much wider range of resolutions, the graphical issues are no longer seen and as a bonus, performance got improved as well:
After completing this, everything is configured and installed and we can start using the VM.
Step 6) Use the VM and exchange files with the host (macOS)
It took a lot of steps and many reboots but if you’re still following at this stage, all drivers are installed and all components in your Windows 98 SE install should be fully functional.
One last thing which I wanted to explain is how to get software and files on the VM. The easiest option is to use ISO files. A lot of games and apps are available for download in this format so it’s definitely a good option. You can use the virtual CD drive in UTM to mount and unmount different ISO images, as we did a few times in the above steps already. Do keep in mind that bin/cue or mdf files will first need to be converted to the ISO format before they are usable.
In order to easily exchange files between macOS and the Windows 98 VM we need something different. Unfortunately most modern methods and protocols did not yet exist or did but the versions supported became considered unsafe in the meanwhile like SMB v1, SCP or HTTPS.
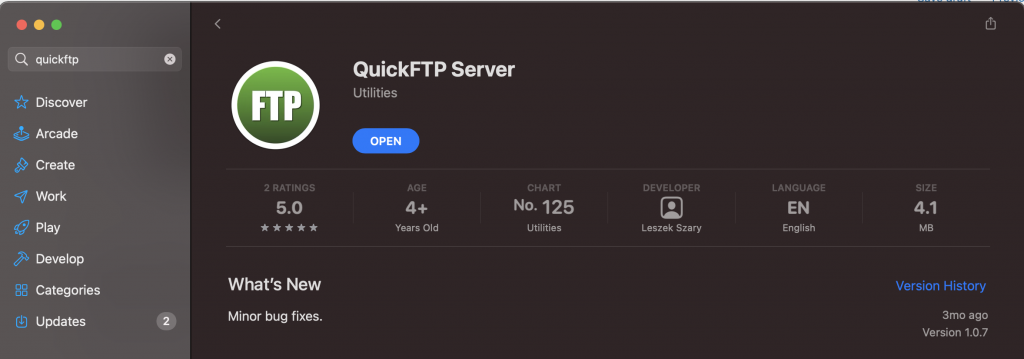
After some searching, for me using FTP, although kind of considered unsafe as well, worked the best. It’s not easy to find a working FTP-server for a modern macOS version like Big Sur or Monterey but fortunately I found an application called QuickFTP Server. This app is free and can be installed from the App store in macOS.
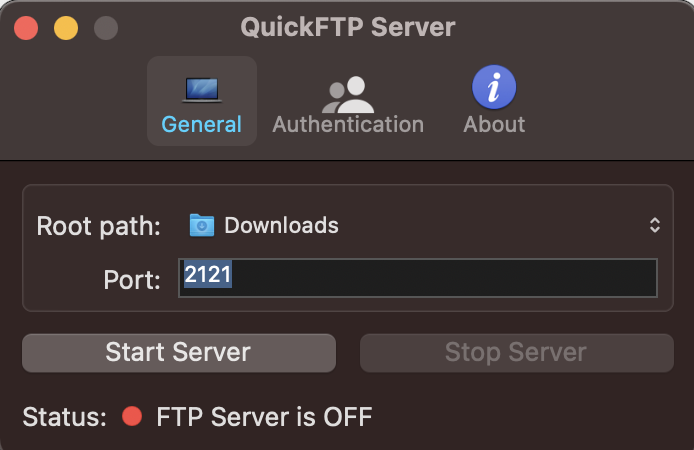
Download and install this app on macOS and start it. In the main screen, select a root path. This is the directory which will be accessible from Windows 98 and select a port. The port number has to be higher than 1024 so the default FTP port 21 will not work:
In the Authentication tab, enter a username and password, this will be required in order to access the files. You can also choose if you want this access to be read-only or read-write.
Then click the Start Server button on the first screen:
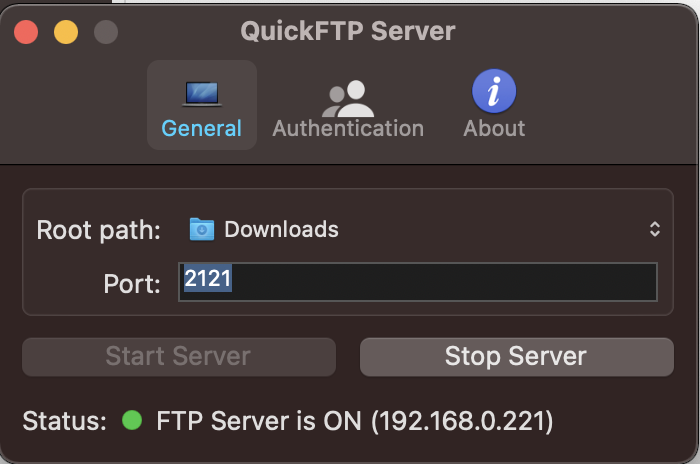
As you can see, this also displays the IP address of your macOS device. This is the IP (192.168.0.221) which we will need to connect to from our Windows 98 VM.
Back on the VM, as we installed the drivers for the network card and UTM is configured to have that card in a shared network with our macOS device, we should be able to reach the IP where the FTP-server is now listening on.
Unfortunately as we are not using the default FTP port (21), we cannot use the Windows CLI FTP client as it doesn’t support specifying a port number. Luckily the built-in FTP client in Internet Explorer does support that.
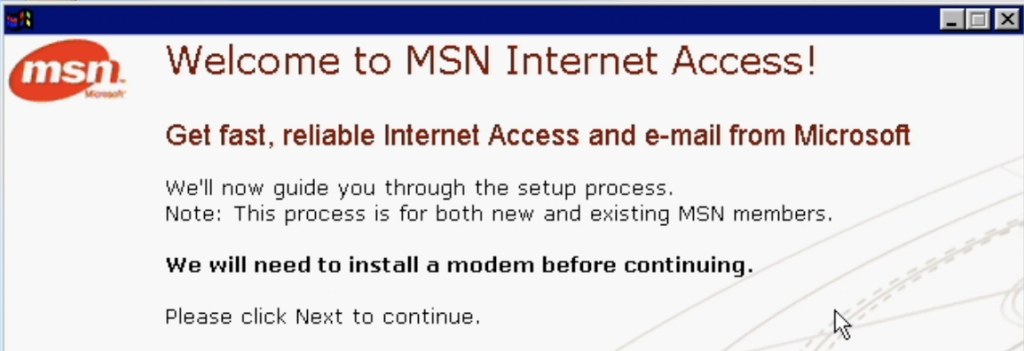
In order to start using Internet Explorer, we will first need to go through the Internet Connection Wizard. Without doing so, we can’t start Internet Explorer as we get pushed to install a modem and setup MSN (not much changed at Microsoft in all those years I guess):
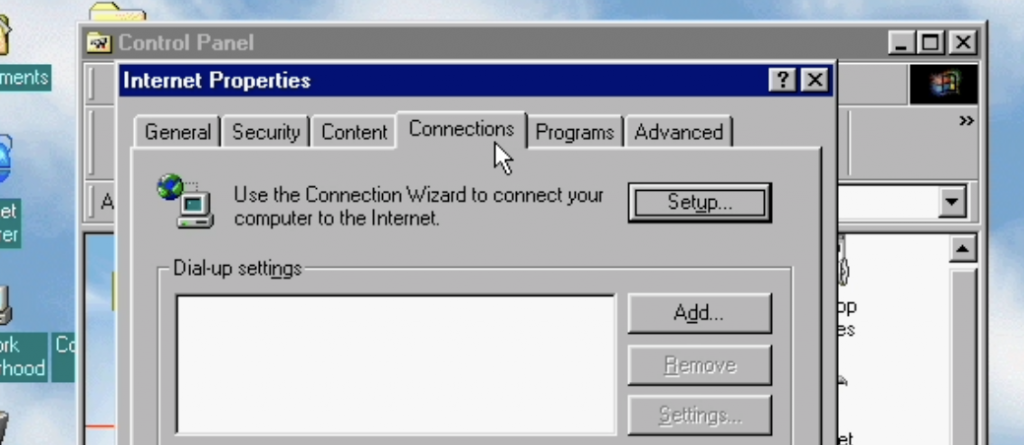
So to overcome this, navigate to: Start – Settings – Control Panel – Internet Options – Connections and click on the Setup button:
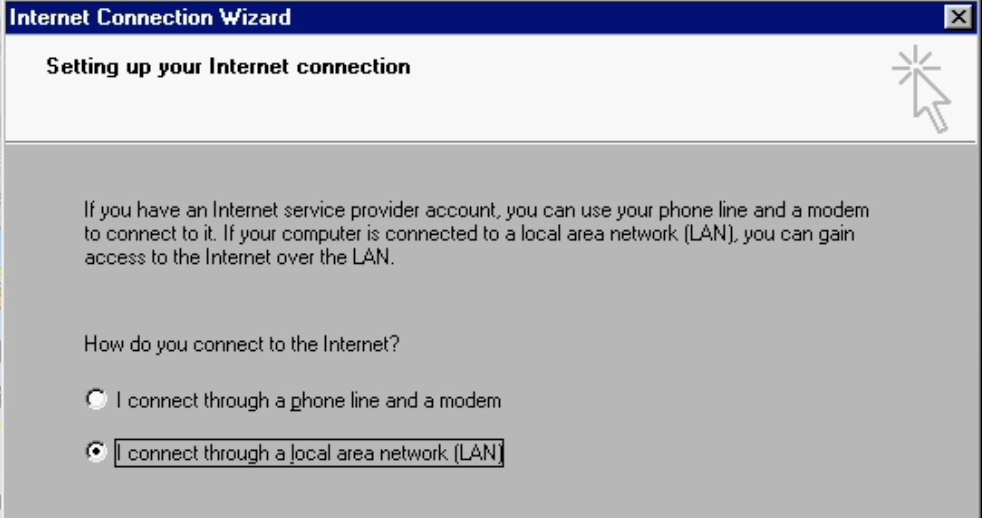
Choose for a manual configuration and click Next:
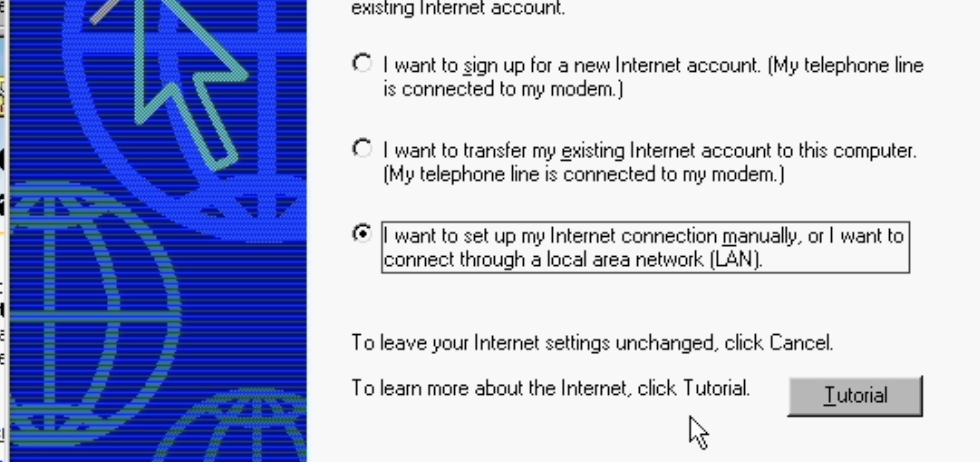
In the next screen, choose “I connect through a local area network (LAN)” and click Next:
Then uncheck the automatic discovery of the proxy server:
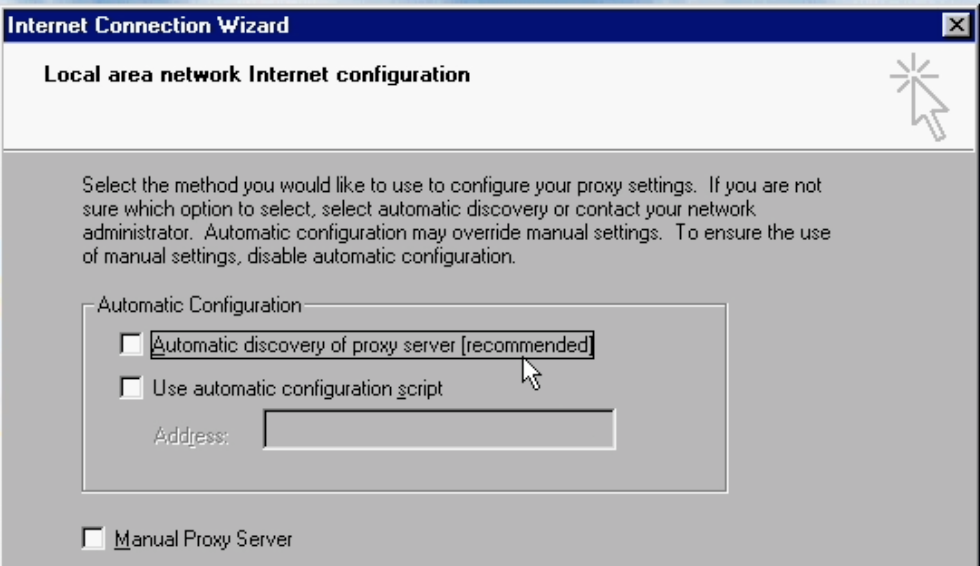
And choose to not set up internet mail when asked.
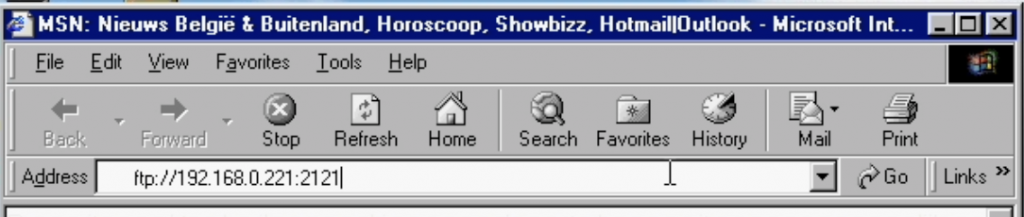
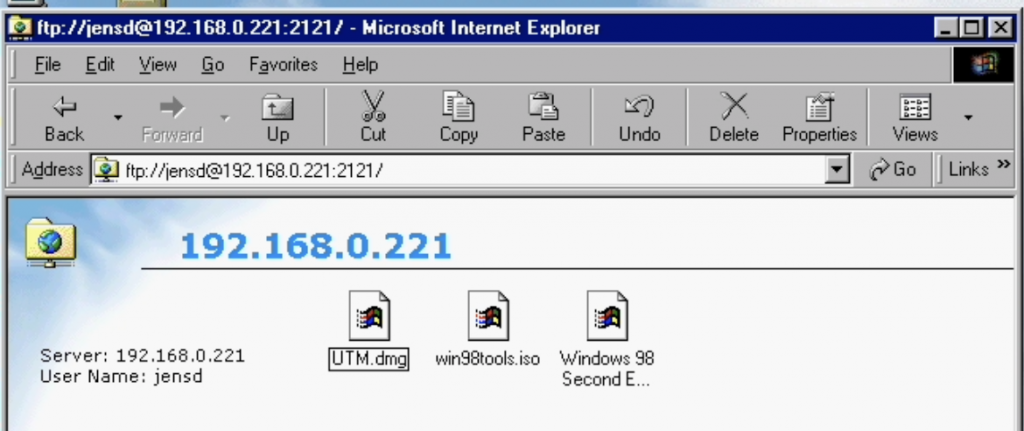
Going through these steps allows us to start Internet Explorer. To connect to the FTP-server which we started on macOS, we can enter the following in the address bar: ftp://<IP address>:<port>. So for my example: ftp://192.168.0.221:2121:
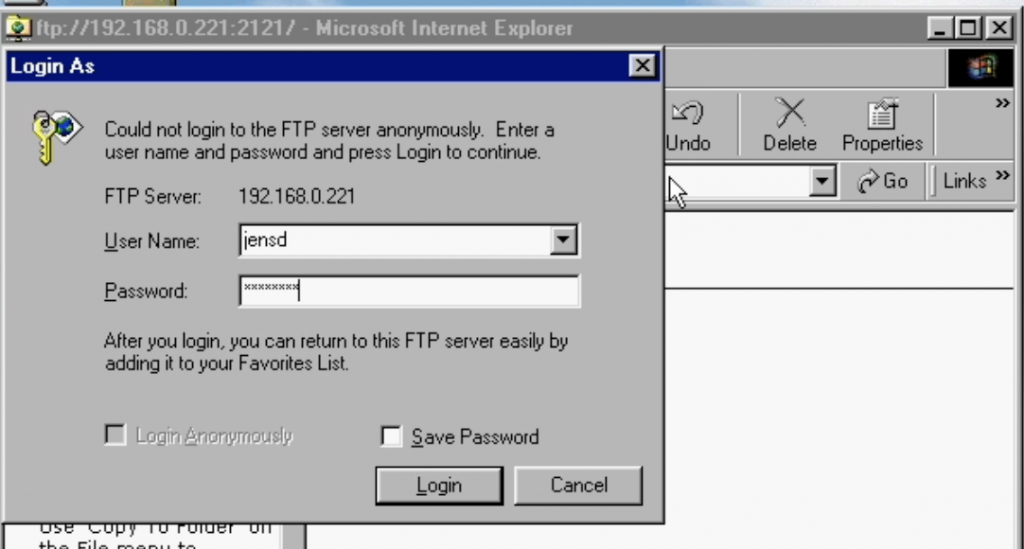
If all goes well, IE will ask for a username and password, which should match with whatever user and password you entered in the Authentication tab before starting the Quick FTP Server:
Once logged in, you can just drag/drop or copy/paste files between the FTP-server and the VM which makes it easy to exchange files back and forth between macOS and the vintage VM:
The rest I leave up to you.
In case you would need some inspiration, I had a lot of fun with this VM with Duke Nukem 3D, Rollercoaster Tycoon 2, SimCity3000 and Theme Hospital but there is plenty more available to explore.
It’s really very good, but the lack of 3D acceleration (Glide, OpenGL and/or Direct 3D games) limits the options in gaming. For example, FIFA 99 is only playable in software mode. To overcome this, I had to use a fork of QEMU called QEMU-3Dfx, a command line based solution. Uses customized glide / opengl libraries for API passthrough calls from Guest to Host OS. This way I can play the glide games, some OpenGL ones (other can have glitches, it’s far from a perfect solution) but so far, I haven’t been able to play D3D games with the WineD3D libraries for the MESA/GL passthrough to work. This means that I have to play games like Counter-Strike 1.6 in software mode (1.5 was the last to support glide).
Installing Windows 10/11 in UTM has a better support though, thanks to SPICE Tools, some kind of 2D and somewhat 3D added to it for some games. Grand Prix 3 was then able to use Direct3D, but performance was poor because of the overhead that the modern Windows has.
Thanks a lot for the great article and the YouTube Videos. Worked like charm :). I had a lot of fun with Need for Speed II so far. However, one “flaw” I might have found so far: It seems like midi sound is not supported, right?
I tried to install Microsofts Puzzle Collection (basically a nice collection of mini games) and sadly there is no sound then.
Any advice / hint?
86box Jenkins built from Git Hub since it seems to be most stable and if you choose the lowest speed you can emulate at least higher Pentium 1 boards with Voodoo 3 support. You need to get the 86box bios files ALSO found on GitHub
Pingback: M1 MacやiOSでも動く高機能な仮想環境UTMを使ってみた – officeの杜
Thanks for the win98tools ISO.
I had problem with keyboard and mouse right after exiting text-based stage (ScanDisk) and booting to graphical installer. In graphical installer, mouse and keyboard does not work and the only option is to turn off the VM.
When I disabled USB support in VM settings, keyboard started to work.
I was successfull to install everything only with keyboard (Keystrokes you need: Tab, Enter, Alt+F4, Win+M, Alt+Enter and Win key).
Even after installing all the drivers, I still have problem with the mouse not working. The cursor jumps to bottom right corner and I cant move with it.
I have tried:
– VM settings -> QEMU -> Force PS/2 controller -> on and off. This did not help.
– VM settings -> Input -> USB 2.0 support. When it is On, Win is stuck at boot/splash screen and not booting.
– VM settings -> Input -> Legacy (PS/2) Mode: This checkbox does not exist in UTM anymore.
Any ideas?
Thanks you
Hmm, I will upgrade to the latest UTM version in the coming days. Strange if the Legacy PS/2 mode would be gone. That takes away a lot of retro options :(
Please export the QEMU command and post here. Maybe there is a way to set it up in the new GUI somehow.
UTM -> win98 VM -> Edit -> QEMU tab -> Export QEMU command
Exported with Legacy (PS/2) Mode on:
qemu-system-i386 -L /Applications/UTM.app/Contents/Resources/qemu -S -qmp tcp:127.0.0.1:4444,server,nowait -nodefaults -vga none -spice "unix=on,addr=/Users/jensd/Library/Group Containers/WDNLXAD4W8.com.utmapp.UTM/C13A92B3-D95E-4B3B-B6C3-35ED817DA917.spice,disable-ticketing=on,image-compression=off,playback-compression=off,streaming-video=off,gl=off" -device cirrus-vga -smp cpus=1,sockets=1,cores=1,threads=1 -machine pc,vmport=off -accel tcg,tb-size=16 -global PIIX4_PM.disable_s3=1 -global ICH9-LPC.disable_s3=1 -boot menu=on -m 64 -device sb16 -name "Win98SE copy" -device ich9-usb-ehci1,id=usb-controller-0 -device ich9-usb-uhci1,masterbus=usb-controller-0.0,firstport=0,multifunction=on -device ich9-usb-uhci2,masterbus=usb-controller-0.0,firstport=2,multifunction=on -device ich9-usb-uhci3,masterbus=usb-controller-0.0,firstport=4,multifunction=on -chardev spicevmc,name=usbredir,id=usbredirchardev0 -device usb-redir,chardev=usbredirchardev0,id=usbredirdev0,bus=usb-controller-0.0 -chardev spicevmc,name=usbredir,id=usbredirchardev1 -device usb-redir,chardev=usbredirchardev1,id=usbredirdev1,bus=usb-controller-0.0 -chardev spicevmc,name=usbredir,id=usbredirchardev2 -device usb-redir,chardev=usbredirchardev2,id=usbredirdev2,bus=usb-controller-0.0 -device ide-hd,bus=ide.0,drive=drive0,bootindex=0 -drive "if=none,media=disk,id=drive0,file=/Users/jensd/Library/Containers/com.utmapp.UTM/Data/Documents/Win98SE copy.utm/Images/disk-0.qcow2,cache=writethrough" -device ide-cd,bus=ide.1,drive=drive1,bootindex=1 -drive if=none,media=cdrom,id=drive1 -device rtl8139,mac=F6:A8:C5:3F:13:F5,netdev=net0 -netdev vmnet-macos,mode=shared,id=net0 -device virtio-serial -device virtserialport,chardev=vdagent,name=com.redhat.spice.0 -chardev spicevmc,id=vdagent,debug=0,name=vdagent -uuid C13A92B3-D95E-4B3B-B6C3-35ED817DA917 -rtc base=localtime%With Legacy (PS/2) off:
qemu-system-i386 -L /Applications/UTM.app/Contents/Resources/qemu -S -qmp tcp:127.0.0.1:4444,server,nowait -nodefaults -vga none -spice "unix=on,addr=/Users/jensd/Library/Group Containers/WDNLXAD4W8.com.utmapp.UTM/C13A92B3-D95E-4B3B-B6C3-35ED817DA917.spice,disable-ticketing=on,image-compression=off,playback-compression=off,streaming-video=off,gl=off" -device cirrus-vga -smp cpus=1,sockets=1,cores=1,threads=1 -machine pc,vmport=off -accel tcg,tb-size=16 -global PIIX4_PM.disable_s3=1 -global ICH9-LPC.disable_s3=1 -boot menu=on -m 64 -device sb16 -name "Win98SE copy" -usb -device usb-tablet,bus=usb-bus.0 -device ich9-usb-ehci1,id=usb-controller-0 -device ich9-usb-uhci1,masterbus=usb-controller-0.0,firstport=0,multifunction=on -device ich9-usb-uhci2,masterbus=usb-controller-0.0,firstport=2,multifunction=on -device ich9-usb-uhci3,masterbus=usb-controller-0.0,firstport=4,multifunction=on -chardev spicevmc,name=usbredir,id=usbredirchardev0 -device usb-redir,chardev=usbredirchardev0,id=usbredirdev0,bus=usb-controller-0.0 -chardev spicevmc,name=usbredir,id=usbredirchardev1 -device usb-redir,chardev=usbredirchardev1,id=usbredirdev1,bus=usb-controller-0.0 -chardev spicevmc,name=usbredir,id=usbredirchardev2 -device usb-redir,chardev=usbredirchardev2,id=usbredirdev2,bus=usb-controller-0.0 -device ide-hd,bus=ide.0,drive=drive0,bootindex=0 -drive "if=none,media=disk,id=drive0,file=/Users/jensd/Library/Containers/com.utmapp.UTM/Data/Documents/Win98SE copy.utm/Images/disk-0.qcow2,cache=writethrough" -device ide-cd,bus=ide.1,drive=drive1,bootindex=1 -drive if=none,media=cdrom,id=drive1 -device rtl8139,mac=F6:A8:C5:3F:13:F5,netdev=net0 -netdev vmnet-macos,mode=shared,id=net0 -device virtio-serial -device virtserialport,chardev=vdagent,name=com.redhat.spice.0 -chardev spicevmc,id=vdagent,debug=0,name=vdagent -uuid C13A92B3-D95E-4B3B-B6C3-35ED817DA917 -rtc base=localtime%Looks like the difference is that with the option off, the following is added to the options:
-usb -device usb-tablet,bus=usb-bus.0after -name <> …
See also the comment from Toni here, looks like it’s called different in newer versions: “VM settings / INPUT / USB / OFF”
hey! it seemed like i did everything right setting up the vm, but when i pressed the play button it came up with this error: qemu-i386-softmmu: -device ide-hd,bus=ide.2,drive=drive1,bootindex=2: Bus ‘ide.2’ not found
do you know how to fix this? did i something wrong? great instructions so far :)
Are you trying to add a second hard disk image to the environment?
I haven’t been able to figure out how to get it to have a third IDE device, but I did find a workaround:
1. When adding a new drive, set the type to “SCSI” & check the box marked “Raw Image”.
2. On boot, Windows will detect a new “PCI SCSI Bus controller” & be unable to find a driver for it. I haven’t been able to figure out what driver it could use, but that doesn’t matter as the drive will still be accessible by the system.
3. Run fdisk to partition your new drive.
4. Reboot.
5. Enjoy.
Some notes:
* Depending on the drive size, fdisk may have formatted it as FAT16. You’ll probably want to reformat it as FAT32.
* Since the SCSI controller doesn’t have drivers, the drive won’t show up in Device Manager & you won’t be able to change the letter assigned to it.
* I’ve been unable to get the USB system up & running, but if you have you could possibly try that as the device type instead of SCSI. Might work; no guarantees.
* The system can see the drive if you select “NVMe” or “VirtIO” as the device type, but attempting to access it will cause crashes. Don’t use these.
Hi, I wasted a lot of time to find a solution too, then I discovered that the solution was to set “VM settings / INPUT / USB / OFF” and it works, try, (sorry my english, i’m using google translate) i’m italian.
Thanks for this guide and the tools, it’s brilliant.
I have one programme I use Windows 98 for and needed a replacement for VMware Fusion. This is perfect.
With UTM 3.1.5 the UI now looks a little different. After clicking create new virtual machine you’ll need to click “Emulate” then “Other” then choose a windows 98 SE.iso as your boot iso. The drive is also created during this stage. Afterwards you’ll need to edit the machine and untick the UEFI boot tick box whcih can now be found in the QEMU tab. Everything else should be similar to the guide above.
I had a few issues at step 5 and found I had to install the RTL8193 drivers and the NUSB drivers last after letting the PCI Bus drivers install, as the RTL8193 driver just wouldn’t install in the order that was suggested. This was a simple work around although it took me a few hours to figure it out.
after setting my display settings, my mouse stopped working. not i cant figure out how to get it back! any advice?
okay so i got everything working (that includes 32 bit video and high res soundblaster 16 auido) but still NO NETWORKING, how to fix? 9yes rtl drivers 8 something from the tools iso is installed, but it’s still not detecting the actual hardware in 98SE. UTM 4.something beta on macos montery.
A few notes that will make Win 98 easier:
Some programs will expect you to have the Windows Installer Update installed. Grab it from the archived MS download page: https://web.archive.org/web/20051024012507/http://download.microsoft.com/download/WindowsInstaller/Install/2.0/W9XMe/EN-US/InstMsiA.exe
MS’s 2004 Security Update CD contains most of the patches released following Win98SE. It’s in ISO format & you can grab it from here: http://www.vogonsdrivers.com/getfile.php?fileid=873&menustate=50,0
Finally, you probably don’t want to browse the web with it, but if you do the last browser released for stock Win9X is Opera 10.63. Only the classic installer still works & can be a bit hard to find, but archive.org has it: https://web.archive.org/web/20171123151844/http://arc.opera.com/pub/opera/win/1063/en/Opera_1063_classic_Setup.exe
The archive.org links should work in the version of IE3 that 98SE installs by default.
If for some reason they don’t, the security update installs IE6 & they should work there instead.
Wow this is awesome, thanks for sharing!
Does anybody know how to get MIDI working? I could only get Adlib to play nice with some games that have MIDI music, but Adlib doesn’t play Wav files for other games, and can’t do sound effects.
Incredible write-up. Thank you so much for doing it–truly!
This is so helpful, thank you!
I’m really keen to know how to get MIDI support. Seems like the Creative Sound Blaster doesn’t support MIDI without the “Creative Wave Blaster” hardware add-on. I can’t see a way to emulate this, can it be overcome with a driver or some other way?
Thanks again!
Thank you for this. but i have no sound :(
i have installed windows 98 se. its installed but no sound card is detected. also sb16 is selected. but windows does not find it. and no matter what sound card i select it does not detect anything.
stuck at step: press play ” QEMU exited from an error: qemu-i386-softmmu: combined size of system firmware exceeds 8388608 bytes”
I am running m1 13.1 8gb memory
I found I missed tweaks turn off uefi boot because they changed the design of the app around.but i ran into a new error QEMU exited from an error: qemu-i386-softmmu: -device usb-storage,drive=drive83C2897B-4BFA-41E9-A9B9-2A00B0D543DF,removable=true,bootindex=0: No ‘usb-bus’ bus found for device ‘usb-storage’
Great tutorial! I got as far as installing the drivers. But I get an error message when I try to install the NUSB driver. So I’m having to wait on that. It says the version of it it too new?
Also, now I can’t seem to get out of safe mode. It keeps crashing on the restart and I have to shut down the whole VM just to be forced into safe mode again. I can’t seem to get out of it. Any advice on this?
Seems like newer version of UTM behave in a bit of a different way. Need to find some time to post an update on that.
Thank you so much for this guide. I’ve been able to install win98 and run it under a 2019 intel Macbook pro running MacOS 12.6 and UTM 4.1.5. I was even able to install the VBE graphics driver. Note that after installing all drivers as outlined, I still have the following undetected:
* PCI Card
* PCI Communications Device
See screenshot here: https://gist.githubusercontent.com/palmerj/f0f3e630f11f999cf3d4d066617c7713/raw/b272916dd6d00687fa4f2d9db74bbcd3b18be5b8/missing_drivers.png
Not sure what I did wrong. Maybe that is the missing USB controllers etc, because we can’t enable USB in the newer versions of UTM without killing the mouse and keyboard.
Notes:
* I could install with more than 128MB of RAM. I got a windows protection error in the stages of detecting and installing hardware drivers. I could increase the ram to 256MB after the install.
* After the file copy part of the process, and when you get to enter the User Information and the CD-Key, I get page fault errors and a stack dump and the setup process fails. The only way to avoid this was not giving the mouse focus on the VM and only using the keyboard. I tried many QEmu settings, including with or without Force PS/2 Controller.
* I copied the “win98” folder from the win98SE disk to the C:\ as part of removing the Plug and Play BIOS system and reinstalling the drivers. Don’t know why, but having the Win98SE ISO in the drive was not enough. Maybe the CD drive device was temporarily not available after removing the Plug and Play BIOS?
* Explorer seems to crash on first load after boot. See https://gist.githubusercontent.com/palmerj/f0f3e630f11f999cf3d4d066617c7713/raw/b272916dd6d00687fa4f2d9db74bbcd3b18be5b8/explorer_crash.png. Any ideas? It did this as soon as I installed windows.
I did all of this to install and run VC++ 1.0! See https://gist.githubusercontent.com/palmerj/f0f3e630f11f999cf3d4d066617c7713/raw/b272916dd6d00687fa4f2d9db74bbcd3b18be5b8/vcpp_1.0.png
I can install the software and use most of the tools. However, when I try to compile C files within a project, the VM graphic driver goes funny (corrupt mosaic of colours on the screen). I think it’s because the vc++ install has made changes to the 386 Enhanced Mode settings within SYSTEM.INI:
[386Enh]
device=*vmcpd
WinExclusive=0
device=C:\MSVC\BIN\dosxnt.386
device=C:\MSVC\BIN\mmd.386
device=C:\MSVC\BIN\cvw1.386
Anyway, the workaround is to go back to the cirrus CLGD 54xx display and driver. Any ideas regarding the VBE driver? Would be better to use this as the colour depth and resolution can go much higher.
Many thanks,
Jeremy
Same problem here! I hope there’s a good solution.
Glad I don’t have a MAC then seeing like VMWARE there is no MIDI on QEMU for WIndows 98 and the author ignores all requests from other comments about it. VMWARE has regular sound but not MIDI even if you select it and it seems QEMU has the same bug.
QEMU on Windows is a mess with being command line only so you have to know what your doing (which I don’t).
What is the exact version on UTM that was used here ? It seems that recent UTM releases have these strange issues with page fault errors. Not only while installing the Win 98 OS but also afterwards.
In the newest version of UTM, there is no advanced button so I can’t get to the window with all the tabs so I can’t get very far with this.
great work, thank you!
I installed the VBE driver, but if i try to enter the Settings-Tab in the display settings to change from 640×480 to higher resolution i instantly get a rundll32-error (popup) and the display window is closed.
Any idea how this can be fixed? i tried to change back from Spice QXL to Cirrus CLGD 54, reinstall VBE driver but i did not succeed.
thank you in advance, kind regards
I’m experiencing the same issue. Right now I’m using regedit to modify resolution:
HKEY_CURRENT_CONFIG > Display > Settings > Resolution
I got the same error after I updated to the new UTM Version. I suppose something changed.
I have a new mac mini
I use my twenty year old Dell to run 98 SE that allows me to get to the dis prompt and to load and use WordPerfect for DOS; for my money, the most elegant word processor out there.
Old Dell is making some funny noises, moans and groans, just like me.
Is there a service than could load the 98 SE and the WordPerfect on my Mac Mini
Following this guide has me running Windows 98 on my Mac mini
Hello! First of all, great tutorial!!! I’m facing some issues with the display card. I can’t change nor even enter to Display settings, to check the resolution. It gives me a Rundll32 error and then it exits.
I tried with both graphic cards, but same issue. Any help?
Thank you!
This is great. But I’m using the latest UTM (4.4.5). I went with Emulate from the choice between Virtual and Emulate, I was able to Untick UEFI boot tick box in the QEMU tab and I had to disable USB drives to get the keyboard and mouse to work. Then I kept getting the blue screen of death, but I found in the comments section here “I had a few issues at step 5 and found I had to install the RTL8193 drivers and the NUSB drivers last after letting the PCI Bus drivers install, as the RTL8193 driver just wouldn’t install in the order that was suggested. This was a simple work around although it took me a few hours to figure it out.”
I found 86Box to be a better option to emulate Windows 98 on Mac: https://www.reddit.com/r/windows98/comments/115eq02/real_quick_and_basic_guide_to_getting_windows_98/
Hi, thanks a lot for this first class tutorial! I was already on the way to follow it step-by-step on my Macbook Pro M1 when I reconsidered what I really wanted to achieve. And then I was wondering if this might just be possible using your technique.
My problem is, that I have a M1 running Mac OS12.4 with lots of capacity – nearly empty. Then I have my old Macbook Pro (early 2015) running Mac OS 10.13.6, together with VMware Fusion 11.5 to operate Windows 98 SE. All with established software and files, which would not run on M1.
I am trying to find a solution to run both machines from the M1 and in the same time to maintain the structure of both. Following your tutorial I was wondering if by using UTM in a similar way as you do, it would be possible to operate the hard drive of my Mac 2015 (with it’s current structure) as an external drive from my M1 via a VM on the M1? Would this be possible?
Thanks a lot for your advice!
Hi, thanks a lot. This was really helpfull. Yes, many reboots and no guess, how it works. But at the end, I have a geat graphic and network. I made a emulation at a Intel-Mac. Now I understand, that older Windows before 2000 is really unstable and not for really working with it. Windows 2000 and XP are much easyer and stable. I made it just for fun and looking for good tutorials for a Windows 95 and 3.11. Thanks again.