
Earlier, I explained how to setup CentOS or RHEL as a KVM virtualization host. You can find that explanation here. It also contains some basic terminology about virtualization which is also applicable for Xen. When talking about KVM, somehow, I immediately associate it with the Red Hat family just as when you talk about Xen, I associate it to Debian derivatives. So for this post, I’ll use Debian to install a host that will run Xen-VM’s by using paravirtualization.
Xen is a little different than KVM since it’s also offering paravirtualization. This is a variant on normal virtualization which requires a modified guest OS but doesn’t require the special virtualization extensions as with “normal” virtualization. When using paravirtualization, the hardware is not emulated to the guest OS and communication with the hardware is passing through the host. Performance for paravirtualization is usually higher since you can omit the emulated hardware layer.
In case you want to run an operating system on top of a Xen-host that is not modified for paravirtualization, you loose the benefits of paravirtualization and you do need the special extensions and hardware emulation. Xen is capable of doing both.
In Xen, terminology is similar to KVM. The only concept that’s new is that of domains. A VM or guest is called a domain. dom0 is the first domain and has control of the hardware so it can be considered as the “host” (although technically not 100% correct). domU is considered a domain without special hardware access (unprivileged).
The examples in this post were executed on a standard Debian Wheezy netinstall with only the SSH server and standard system utilities installed.
Storage consideration for your Xen domains
Xen supports saving the data of it’s domains on the dom0-filesystem. This means that the image of the guest is a regular file on the host. Another option is to use LVM and store the data of the guests on free space of a volume group. This means that we eliminate one intermediate file system and gain performance. Tests show that the performance difference can be huge.
For my test-setup, I create a boot, swap and LVM parition on the system and added the LVM parition to a volume group called vg_sys. On the VG, I made one logical volume: lv_root which contains the complete /-file system.
First we’ll check if we have free space in our volume group:
root@xenhost:~# vgdisplay|egrep "Free|Name"
 VG Name vg_sys
Free PE / Size 20453 / 79.89 GiB
In case you don’t have LVM on your machine or you don’t have any free extends in your volume group, you can either add a physical volume or save the guest’s data as files on the file system of dom0.
Install domain0
The first thing to do is installing the packages that are necessary for Xen:
root@xenhost:~# aptitude install xen-linux-system
...
Setting up xen-linux-system-amd64 (3.2+46) ...
After the installation, we need to make sure that Xen is loading before we’re loading the Linux kernel in order to be able to use it. For that, we will move Xen higher than the kernel in the list that GRUB uses to construct it’s entries.
root@xenhost:~# mv /etc/grub.d/20_linux_xen /etc/grub.d/08_linux_xen
root@xenhost:~# ls -1 /etc/grub.d/
00_header
05_debian_theme
08_linux_xen
10_linux
...
After renaming XX_linux_xen to a lower number than our kernel, we need to update GRUB, to generate a new menu, and reboot our machine.
root@xenhost:~# update-grub
Generating grub.cfg ...
Found linux image: /boot/vmlinuz-3.2.0-4-amd64
Found initrd image: /boot/initrd.img-3.2.0-4-amd64
Found linux image: /boot/vmlinuz-3.2.0-4-amd64
Found initrd image: /boot/initrd.img-3.2.0-4-amd64
done
root@xenhost:~# init 6
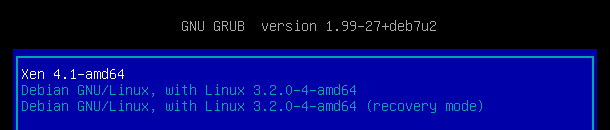
During the boot, you will see that GRUB first loads Xen:
After the reboot, you can check if Xen was installed and executed successfull by executing the xm info command:
If something’s wrong and Xen is not loaded:
root@xenhost:~# xm info
ERROR: Can't find hypervisor information in sysfs!
When everything is installed and running as it should:
root@xenhost:~# xm info
host : xenhost
release : 3.2.0-4-amd64
version : #1 SMP Debian 3.2.60-1+deb7u3
machine : x86_64
nr_cpus : 8
nr_nodes : 1
cores_per_socket : 4
threads_per_core : 2
cpu_mhz : 3392
hw_caps : bfebfbff:2c100800:00000000:00007f40:73fafbff:00000000:00000021:00002fbb
virt_caps : hvm
total_memory : 16295
free_memory : 710
free_cpus : 0
xen_major : 4
xen_minor : 1
xen_extra : .4
xen_caps : xen-3.0-x86_64 xen-3.0-x86_32p hvm-3.0-x86_32 hvm-3.0-x86_32p hvm-3.0-x86_64
xen_scheduler : credit
xen_pagesize : 4096
platform_params : virt_start=0xffff800000000000
xen_changeset : unavailable
xen_commandline : placeholder
cc_compiler : gcc version 4.7.2 (Debian 4.7.2-5)
cc_compile_by : ultrotter
cc_compile_domain : debian.org
cc_compile_date : Mon Sep 29 16:42:20 EEST 2014
xend_config_format : 4
Network preparation of dom0
Running guests without networking isn’t very useful so we need to prepare our host-system to provide some kind of networking to it’s virtual machines. Xen supports various methods (bridging, nat or routing). The most popular is bridging so we’ll prepare the system and setup a bridge to use with Xen. The standard name for the bridge used by Xen is xenbr0.
To configure the bridge, we need to change /etc/network/interfaces and move the IP information from our physical interface to the bridge (as with KVM). But first we need to install the package bridge-utils:
root@xenhost:~# aptitude install bridge-utils
...
Setting up bridge-utils (1.5-6) ...
Now it’s time to change the network configuration.This is how my original /etc/network/interfaces looked like:
root@xenhost:~# cat /etc/network/interfaces
auto lo
iface lo inet loopback

auto eth0
iface eth0 inet static
        address 192.168.249.130
        netmask 255.255.255.0
        network 192.168.249.0
        broadcast 192.168.249.255
        gateway 192.168.249.2
        dns-nameservers 192.168.249.2
This is how the configuration looks like after adding the bridge:
root@xenhost:~# cat /etc/network/interfaces
auto lo
iface lo inet loopback

auto eth0
iface eth0 inet manual

auto xenbr0
iface xenbr0 inet static
        bridge_ports eth0
        address 192.168.249.130
        netmask 255.255.255.0
        network 192.168.249.0
        broadcast 192.168.249.255
        gateway 192.168.249.2
        dns-nameservers 192.168.249.2
As you can see, I changed eth0 from type static to manual and removed all it’s parameters. Those parameters plus the link between the bridge and the real physical interfaces were moved to the bridge.
After chaning the configuration, we need to load it and we can check if the bridge is now the owner of our IP-address:
root@xenhost:~# /etc/init.d/networking restart
[....] Running /etc/init.d/networking restart is deprecated because it may not r[warnble some interfaces ... (warning).
[....] Reconfiguring network interfaces...
Waiting for xenbr0 to get ready (MAXWAIT is 32 seconds).
done.
root@xenhost:~# ip a
1: lo: <LOOPBACK,UP,LOWER_UP> mtu 16436 qdisc noqueue state UNKNOWN
    link/loopback 00:00:00:00:00:00 brd 00:00:00:00:00:00
    inet 127.0.0.1/8 scope host lo
    inet6 ::1/128 scope host
       valid_lft forever preferred_lft forever
2: eth0: <BROADCAST,MULTICAST,UP,LOWER_UP> mtu 1500 qdisc pfifo_fast master xenbr0 state UP qlen 1000
    link/ether 00:0c:29:85:30:e7 brd ff:ff:ff:ff:ff:ff
3: xenbr0: <BROADCAST,MULTICAST,UP,LOWER_UP> mtu 1500 qdisc noqueue state UP
    link/ether 00:0c:29:85:30:e7 brd ff:ff:ff:ff:ff:ff
    inet 192.168.249.130/24 brd 192.168.249.255 scope global xenbr0
    inet6 fe80::20c:29ff:fe85:30e7/64 scope link
       valid_lft forever preferred_lft forever
Xen is using bridge xenbr0 by default so we don’t need to define that in the configuration. We do need to define which physical interface that bridge is using to avoind the following warning:
You appear to have a missing vif-script, or network-script, in the
Xen configuration file /etc/xen/xend-config.sxp.

Please fix this and restart Xend, or your guests will not be able
to use any networking!
We can do that by adding it to /etc/xen/xend-config.sxp as mentioned in the warning.
/etc/xen/xend-config.sxp before the change:
(vif-script vif-bridge)
/etc/xen/xend-config.sxp after the change:
(vif-script vif-bridge)
(network-script 'network-bridge netdev=eth0')
After the change, we need to load the changed configuration by restarting xend:
root@xenhost:~# /etc/init.d/xen restart
[ ok ] Restarting Xen daemons: xend xend xenconsoled.
Adding domU virtual machines
Now that our host or domain0 is completely ready to run virtual machines, we can start by installing the xen-tools package to be able to deploy or create domU’s:
root@xenhost:~# apt-get install xen-tools
Once the necessary packages are installed, we can create a new domain with the following command and arguments. In case you don’t want to use LVM to store the data of the guests, you should specify –dir=<location> to specify a location for the images and remove the –lvm=vg_sys parameter.
root@xenhost:~# xen-create-image --hostname=xenguest1 --memory=14336mb --vcpus=8 --lvm=vg_sys --ip=192.168.249.131 --gateway=192.168.249.2 --netmask=255.255.255.0 --nameserver=192.168.249.2 --pygrub --dist=wheezy --size=30Gb

General Information
--------------------
Hostname : xenguest1
Distribution : wheezy
Mirror : http://ftp.belnet.be/debian/
Partitions : swap 128Mb (swap)
/ 30Gb (ext3)
Image type : full
Memory size : 14336mb
Kernel path : /boot/vmlinuz-3.2.0-4-amd64
Initrd path : /boot/initrd.img-3.2.0-4-amd64

Networking Information
----------------------
IP Address 1 : 192.168.249.131 [MAC: 00:16:3E:3D:3E:B7]
Netmask : 255.255.255.0
Gateway : 192.168.249.2
Nameserver : 192.168.249.2
Creating swap on /dev/vg_sys/xenguest-swap
Done

Creating ext3 filesystem on /dev/vg_sys/xenguest-disk
Done
Installation method: debootstrap
Done

Running hooks
Done

No role scripts were specified. Skipping

Creating Xen configuration file
Done

No role scripts were specified. Skipping
Setting up root password
Generating a password for the new guest.
All done
Logfile produced at:
/var/log/xen-tools/xenguest.log

Installation Summary
---------------------
Hostname : xenguest
Distribution : wheezy
IP-Address(es) : 192.168.249.131
RSA Fingerprint : 7a:df:7b:ba:7f:a0:e6:67:e8:56:0e:73:f6:02:58:fe
Root Password : uXk7HqZn
Once the creation is finished, you should see that there are two logical volumes added to the specified volume group. One for swap and a second for the file system:
root@xenhost:~# lvdisplay |grep "LV Name"
LV Name lv_root
LV Name xenguest1-swap
LV Name xenguest1-disk
Besides the logical volume, the command also created the config file for the domain in /etc/xen:
root@xenhost:~# ls -l /etc/xen/
total 36
drwxr-xr-x 2 root root 4096 Oct 17 15:05 scripts
-rw-r--r-- 1 root root 11372 Oct 17 15:31 xend-config.sxp
-rw-r--r-- 1 root root 1256 Jan 22 2013 xend-pci-permissive.sxp
-rw-r--r-- 1 root root 4129 Jan 22 2013 xend-pci-quirks.sxp
-rw-r--r-- 1 root root 675 Oct 17 15:36 xenguest1.cfg
-rw-r--r-- 1 root root 275 Jan 22 2013 xl.conf
Start using the newly deployed virtual machine
Now that we prepared our domU (xenguest1), we can start using it by starting it. This is called creating the domain in Xen terminology:
root@xenhost:~# xm create /etc/xen/xenguest1.cfg
Using config file "/etc/xen/xenguest1.cfg".
Started domain xenguest1 (id=1)
To check which domains are active, we can list them:
root@xenhost:~# xm list
Name ID Mem VCPUs State Time(s)
Domain-0 0 1765 8 r----- 142.5
xenguest 1 14336 8 -b---- 3.9
Now that our newly created domain is started, we can just connect to it with SSH:
root@xenhost:~# ssh 192.168.249.131
The authenticity of host '192.168.249.131 (192.168.249.131)' can't be established.
ECDSA key fingerprint is d2:da:a4:28:b4:c5:a7:76:d3:ed:46:50:f1:31:02:07.
Are you sure you want to continue connecting (yes/no)? yes
Warning: Permanently added '192.168.249.131' (ECDSA) to the list of known hosts.
root@192.168.249.131's password:
Linux xenguest1 3.2.0-4-amd64 #1 SMP Debian 3.2.60-1+deb7u3 x86_64

The programs included with the Debian GNU/Linux system are free software;
the exact distribution terms for each program are described in the
individual files in /usr/share/doc/*/copyright.

Debian GNU/Linux comes with ABSOLUTELY NO WARRANTY, to the extent
permitted by applicable law.
root@xenguest1:~# cat /etc/issue
Debian GNU/Linux 7 \n \l
In case you want to stop a domain, you can issue shutdown to do a clean shutdown or destroy to kill the domain:
root@xenhost:~# xen shutdown xenguest1
root@xenhost:~# xm list
Name ID Mem VCPUs State Time(s)
Domain-0 0 1765 8 r----- 145.3
As you can see, getting up and running with Xen doesn’t take much effort. Offcourse Xen is a lot more that this minimal example. It’s for example possible to connect to the console of a running domain with VNC or to install a unmodified OS like WIndows. Maybe later, with more time, I’ll add those instructions here.
I struggled with this question when I upgraded to debian 7xen4.1.
The resolved the problem.
Thanks
-K