
It’s been a while since I was busy with Zabbix but I have been following their alpha releases for version 3 quite closely. Now that Zabbix released the first beta release for version 3, I thought that it was time to have a good look at this new and improved version. Zabbix is used a lot and more and more companies count on it as their primary monitoring solution. In this post, I’ll explain how to get started with the beta of the latest Zabbix release on CentOS 7 or RHEL 7.
I’ve made some posts earlier about Zabbix and I can see that the topic is quite popular on my blog. Since the long awaited version 3 of this monitoring tool has recently had a beta-release, I’m too curious to not check it out and decided to created this post.
For more information about the current stable release, check out this previous post: http://jensd.be/393/linux/install-zabbix-on-centos-7-or-rhel-7
It might be obvious but I do want to point out that a beta is not supposed to be used for production work. Nevertheless, it can give you a heads-up and a good look and feel for the final release. When you encounter bugs, I recommend submitting them to the dev team because from their point of view, that’s what beta’s are for and why they are released.
The beta does not come in a ready-made distro packages but is either delivered as an appliance or as source package. The appliance-version is something new and it allows you to run the Zabbix beta as a ready-made VM or Live ISO. Off course that would be too easy so I decided to install Zabbix from source on a minimal CentOS/RHEL 7 installation.
Download the sources
The first step in the process, is to download the source for the beta from the Zabbix website. The sources can be found here: http://www.zabbix.com/download.php. After downloading, unpack them (in your home directory).
[jensd@cen7 ~]$ sudo yum -y install wget
...
Complete!
[jensd@cen7 ~]$ wget  http://netix.dl.sourceforge.net/project/zabbix/ZABBIX%20Latest%20Development/3.0.0beta1/zabbix-3.0.0beta1.tar.gz
--2016-01-26 15:56:34--  http://netix.dl.sourceforge.net/project/zabbix/ZABBIX%20Latest%20Development/3.0.0beta1/zabbix-3.0.0beta1.tar.gz
Resolving netix.dl.sourceforge.net (netix.dl.sourceforge.net)... 87.121.121.2
Connecting to netix.dl.sourceforge.net (netix.dl.sourceforge.net)|87.121.121.2|:80... connected.
HTTP request sent, awaiting response... 200 OK
Length: 14787939 (14M) [application/x-gzip]
Saving to: ‘zabbix-3.0.0beta1.tar.gz’

100%[=================================================================================>] 14,787,939   111KB/s   in 13s

2016-01-26 15:56:47 (1.08 MB/s) - ‘zabbix-3.0.0beta1.tar.gz’ saved [14787939/14787939]

[jensd@cen7 ~]$ tar -xvzf zabbix-3.0.0beta1.tar.gz
...
[jensd@cen7 ~]$
Create a user to run the Zabbix processes
I shouldn’t mention that it isn’t a very good idea to run Zabbix under root so let’s create a new user that will run the Zabbix processes. Keep in mind that it’s also a good practice to use a separate user to run the Zabbix agent.
[jensd@cen7 ~]$ sudo groupadd zabbix
[jensd@cen7 ~]$ sudo useradd -g zabbix zabbix
Setup the database
Zabbix uses a database to store all of it’s information. Most common DB-systems are supported but for this installation, I chose to go with MySQL (or the fork MariaDB).
Install MariaDB:
[jensd@cen7 ~]$ yum -y install mariadb mariadb-server
...
Complete!
After the installation, we can start MariaDB and run the initial setup script to configure the root password. After that, let’s enable MariaDB to let it start on boot:
[jensd@cen7 ~]$ sudo systemctl start mariadb
[jensd@cen7 ~]$ sudo mysql_secure_installation
/bin/mysql_secure_installation: line 379: find_mysql_client: command not found

NOTE: RUNNING ALL PARTS OF THIS SCRIPT IS RECOMMENDED FOR ALL MariaDB
      SERVERS IN PRODUCTION USE!  PLEASE READ EACH STEP CAREFULLY!

In order to log into MariaDB to secure it, we'll need the current
password for the root user.  If you've just installed MariaDB, and
you haven't set the root password yet, the password will be blank,
so you should just press enter here.

Enter current password for root (enter for none):
OK, successfully used password, moving on...

Setting the root password ensures that nobody can log into the MariaDB
root user without the proper authorisation.

Set root password? [Y/n] y
New password:
Re-enter new password:
Password updated successfully!
Reloading privilege tables..
 ... Success!


By default, a MariaDB installation has an anonymous user, allowing anyone
to log into MariaDB without having to have a user account created for
them.  This is intended only for testing, and to make the installation
go a bit smoother.  You should remove them before moving into a
production environment.

Remove anonymous users? [Y/n] y
 ... Success!

Normally, root should only be allowed to connect from 'localhost'.  This
ensures that someone cannot guess at the root password from the network.

Disallow root login remotely? [Y/n] y
 ... Success!

By default, MariaDB comes with a database named 'test' that anyone can
access.  This is also intended only for testing, and should be removed
before moving into a production environment.

Remove test database and access to it? [Y/n] y
 - Dropping test database...
 ... Success!
 - Removing privileges on test database...
 ... Success!

Reloading the privilege tables will ensure that all changes made so far
will take effect immediately.

Reload privilege tables now? [Y/n] y
 ... Success!

Cleaning up...

All done!  If you've completed all of the above steps, your MariaDB
installation should now be secure.

Thanks for using MariaDB!
[jensd@cen7 ~]$ sudo systemctl enable mariadb
Created symlink from /etc/systemd/system/multi-user.target.wants/mariadb.service to /usr/lib/systemd/system/mariadb.service.
At this point, our database is installed and running but doesn’t contain any database, tables or user for Zabbix to use. Let’s go ahead and create those. Replace the password “secretpass” with your own password:
[jensd@cen7 ~]$ mysql -u root -p
Enter password:
Welcome to the MariaDB monitor.  Commands end with ; or \g.
Your MariaDB connection id is 10
Server version: 5.5.44-MariaDB MariaDB Server

Copyright (c) 2000, 2015, Oracle, MariaDB Corporation Ab and others.

Type 'help;' or '\h' for help. Type '\c' to clear the current input statement.

MariaDB [(none)]> create database zabbix character set utf8 collate utf8_bin;
Query OK, 1 row affected (0.00 sec)

MariaDB [(none)]> grant all privileges on zabbix.* to zabbix@localhost identified by 'secretpass';
Query OK, 0 rows affected (0.00 sec)

MariaDB [(none)]> flush privileges;
Query OK, 0 rows affected (0.00 sec)

MariaDB [(none)]> quit
Bye
After creating the database and user, we can create the database structure. The SQL-scripts to do so are delivered with the source in database/mysql/:
[jensd@cen7 ~]$ cd zabbix-3.0.0beta1/database/mysql/
[jensd@cen7 mysql]$ mysql -u zabbix -p -D zabbix < schema.sql
Enter password:
[jensd@cen7 mysql]$ mysql -u zabbix -p -D zabbix < images.sql
Enter password:
[jensd@cen7 mysql]$ mysql -u zabbix -p -D zabbix < data.sql
Enter password:
Now that we created the DB structure, the database setup is complete.
Compile and install the Zabbix source
Before we can start compiling the source, we need to install the required dependencies for the compilation. The list of dependencies depends on the options you supply during the configuration phase.
[jensd@cen7 zabbix-3.0.0beta1]$ sudo yum -y install gcc make mariadb-devel libxml2-devel net-snmp-devel libcurl-devel libssh2-devel
...
Complete!
Once the dependencies are installed, we can run ./configure with the options which we require. For this post, I chose to run the agent and server on one host and included the most common options:
[jensd@cen7 mysql]$ cd  ~/zabbix-3.0.0beta1
[jensd@cen7 zabbix-3.0.0beta1]$ ./configure --enable-server --enable-agent --with-mysql --with-net-snmp --with-libcurl --with-libxml2 --with-ssh2
checking for a BSD-compatible install... /bin/install -c
checking whether build environment is sane... yes
...
config.status: creating include/config.h
config.status: executing depfiles commands


Configuration:

  Detected OS:           linux-gnu
  Install path:          /usr/local
  Compilation arch:      linux

  Compiler:              gcc
  Compiler flags:        -g -O2  -I/usr/include/mysql     -I/usr/include/libxml2   -I/usr/local/include -I/usr/lib64/perl5/CORE -I. -I/usr/include -I/usr/include

  Enable server:         yes
  Server details:
    With database:         MySQL
    WEB Monitoring:        cURL
    Native Jabber:         no
    SNMP:                  yes
    IPMI:                  no
    SSH:                   yes
    TLS:                   no
    ODBC:                  no
    Linker flags:          -rdynamic      -L/usr/lib64/mysql        -L/usr/lib64 -L/usr/lib
    Libraries:             -lm -ldl  -lresolv    -lmysqlclient      -lxml2    -lnetsnmp -lssh2     -lcurl

  Enable proxy:          no

  Enable agent:          yes
  Agent details:
    TLS:                   no
    Linker flags:          -rdynamic
    Libraries:             -lm -ldl  -lresolv      -lcurl

  Enable Java gateway:   no

  LDAP support:          no
  IPv6 support:          no

***********************************************************
*            Now run 'make install'                       *
*                                                         *
*            Thank you for using Zabbix!                  *
*              <http://www.zabbix.com>                    *
***********************************************************
Once ./configure made a MakeFile for the installation, we can do the actual compilation by executing make:
[jensd@cen7 zabbix-3.0.0beta1]$ make
Making all in src
make[1]: Entering directory `/home/jensd/zabbix-3.0.0beta1/src'
Making all in libs
...
make[1]: Nothing to be done for `all-am'.
make[1]: Leaving directory `/home/jensd/zabbix-3.0.0beta1'
[jensd@cen7 zabbix-3.0.0beta1]$
With make, we compiled all binaries and the last step to complete the Zabbix backend installation is to copy the files to the correct locations. This requires superuser privileges:
[jensd@cen7 zabbix-3.0.0beta1]$ sudo make install
Initial Zabbix configuration and preparation
Before we can start the Zabbix agent and server, it’s a good thing to verify the configuration files and change the parameters to values which are suited for your installation.
For the server, edit the file /usr/local/etc/zabbix_server.conf and include the following. Make sure that you replace the password with the one specified when creating the database user:
LogFile=/var/log/zabbix/zabbix_server.log
LogFileSize=500
DBHost=localhost
DBName=zabbix
DBUser=zabbix
DBPassword=secretpass
PidFile=/var/run/zabbix/zabbix_server.pid
For the agent, edit the file /usr/local/etc/zabbix_agentd.conf and include the following:
LogFile=/var/log/zabbix/zabbix_agentd.log
LogFileSize=200
PidFile=/var/run/zabbix/zabbix_agent.pid
As you can see in the contents of the configuration files, I changed the directory containing the logs to /var/log/zabbix and I specified a new location for the Pidfiles, so we need to make sure those directories exist and have the correct permissions:
[jensd@cen7 ~]$ sudo mkdir /var/log/zabbix
[jensd@cen7 ~]$ sudo chown zabbix:zabbix /var/log/zabbix/
[jensd@cen7 ~]$ sudo mkdir /var/run/zabbix/
[jensd@cen7 ~]$ sudo chown zabbix:zabbix /var/run/zabbix/
The backend is installed and configured so we could start the binaries manually under the Zabbix user but that’s not a very clean approach. I know it’s a beta but even in such case, it would hurt me to do so and I think it’s a better idea to create systemd-service files for the server and agent.
Create service-file /etc/systemd/system/zabbix-server.service with the following contents:
[Unit]
Description=Zabbix Server
After=syslog.target network.target mariadb.service

[Service]
Type=oneshot
User=zabbix
ExecStart=/usr/local/sbin/zabbix_server
ExecReload=/usr/local/sbin/zabbix_server -R config_cache_reload
RemainAfterExit=yes
PIDFile=/var/run/zabbix/zabbix_server.pid

[Install]
WantedBy=multi-user.target
Create service-file /etc/systemd/system/zabbix-agent.service with the following contents:
[Unit]
Description=Zabbix Agent
After=syslog.target network.target

[Service]
Type=oneshot
User=zabbix
ExecStart=/usr/local/sbin/zabbix_agentd
RemainAfterExit=yes
PIDFile=/var/run/zabbix/zabbix_agent.pid

[Install]
WantedBy=multi-user.target
Let systemd reload the service files:
[jensd@cen7 ~]$ sudo systemctl daemon-reload
Run Zabbix for the first time
The installation of the Zabbix backend (server) is completed and the service can be started. Since we created nice systemd service files, we can start the server and agent as any other service:
[jensd@cen7 ~]$ sudo systemctl daemon-reload
[jensd@cen7 ~]$ sudo systemctl start zabbix-agent
[jensd@cen7 ~]$ sudo systemctl status zabbix-agent
● zabbix-agent.service - Zabbix Agent
   Loaded: loaded (/etc/systemd/system/zabbix-agent.service; disabled; vendor preset: disabled)
   Active: active (exited) since Tue 2016-01-26 18:06:22 CET; 6s ago
  Process: 77187 ExecStart=/usr/local/sbin/zabbix_agentd (code=exited, status=0/SUCCESS)
 Main PID: 77187 (code=exited, status=0/SUCCESS)
   CGroup: /system.slice/zabbix-agent.service
           ├─77189 /usr/local/sbin/zabbix_agentd
           ├─77190 /usr/local/sbin/zabbix_agentd: collector [idle 1 sec]
           ├─77191 /usr/local/sbin/zabbix_agentd: listener #1 [waiting for connection]
           ├─77192 /usr/local/sbin/zabbix_agentd: listener #2 [waiting for connection]
           ├─77193 /usr/local/sbin/zabbix_agentd: listener #3 [waiting for connection]
           └─77194 /usr/local/sbin/zabbix_agentd: active checks #1 [idle 1 sec]

Jan 26 18:06:22 cen7 systemd[1]: Starting Zabbix Agent...
Jan 26 18:06:22 cen7 systemd[1]: Started Zabbix Agent.
[jensd@cen7 ~]$ sudo systemctl stop zabbix-server
[jensd@cen7 ~]$ sudo systemctl stop zabbix-agent
[jensd@cen7 ~]$ sudo systemctl start zabbix-server
[jensd@cen7 ~]$ sudo systemctl start zabbix-agent
[jensd@cen7 ~]$ sudo systemctl status zabbix-server
● zabbix-server.service - Zabbix Server
   Loaded: loaded (/etc/systemd/system/zabbix-server.service; disabled; vendor preset: disabled)
   Active: active (exited) since Tue 2016-01-26 18:08:54 CET; 8s ago
  Process: 77251 ExecStart=/usr/local/sbin/zabbix_server (code=exited, status=0/SUCCESS)
 Main PID: 77251 (code=exited, status=0/SUCCESS)
   CGroup: /system.slice/zabbix-server.service
           ├─77253 /usr/local/sbin/zabbix_server
           ├─77258 /usr/local/sbin/zabbix_server: configuration syncer [waiting 60 sec for processes]
           ├─77259 /usr/local/sbin/zabbix_server: db watchdog [synced alerts config in 0.057352 sec, idle 60 sec]
           ├─77260 /usr/local/sbin/zabbix_server: poller #1 [got 0 values in 0.000005 sec, idle 5 sec]
           ├─77261 /usr/local/sbin/zabbix_server: poller #2 [got 0 values in 0.000009 sec, idle 5 sec]
           ├─77262 /usr/local/sbin/zabbix_server: poller #3 [got 0 values in 0.000005 sec, idle 5 sec]
           ├─77263 /usr/local/sbin/zabbix_server: poller #4 [got 0 values in 0.000005 sec, idle 5 sec]
           ├─77264 /usr/local/sbin/zabbix_server: poller #5 [got 0 values in 0.000004 sec, idle 5 sec]
           ├─77265 /usr/local/sbin/zabbix_server: unreachable poller #1 [got 0 values in 0.000009 sec, idle 5 sec]
           ├─77266 /usr/local/sbin/zabbix_server: trapper #1 [processed data in 0.000000 sec, waiting for connection]
           ├─77267 /usr/local/sbin/zabbix_server: trapper #2 [processed data in 0.000000 sec, waiting for connection]
           ├─77268 /usr/local/sbin/zabbix_server: trapper #3 [processed data in 0.000000 sec, waiting for connection]
           ├─77269 /usr/local/sbin/zabbix_server: trapper #4 [processed data in 0.000000 sec, waiting for connection]
           ├─77270 /usr/local/sbin/zabbix_server: trapper #5 [processed data in 0.000006 sec, waiting for connection]
           ├─77271 /usr/local/sbin/zabbix_server: icmp pinger #1 [got 0 values in 0.000007 sec, idle 5 sec]
           ├─77272 /usr/local/sbin/zabbix_server: alerter [sent alerts: 0 success, 0 fail in 0.001696 sec, idle 30 sec]
           ├─77273 /usr/local/sbin/zabbix_server: housekeeper [startup idle for 30 minutes]
           ├─77274 /usr/local/sbin/zabbix_server: timer #1 [processed 1 triggers, 0 events in 0.001133 sec, 0 maintenanc...
           ├─77275 /usr/local/sbin/zabbix_server: http poller #1 [got 0 values in 0.000901 sec, idle 5 sec]
           ├─77276 /usr/local/sbin/zabbix_server: discoverer #1 [processed 0 rules in 0.000238 sec, idle 60 sec]
           ├─77277 /usr/local/sbin/zabbix_server: history syncer #1 [synced 0 items in 0.000002 sec, idle 1 sec]
           ├─77278 /usr/local/sbin/zabbix_server: history syncer #2 [synced 0 items in 0.000001 sec, idle 1 sec]
           ├─77279 /usr/local/sbin/zabbix_server: history syncer #3 [synced 0 items in 0.000002 sec, idle 1 sec]
           ├─77280 /usr/local/sbin/zabbix_server: history syncer #4 [synced 0 items in 0.000002 sec, idle 1 sec]
           ├─77281 /usr/local/sbin/zabbix_server: escalator #1 [processed 0 escalations in 0.000623 sec, idle 3 sec]
           ├─77282 /usr/local/sbin/zabbix_server: proxy poller #1 [exchanged data with 0 proxies in 0.000006 sec, idle 5...
           └─77283 /usr/local/sbin/zabbix_server: self-monitoring [processed data in 0.000007 sec, idle 1 sec]

Jan 26 18:08:54 cen7 systemd[1]: Starting Zabbix Server...
Jan 26 18:08:54 cen7 systemd[1]: Started Zabbix Server.
[jensd@cen7 ~]$ sudo systemctl status zabbix-agent
● zabbix-agent.service - Zabbix Agent
   Loaded: loaded (/etc/systemd/system/zabbix-agent.service; disabled; vendor preset: disabled)
   Active: active (exited) since Tue 2016-01-26 18:08:58 CET; 9s ago
  Process: 77313 ExecStart=/usr/local/sbin/zabbix_agentd (code=exited, status=0/SUCCESS)
 Main PID: 77313 (code=exited, status=0/SUCCESS)
   CGroup: /system.slice/zabbix-agent.service
           ├─77315 /usr/local/sbin/zabbix_agentd
           ├─77316 /usr/local/sbin/zabbix_agentd: collector [idle 1 sec]
           ├─77317 /usr/local/sbin/zabbix_agentd: listener #1 [waiting for connection]
           ├─77318 /usr/local/sbin/zabbix_agentd: listener #2 [waiting for connection]
           ├─77319 /usr/local/sbin/zabbix_agentd: listener #3 [waiting for connection]
           └─77320 /usr/local/sbin/zabbix_agentd: active checks #1 [idle 1 sec]

Jan 26 18:08:58 cen7 systemd[1]: Starting Zabbix Agent...
Jan 26 18:08:58 cen7 systemd[1]: Started Zabbix Agent.
[jensd@cen7 ~]$ sudo netstat -tlpn|grep zabbix
tcp        0      0 0.0.0.0:10050           0.0.0.0:*               LISTEN      77315/zabbix_agentd
tcp        0      0 0.0.0.0:10051           0.0.0.0:*               LISTEN      77253/zabbix_server
The last part (the netstat command) is optional but I just did it to check if the agent and server are listening for incoming connections.
Now that the services are started, the backend setup of Zabbix is complete and we can proceed with the frontend.
Zabbix frontend installation
To control the Zabbix server, we need to install a frontend. This is the webinterface used to manage Zabbix and for daily use. The frontend is running on Apache with PHP.
The first step in running the frontend is to install Apache, PHP and all required PHP libraries for Zabbix:
[jensd@cen7 ~]$ sudo yum -y install httpd php php-mysql php-bcmath php-mbstring php-gd php-xmlwriter php-xml
...
Complete!
The files for the frontend are supplied with the source in frontends/php so all we need to do is to copy them to our htdocs location.
[jensd@cen7 ~]$ sudo mkdir /var/www/html/zabbix
[jensd@cen7 ~]$ sudo cp -a zabbix-3.0.0beta1/frontends/php/* /var/www/html/zabbix/
After copying the files, it’s important to set the permissions and SELinux context correct so Zabbix can write to the correct directory if needed:
[jensd@cen7 ~]$ sudo chown -R apache:apache /var/www/html/zabbix/
[jensd@cen7 ~]$ sudo restorecon -R /var/www/html/zabbix/
[jensd@cen7 ~]$ sudo chcon -t httpd_sys_rw_content_t /var/www/html/zabbix/conf
Another SELinux boolean needs to be changed in order for the Zabbix webinterface to be allowed to communicate with the server:
[jensd@cen7 ~]$ sudo setsebool -P httpd_can_connect_zabbix=1
We installed PHP but the default options for PHP are not optimal for Zabbix and the installer will not continue without them having good values. Let’s correct them to suitable values for Zabbix:
[jensd@cen7 ~]$ sudo sed -i 's/^max_execution_time.*/max_execution_time=300/' /etc/php.ini
[jensd@cen7 ~]$ sudo sed -i 's/^max_input_time.*/max_input_time=300/' /etc/php.ini
[jensd@cen7 ~]$ sudo sed -i 's/^post_max_size.*/post_max_size=32M/' /etc/php.ini
[jensd@cen7 ~]$ sudo sed -i 's/^upload_max_filesize.*/upload_max_filesize=16M/' /etc/php.ini
[jensd@cen7 ~]$ sudo sed -i "s/^\;date.timezone.*/date.timezone=\'Europe\/Brussels\'/" /etc/php.ini
That should be all for the frontend installation and now is a good time to start Apache. While we’re busy with that, let’s also enable Apache on boot:
[jensd@cen7 ~]$ sudo systemctl start httpd
[jensd@cen7 ~]$ sudo systemctl enable httpd
Created symlink from /etc/systemd/system/multi-user.target.wants/httpd.service to /usr/lib/systemd/system/httpd.service.
Before we can access the Zabbix webinterface, we need to open up the firewall to port 80 (HTTP):
[jensd@cen7 ~]$ sudo firewall-cmd --permanent --add-service=http
success
[jensd@cen7 ~]$ sudo firewall-cmd --reload
success
Zabbix frontend configuration
The biggest part of the installation is done and the last step is to connect to the webinterface and walk trough the setup. Point your browser to the IP or hostname of the server where you just performed the above steps and follow the instructions:
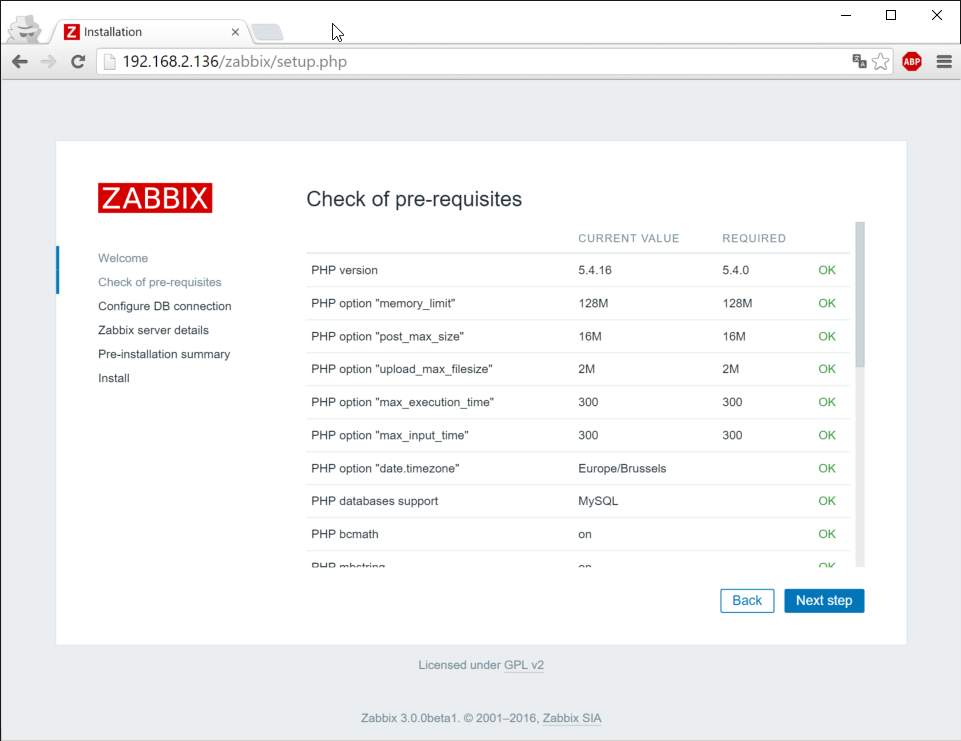
Click next step and verify that all requirements are fulfilled:
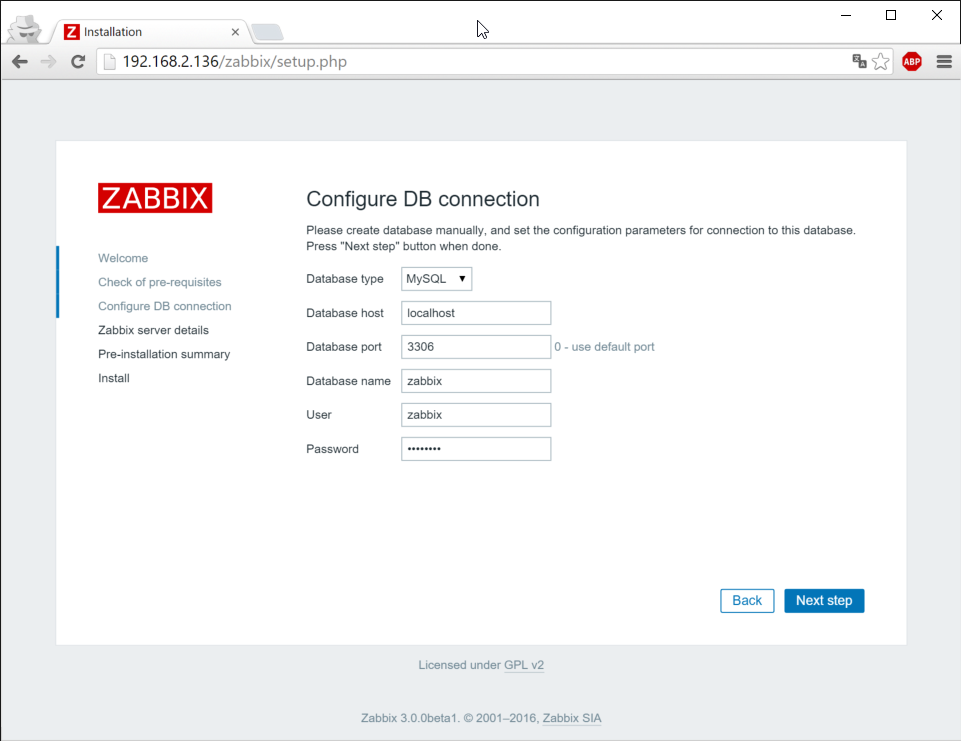
 In the next step, enter the database password which you specified when creating the database user in the beginning:
Go trough the server details, verify the summary and click Next to write the configuration file to /var/www/html/zabbix/conf:
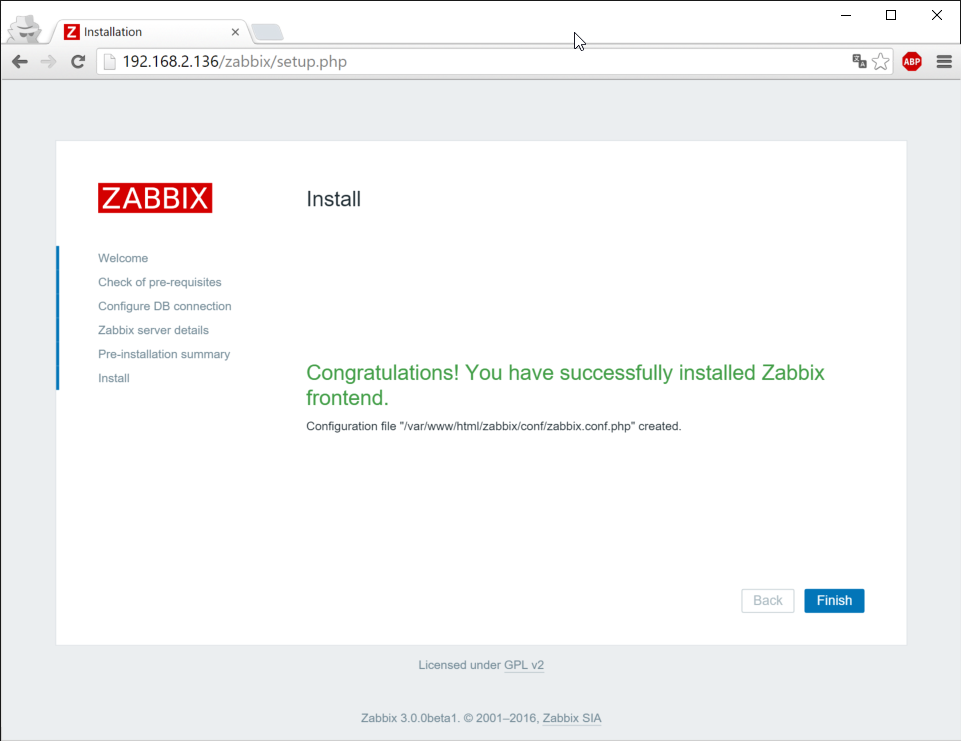
This should be all it takes to setup Zabbix and at this point, you can start using Zabbix.
Use Zabbix
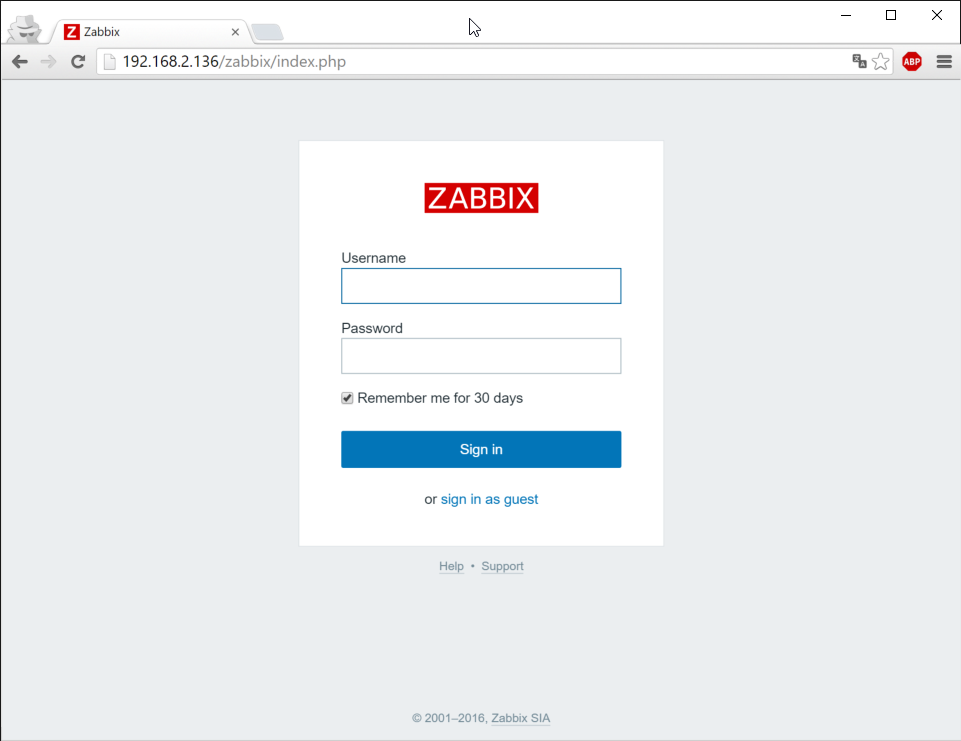
Now that we installed and started the backend, installed, started and configured the frontend, it’s time to explore your new Zabbix version 3 installation. To do so, connect to the IP or hostname of the server with your browser and login with Admin/zabbix. (please note that this is case-sensitive):
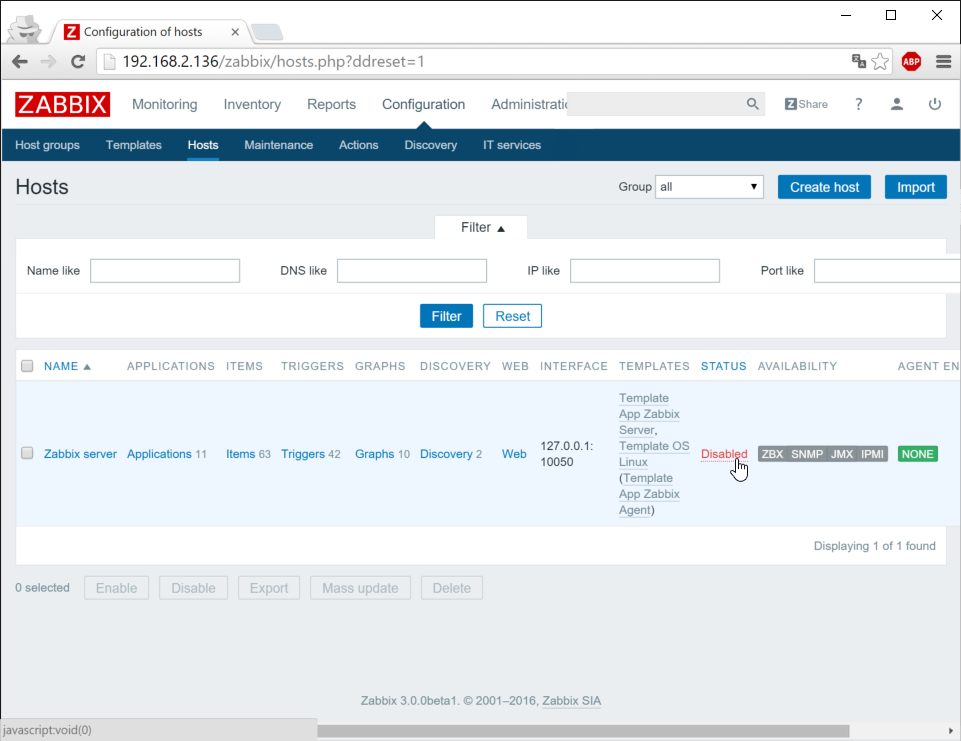
One first thing which you should do, is to enable the Zabbix server itself. This can be done in Configuration – Hosts – Zabbix server -Enable:
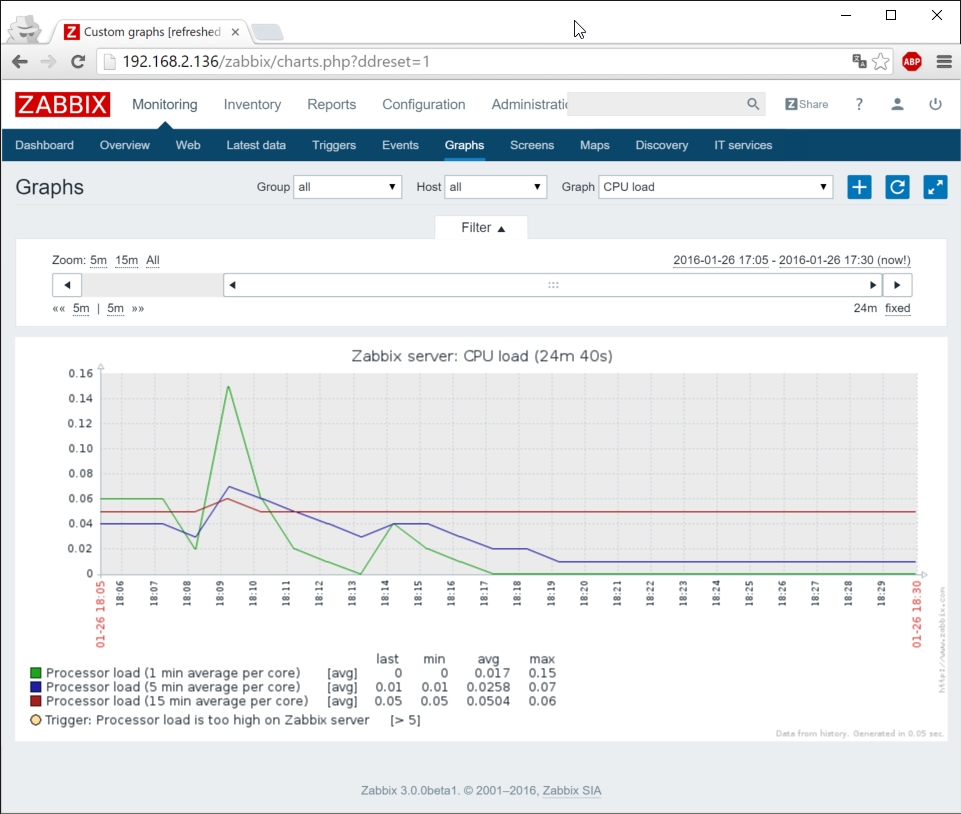
After performing this step, you should start to see data about the Zabbix server in the graphs:
For a quick guide on how to use Zabbix, I’ll have to point you to my previous post about Zabbix. Later, when I find some more time, I will try to update that information for the new version.
Let me know what you think about the new release. To my idea, it’s already quite stable and doesn’t contain too much bugs for a beta. Enjoy.
Thanks! Very useful article, much more detailed than official guide.
Thanks. I’ve also just updated my post on how to install the 3.2 release (not from source) on CentOS: http://jensd.be/393/linux/install-zabbix-on-centos-7-or-rhel-7
Nice walkthrough installing Zabbix 3.0 beta from source on CentOS/RHEL really highlights the setup details that can trip people up, especially around database configuration. It’s a solid guide for anyone curious to test the new features before the stable release.