In certain cases you might need to perform a fresh installation of macOS or at least have a recovery environment available when you are no longer able to use or boot your Apple macOS-based device. This could also be the case if you want to install macOS on a VM or unsupported hardware like on a Hackintosh. In this post I will explain how you can still create a bootable macOS USB drive from a Windows-based machine which then can be used for macOS installation or running recovery.
YouTube Video
If you are interested, I also created a YouTube video from this blogpost. If you prefer classic text, you can just follow the rest of this article:
Introduction
So if you would be in the situation where you no longer have access to macOS, for example if your drive failed or your installation got corrupt and can no longer boot, or simply because you would like to install macOS on non-official hardware, and you do still have a Windows-based machine available, you came to the right place.
If you still do have access to a macOS-based machine, creating that same bootable macOS installation media from macOS itself is fairly easy. You just need to download the installer from the App Store and then run the “createinstallmedia” script from that application’s contents. I covered this in detail in the past in this post.
And if you would be looking to do the opposite, to create bootable USB installation media for Windows from macOS instead, I did cover this before as well over here.
For this post we will focus on getting that USB-drive created without the need for a macOS-based machine or Apple hardware.
Process overview
As I wanted to avoid both using paid tools like Transmac or UUByte, or using pre-created images, I decided to go for a slightly different approach. Instead of directly creating the USB drive from Windows, we will first get a macOS Catalina VM running and use that to create the installation media. This approach does add quite a bit of steps but gives you a lot of flexibility in return. One large advantage is that this will also allow you to create a USB drive for unsupported (Apple) hardware.
From a high level, the process looks as follows:
- Step 1) Download a macOS Catalina recovery image
- Step 2) Convert the recovery image to a VMDK-file
- Step 3) Install VirtualBox and the extension pack
- Step 4) Create a VM for macOS and link the VMDK file to it
- Step 5) Install macOS Catalina
- Step 6) Download the macOS installer of your choice
- Step 7) Prepare and create USB installation media
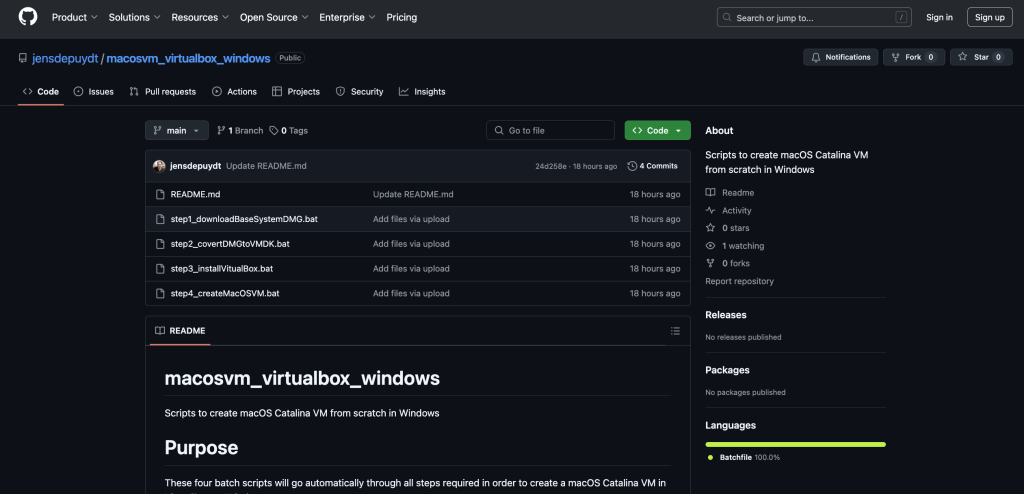
I will cover these steps in detail below for your reference but as the first four steps require quite a bit of manual work including running commands in command prompt, I decided to make some scripts and share these on Github to simplify the process. You can find the scripts over here: https://github.com/jensdepuydt/macosvm_virtualbox_windows
Prepare the macOS Catalina VM
In the first part we need to perform some preparation steps get a virtual machine ready that will run macOS Catalina on top of our Windows-based system. This is exactly what the four scripts that I mentioned will be doing.
The reason to go for Catalina, is that since macOS 11, also known as Big Sur, Apple changed the format in which they distribute the recovery and installation images. With that new format it became a lot harder to extract the required data and create a usable virtual drive from Windows, at least without the need for paid tools. Hence I’m going for a virtual machine with macOS Catalina which works perfectly fine for our purpose.
In case you would encounter issues doing these steps using the mentioned scripts, you can check the manual steps below instead.
Download the scripts from Github
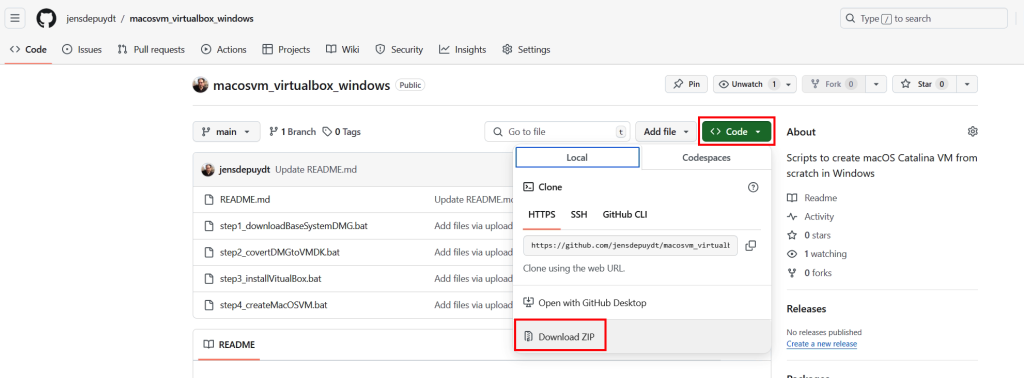
To start, we need to download the scripts from Github, so navigate with your browser to https://github.com/jensdepuydt/macosvm_virtualbox_windows and click on the green Code button, then choose “Download ZIP”:
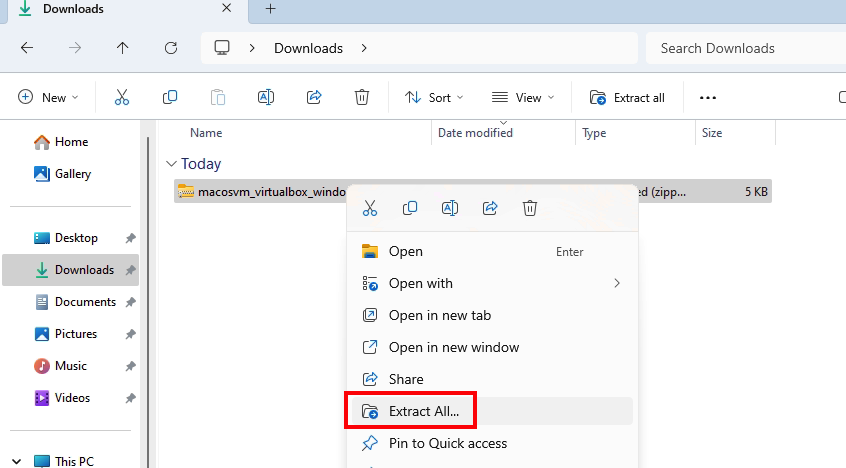
Once the file is downloaded, navigate to your Downloads folder and extract the ZIP-file by right clicking on it and choose for “Extract All…”, followed by clicking on Extract in the dialog.
Once the files got extracted, open the displayed folder called “macosvm_virtualbox_windows-main”. As you can see, this contains the four batch files for the first four steps:
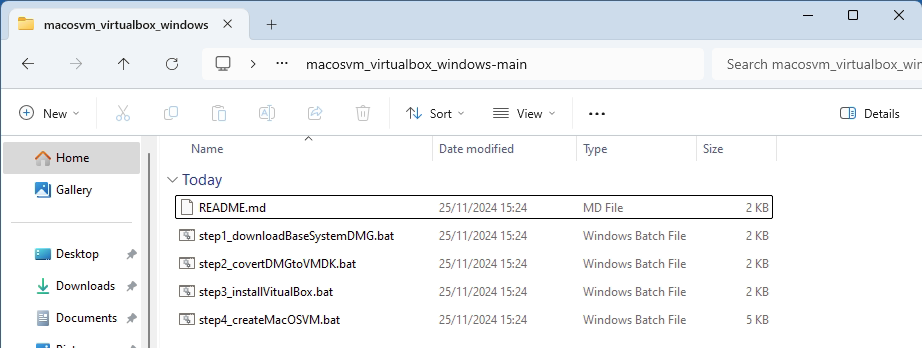
You can leave the files here or move them to another location as this requires about 35 GB of free space on the location where you will execute the scrips from.
Execute step 1 (step1_downloadBaseSystemDMG.bat)
The first step is to download a current BaseSystem.dmg file for macOS Catalina from Apple. We will do that with a tool called gibMacOS which will be taken care of by the script.
To start, simply execute the first batch file called “step1_downloadBaseSystemDMG.bat” by double-clicking on it. If you would see a Microsoft Defender SmartScreen dialog like this, click on “More Info”, then click on “Run anyway”:
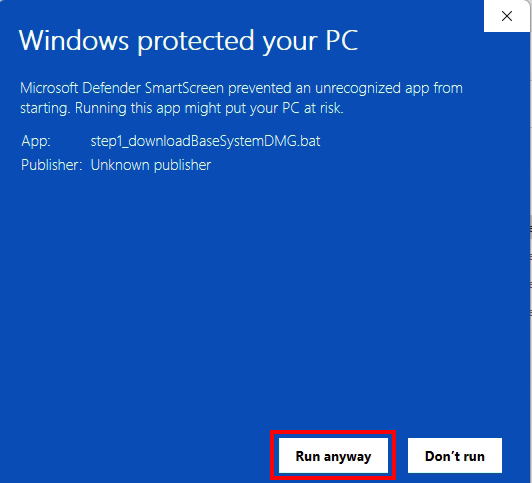
As mentioned, this first script will download GibMacOS, install Python if needed and then run GibMacOS to find the latest URL to download a BaseSystem.dmg file from Apple.
At the end of the script, you should see the location of the downloaded image called BaseSystem_catalina.dmg:
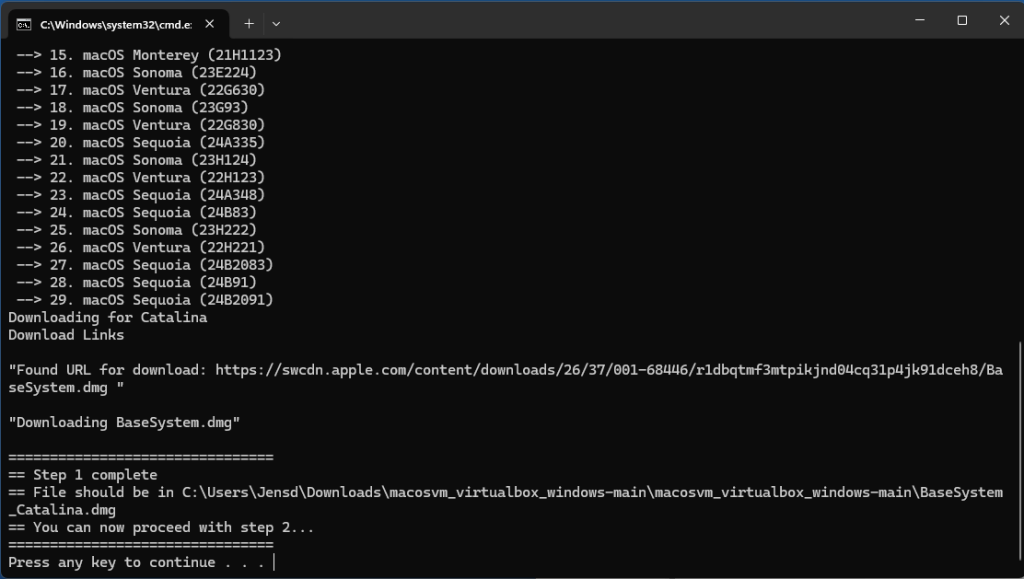
You can now just pres any key or close this dialog and move to the next step.
Execute step 2 (step2_covertDMGtoVMDK.bat)
Step 2 will use the image we downloaded in step 1 and convert it in a format that is usable in VirtualBox. Before we can do that, the script will install QEMU which we will use to do this.
Again, simply execute the batch script, this time called “step2_covertDMGtoVMDK.bat” by double-clicking on it. Same as with the first file, if you get a notification from Microsoft Defender SmartScreen, click on “More Info”, then click on “Run anyway”:
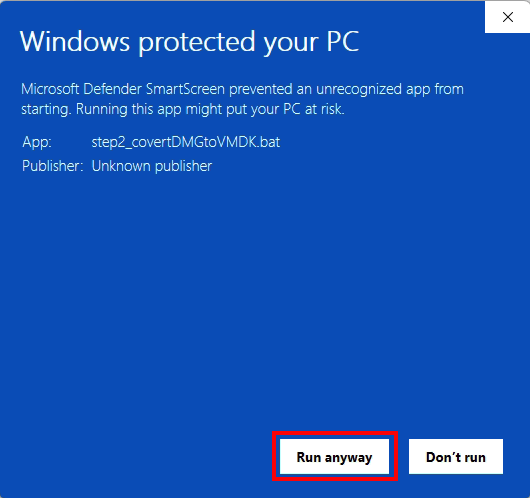
Once the script downloaded QEMU for Windows, it will install this and ask for your permission to do so with a UAC dialog. Click on “Yes” here:
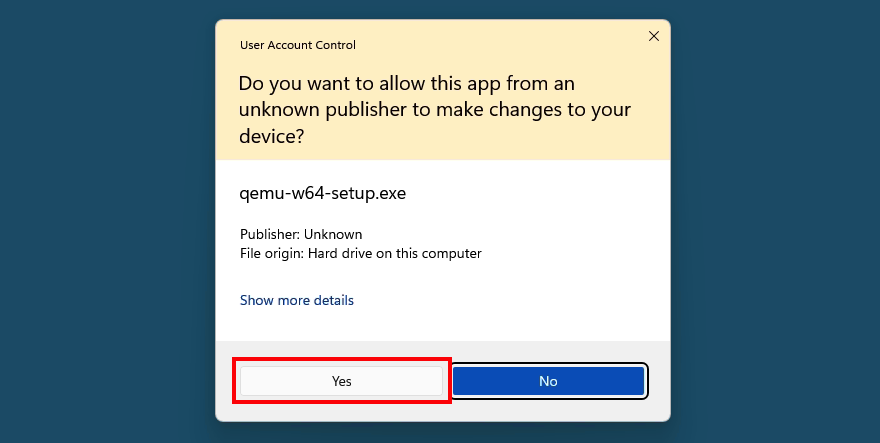
If all goes well, the script will end as follows and again will let you know the location of the converted file in VMDK format:

As with the first script, you can now just pres any key or close this dialog and move to step 3.
Execute step 3 (step3_installVitualBox.bat)
In this step, the script called “step3_installVitualBox.bat” will install the prerequisites for VirtualBox, VirtualBox itself and the extension pack which we need in order to run macOS virtual machines.
Same as the previous steps, execute the 3rd script called “step3_installVitualBox.bat” by double-clicking on it and choose for More Info, then click on “Run anyway” if asked by Microsoft Defender SmartScreen.
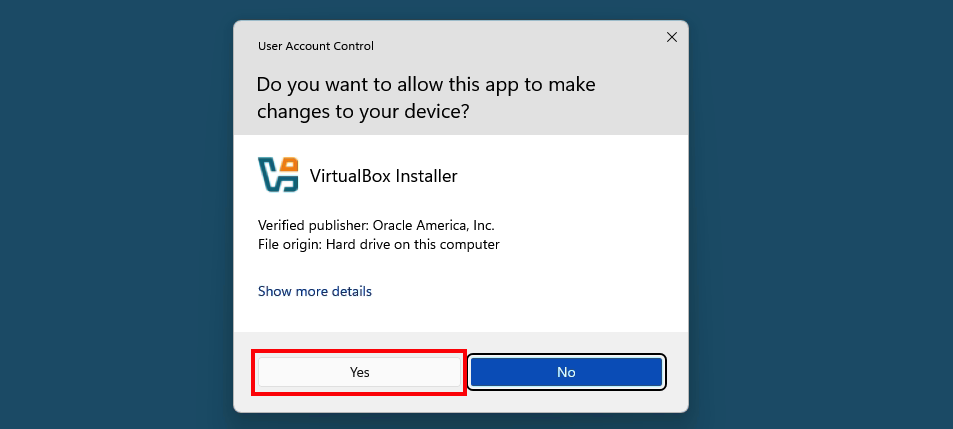
As with the previous step, you will be asked multiple times to confirm the changes to your machine with a User Account Control dialog box where each time you should click on “Yes”:
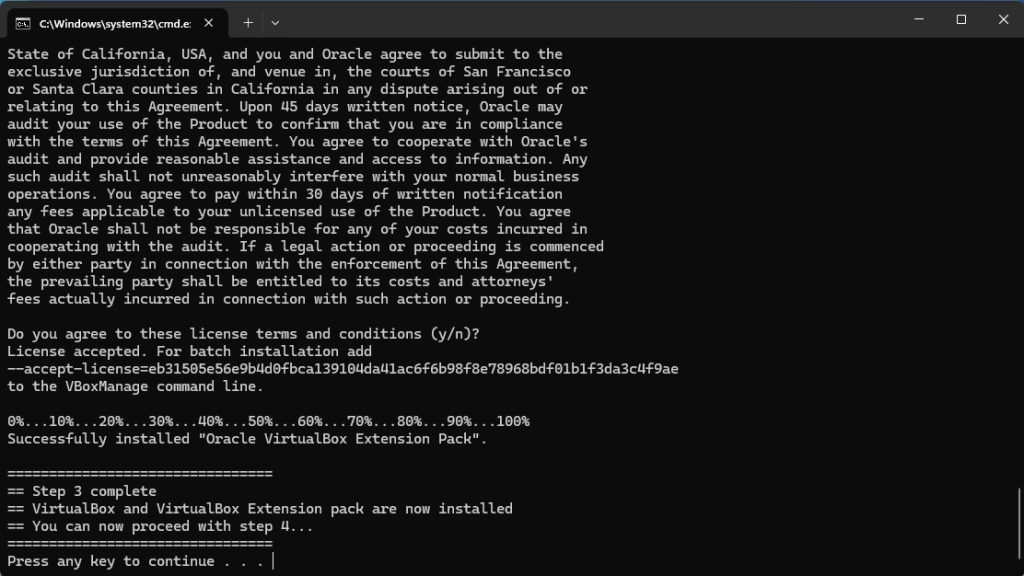
Once the script completes, you can press any key or just close the command prompt window and proceed to step 4:
Execute step 4 (step4_createMacOSVM.bat)
In step 4, we will create a VM in VirtualBox and configure it to run macOS. This includes detecting if you are running on an Intel-based or AMD-based system and linking the earlier prepared BaseSystem_Catalina.vmdk file to that same VM.
Again, simply double-click on the 4th script called “step4_createMacOSVM.bat” and choose for More Info, then click on “Run anyway” if asked by Microsoft Defender SmartScreen.
If all goes well, you should end with an output looking similar to this:
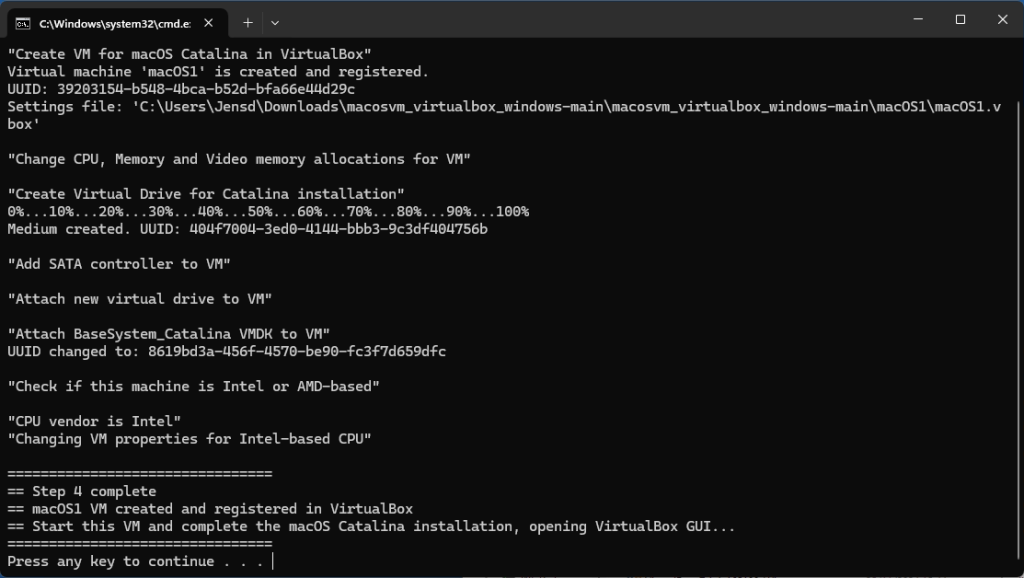
Once this completed, press any key to open the VirtualBox GUI where we will run the macOS Catalina installation.
Step 5) Install macOS Catalina
At this point all preparations are done to run macOS Catalina in a VirtualBox VM. The last part of step 4 should have opened the VirtualBox user interface but if that is not the case or you closed the command prompt window before it dit, you can start it manually.
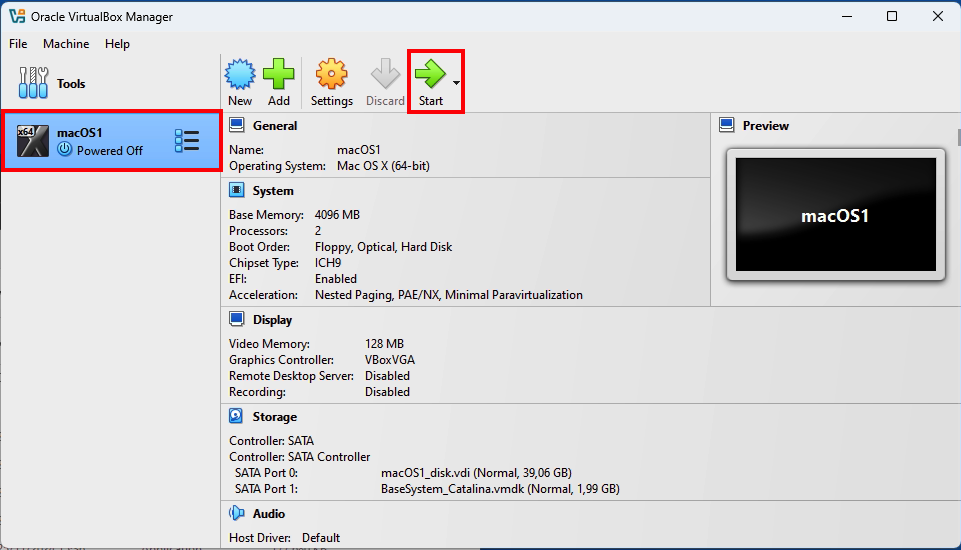
Start the macOS1 VM
In VirtualBox, make sure that the newly created macOS1 VM is selected and press Start:
After a bit of patience, you will see a lot of text scrolling by. These are the boot messages (in verbose mode) for macOS:
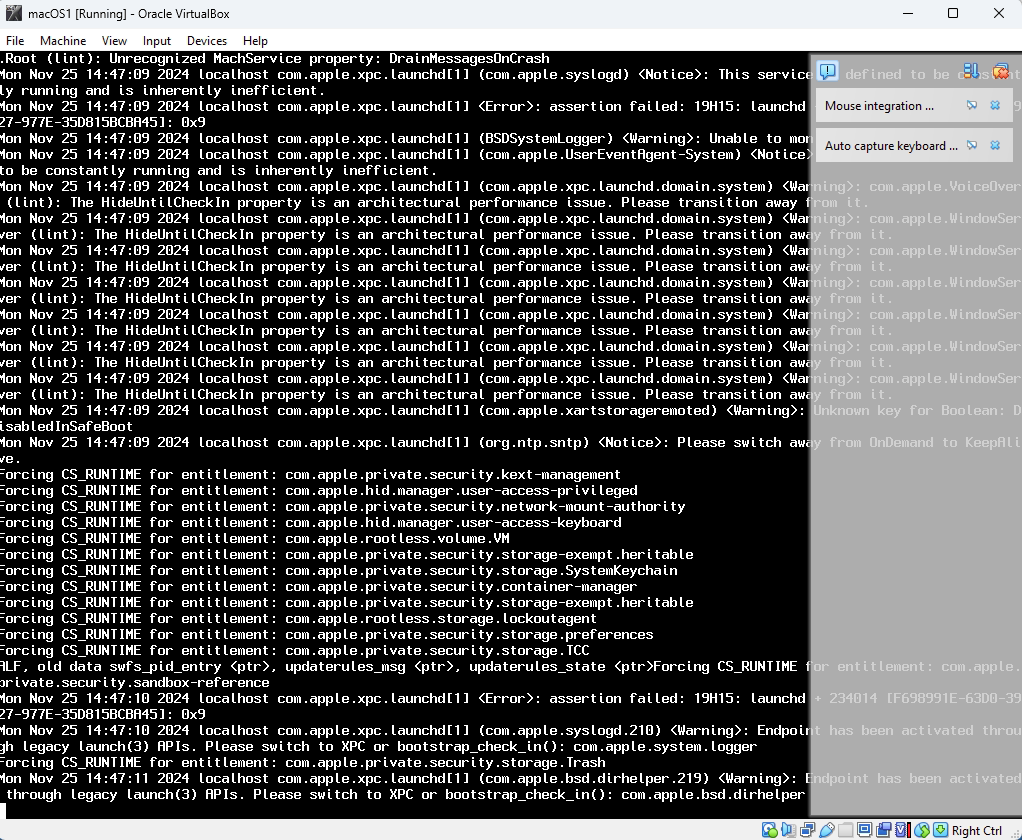
If all goes well, you should also briefly see the Apple logo with a progress bar and eventually you should end up in macOS Recovery where the first step is to select a language:
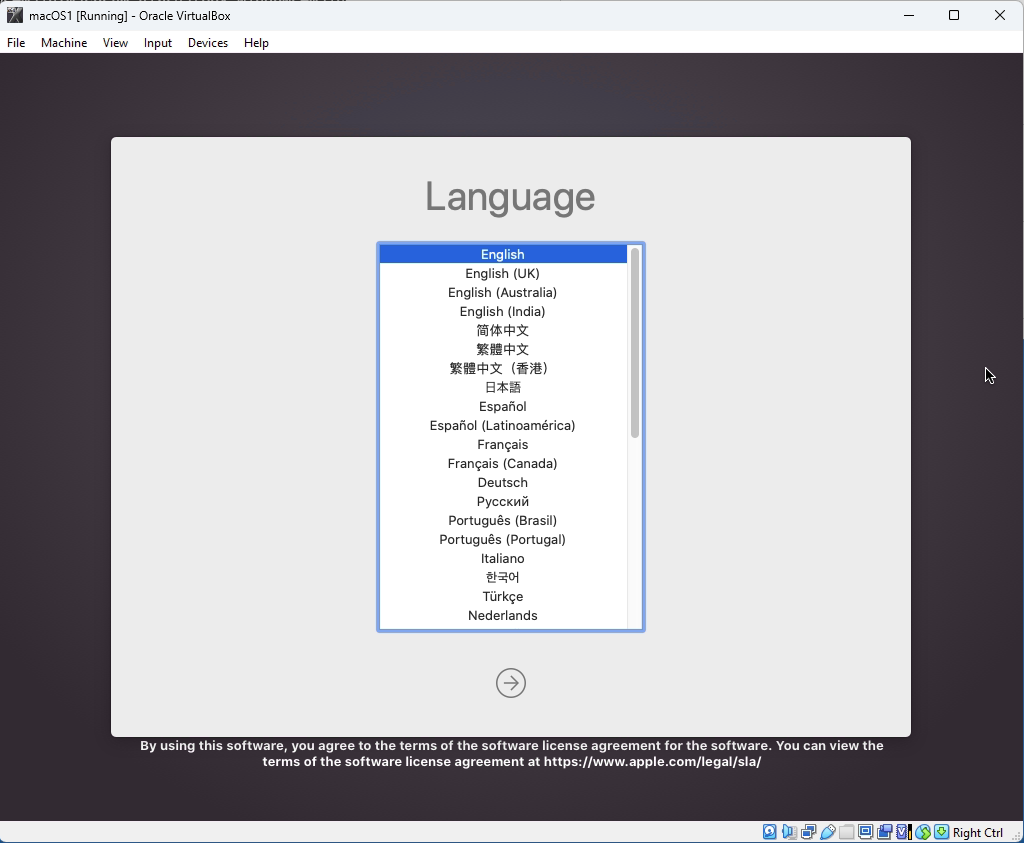
Choose the language of your choice and press the next button at the bottom of the window.
Prepare the virtual disk for macOS Catalina
Now that we are in Recovery, before we can install Catalina, we first need to prepare the virtual disk by creating a filesystem on it. So In the macOS Recovery menu, choose for Disk Utility:
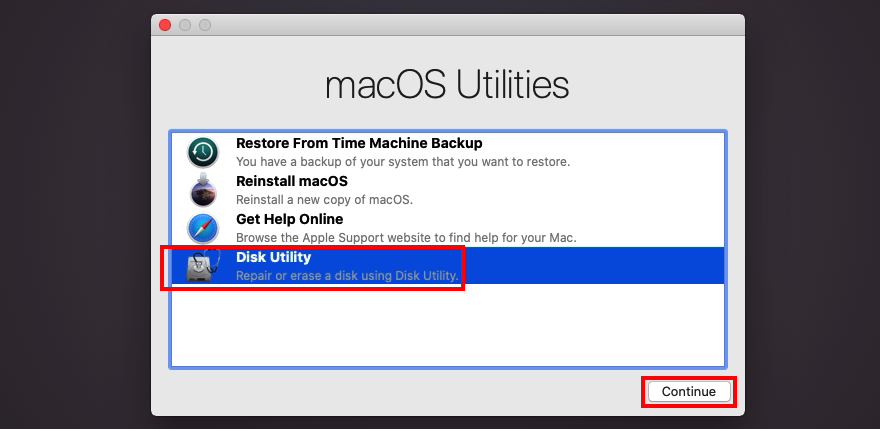
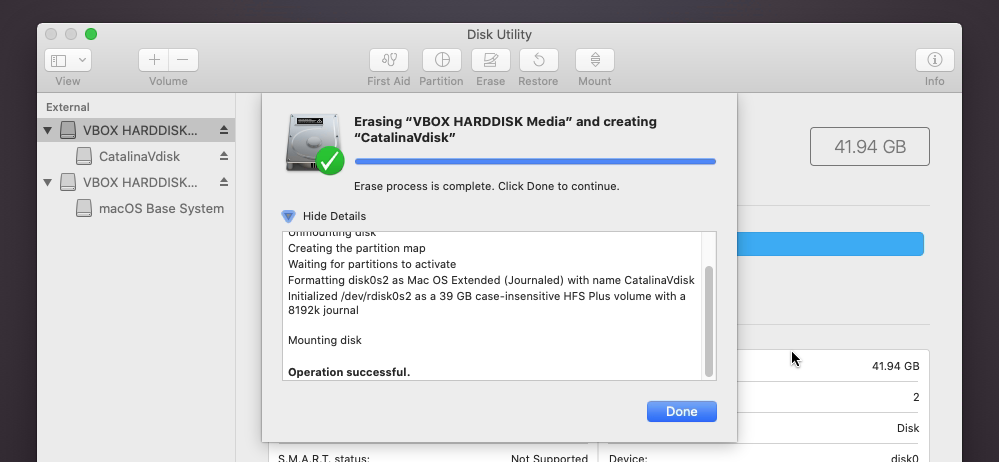
In Disk Utility, select the VBOX HARDDISK on the left side, then choose Erase in the top menu. Give the drive a name, I chose for “CatalinaVdisk” and leave the rest of the options as is proposed:
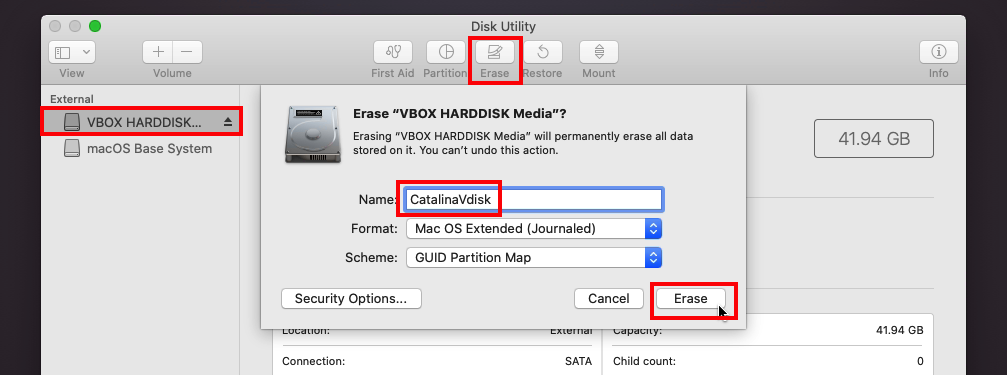
After a bit of waiting, the preparation of the drive should be complete and you are good to close Disk Utility and proceed with the Catalina installation.
Install macOS Catalina
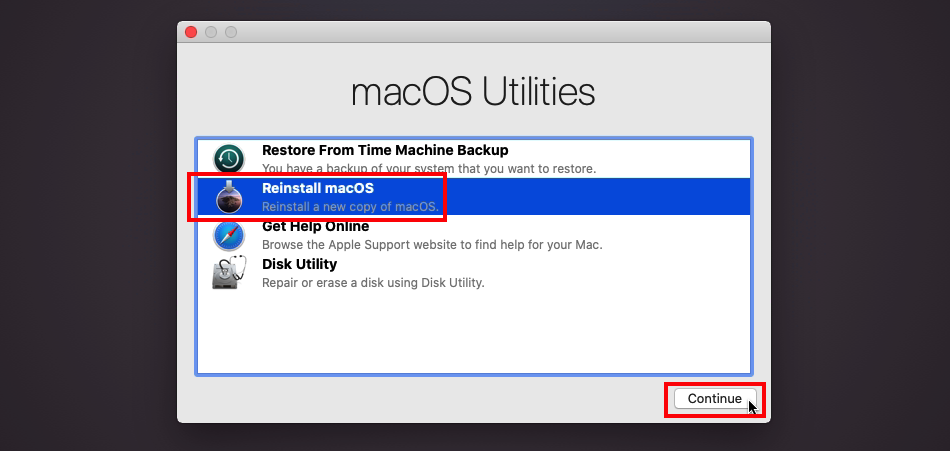
Finally we can go ahead select “Reinstall macOS Catalina” from the Recovery menu:
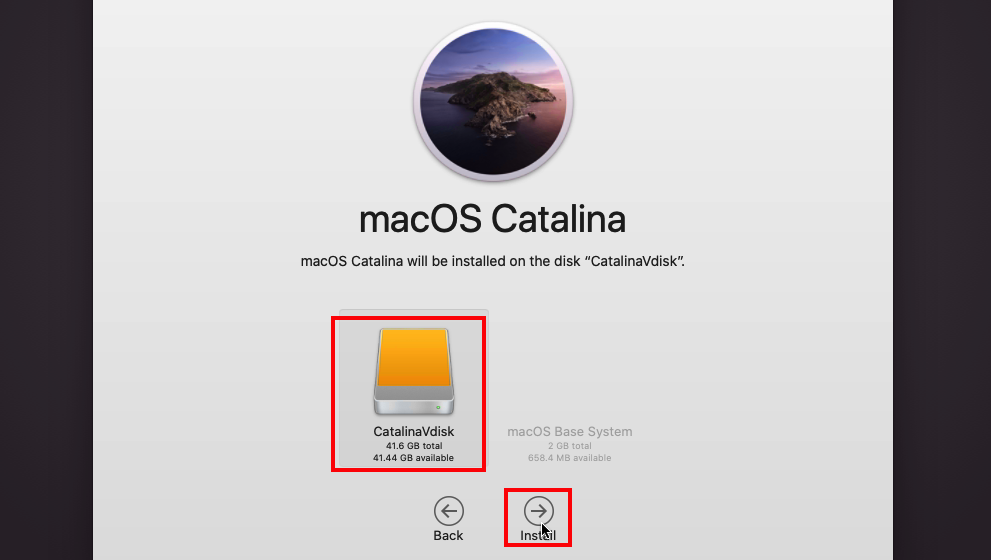
In the next screen, click Continue, accept the license terms and select where to install macOS, which should show the name you just gave to the virtual drive:
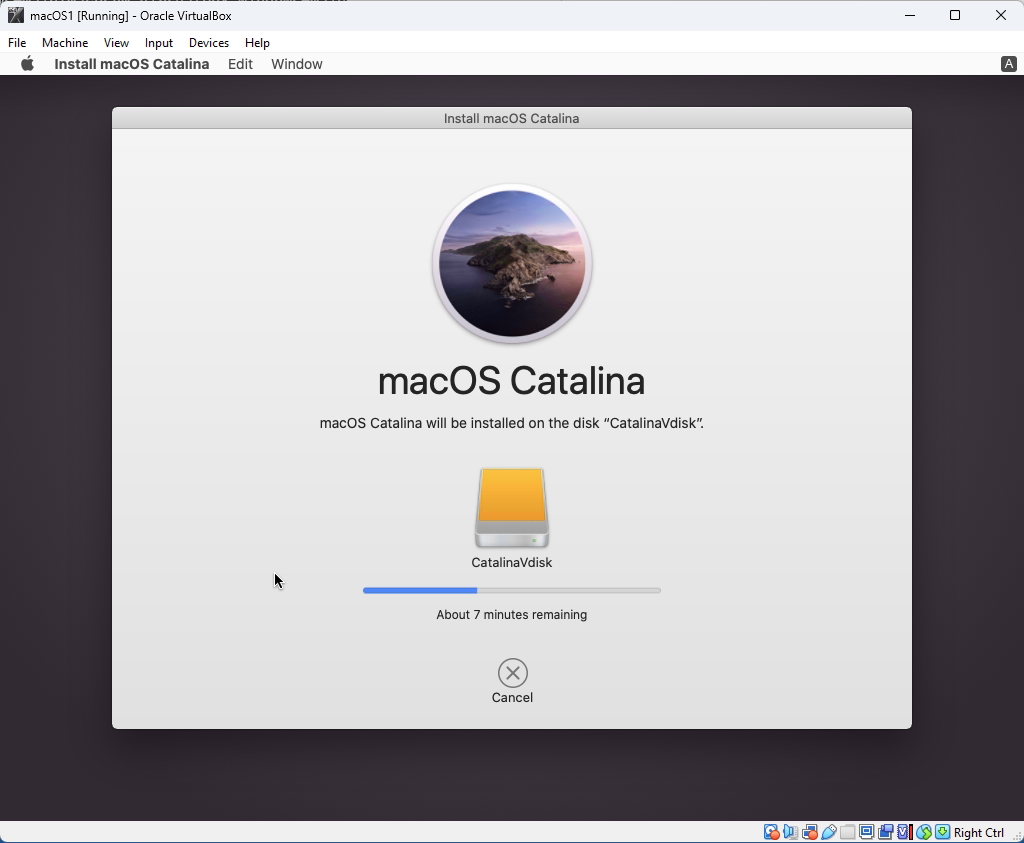
From here, your patience will be tested as this process can take some time. All required files will be downloaded and installed on that new virtual drive in the macOS1 VM:
If all goes well, you should eventually end up in the Welcome screen:
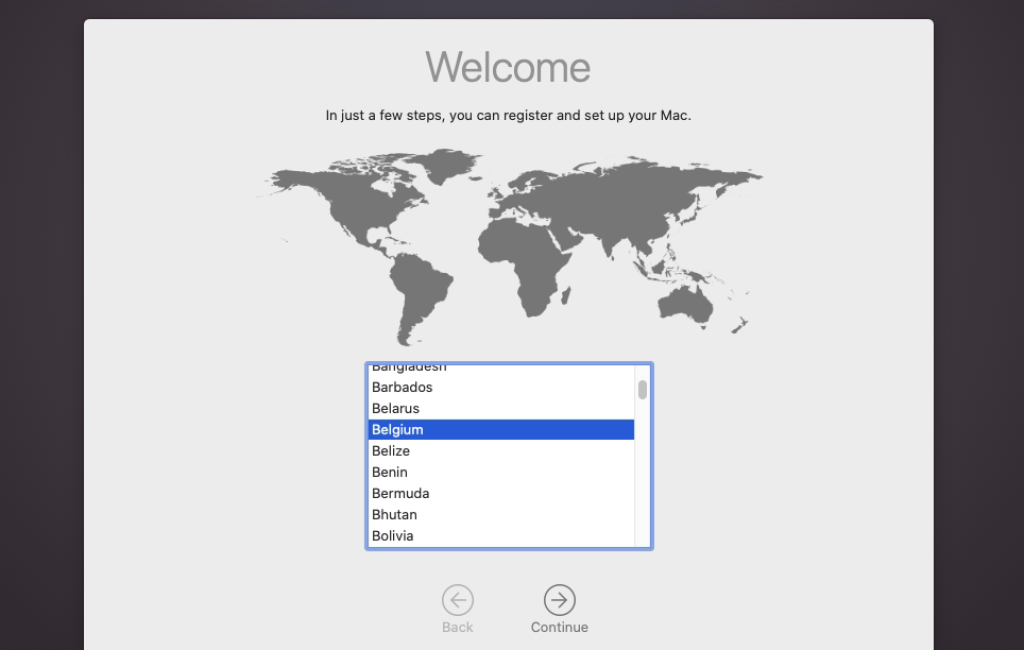
This is exactly the same as you would see when doing a fresh installation on real Apple hardware. Just click yourself through the steps in the wizard here. You can provide things like your location, language, keyboard layout, Apple ID (which you can skip), need to accept the terms and conditions, create an account and so on.
After completing all of these, you should end up on the desktop of your virtual machine which is now running macOS Catalina.
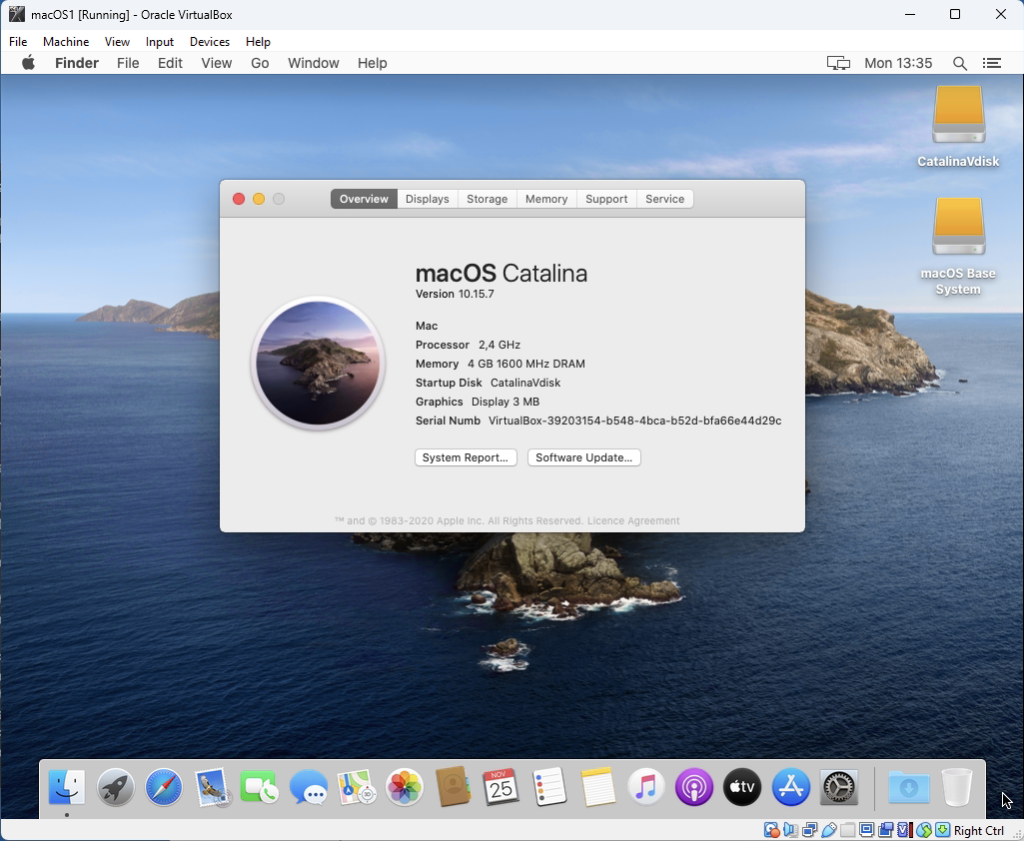
From here on you can use this VM as macOS would be running on real hardware. And although this took us quite a bit of extra steps, this now gives us the ability to create installation media on a USB drive but also to prepare specific macOS-only tools in this VM if required.
Step 6) Download the macOS installer of your choice
Now that we have macOS running in our virtual machine, let’s use it to download the latest version of macOS, from which we will then create a bootable USB drive.
To do so, simply open the App Store on the VM, which you can find in the dock with the blue icon. Search for “macos sequoia” or any other macOS version of your choice, and click on “VIEW” for that same macOS version in the results:
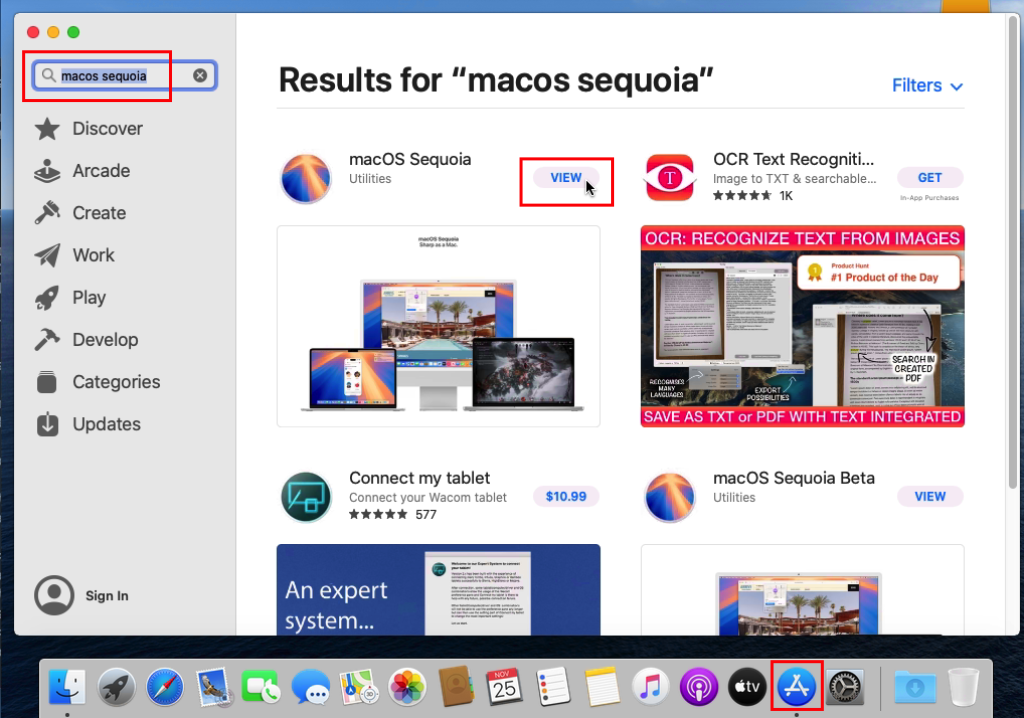
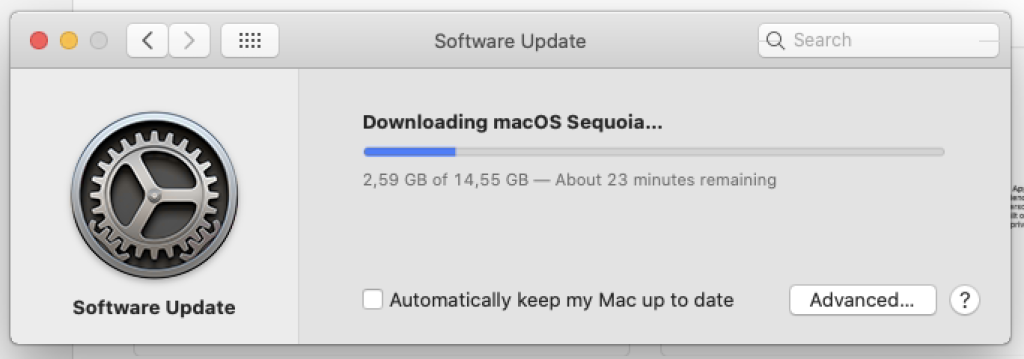
After clicking on the view button, just click on GET to start the download of macOS Sequoia and confirm that you want to download this in Software Update:
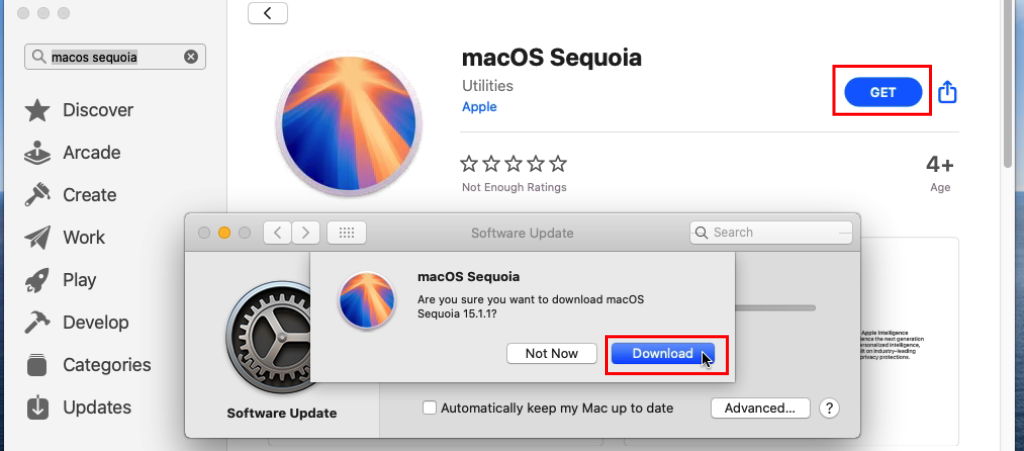
Again you will need to be a bit patient here as the download is roughly 15GB in size which can take some time, depending on the speed of your internet connection.
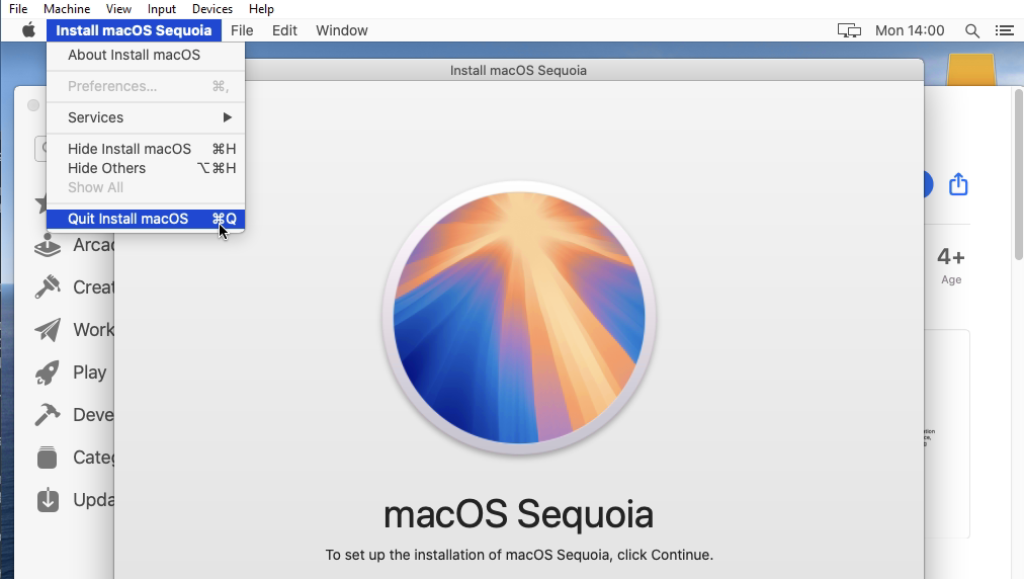
Once the download completes, the “Install macOS Sequoia” application will automatically launch on the VM but we can just close it as we will only use it as a source for the installation media:
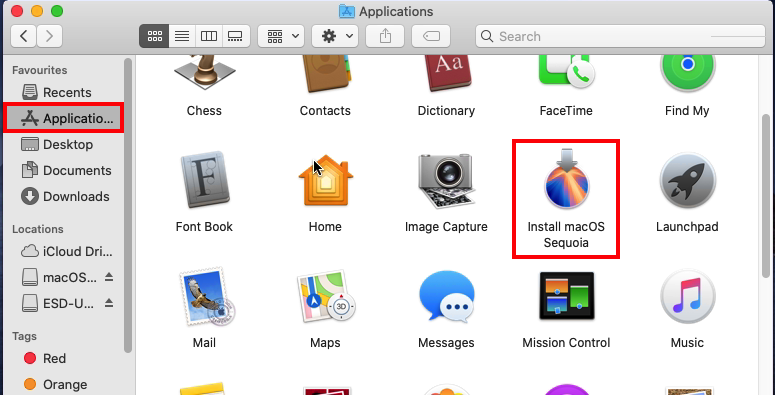
If you would check the Applications folder on the Catalina VM in Finder, you will see the installer application which we will use in the next steps to create bootable USB installation media:
Step 7) Prepare and create USB installation media
Now that we have the required installation files on our Catalina VM, we can use these to create a bootable installer.
Connect a USB drive to the VM
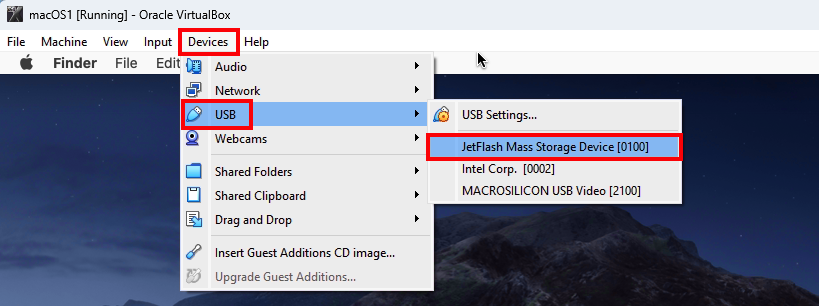
As we want to let the virtual machine have access to our USB drive, after inserting it into your Windows-based machine, we need to link it to the VM instead of to the Windows-host. To do so, in the virtual machine’s window in VirtualBox, go to Devices > USB and select your USB drive in the list. The name of the device depends on the type and vendor of USB drive so this can be different:
Prepare the USB drive
Before we go ahead and start to write files to the USB drive, it is a good idea to make sure it is well-prepared. So to make sure there aren’t any weird partitions or leftovers from previous use, we will erase the drive and create the required scheme and partition on it.
Similarly as we did during the Catalina installation, we can do this with Disk Utility. Start Disk Utility by going to Finder > Applications > Utilities > Disk Utility:
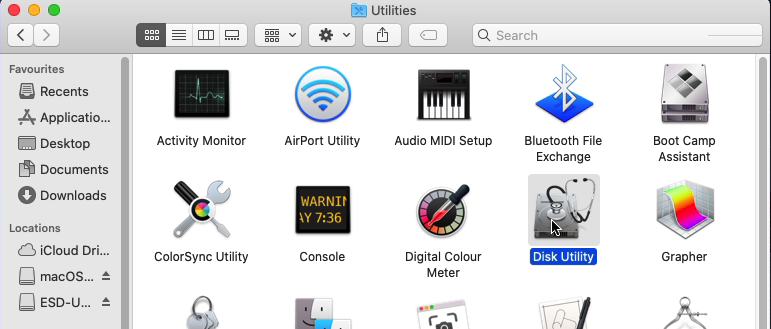
In Disk Utility, click on View > Show All Devices:

Then find your USB drive on the left side and make sure to click on the device itself, not a volume on the device and click on Erase. In the dialog that comes up, provide a name, I chose for “SequoiaUSB”, select “Mac OS Extended” as format and “GUID Partition Map” as scheme, then click “Erase”:
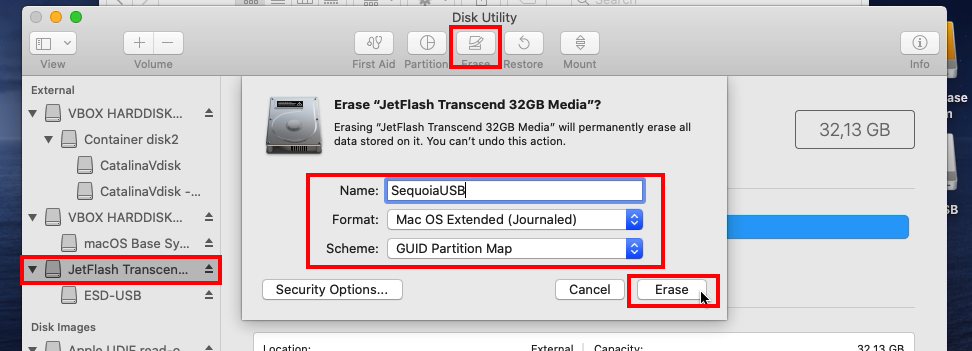
After this process complets, the USB drive is ready and we can close Disk Utility and move on to the next step:

Create USB installation media for supported systems
After we downloaded the macOS installer of your choice in step 6, as mentioned, this added a new application on the VM, called “Install macOS” and the version. In my case this is “Install macOS Sequoia”:

There is no need to launch the installation as we don’t want to install this on the virtual machine. Instead, start terminal by going to Applications > Utilities > Terminal and enter the following command:
sudo /Applications/Install\ macOS\ <version>.app/Contents/Resources/createinstallmedia --volume /Volumes/<name>
Make sure you replace the <version> with the correctly downloaded version in your path. You can use a tab to complete the entries. Same for the Volume name (<name>) which you use as destination, make sure it matches with what you entered in Disk Utility when erasing the USB drive. In my case this was “SequoiaUSB”.
So for my example for Sequoia to a USB drive called SequoiaUSB:
sudo /Applications/Install\ macOS\ Sequoia.app/Contents/Resources/createinstallmedia --volume /Volumes/SequoiaUSB
After entering the command with the correct values, press enter. This will ask for your password. Here, just type in the password (you will not see anything appear on the screen) and press enter. Confirm that you are good to erase the contents of the USB drive with “y” and allow terminal to access the USB drive:
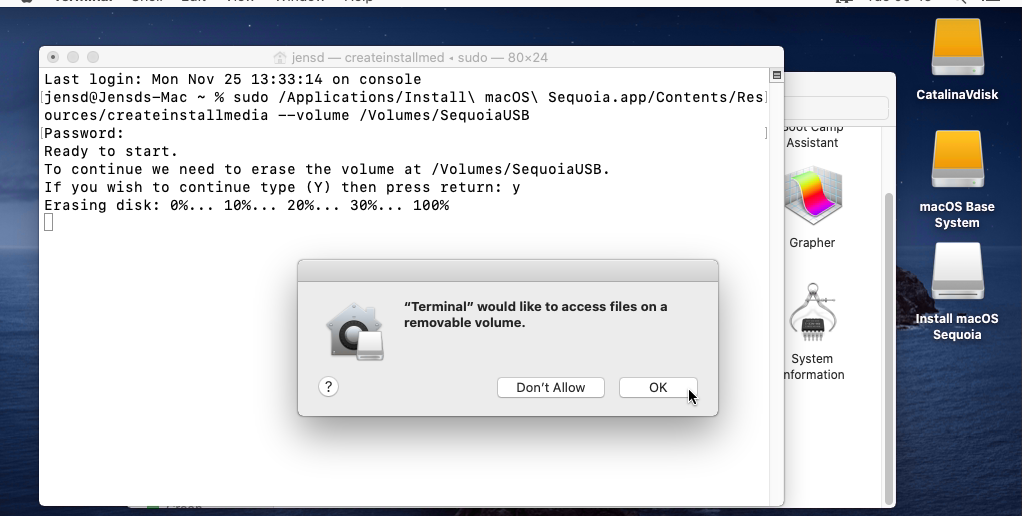
Again this will take some time as all installation files will be copied to your USB drive.
When complete, the utility will make sure the USB drive is made bootable:
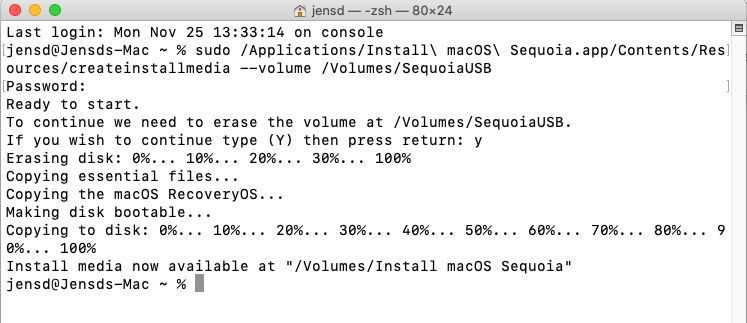
If you plan to use the USB drive for a system that officially supports the macOS release that you downloaded in step 6, and used to create the bootable drive then at this point you can safely remove the USB drive in the VM, shut down the macOS Catalina VM and use the USB drive to perform a fresh installation or recover a device which has issues booting into macOS.
If on the other hand you plan to use this drive to install macOS on a system that is no longer supporting this latest release, follow the instructions in the next step to prepare and install OpenCore on the drive.
Create USB installation media for unsupported systems
As mentioned from the beginning of the article, one large advantage of going through the hassle of setting up the Catalina VM is that you have the freedom and flexibility to run tools and applications for macOS as well. So if for example you want to use the USB drive that we prepared to install a macOS version that is newer than what your Apple (or other) system officially supports, you can use OCLP to build OpenCore specifically for the system where you plan to use the USB drive.
If you need more details about this process, as I will try to keep it short for this post, you can refer to an earlier post I made regarding this topic: https://jensd.be/2496/apple/install-macos-sequoia-on-unsupported-models
First of all we will need to download the latest version of OCLP. To do so, navigate to the releases page of OCLP on GitHub using Safari: https://github.com/dortania/OpenCore-Legacy-Patcher/releases. As you will see, since the Safari version that comes with Catalina is pretty outdated by now, there are some issues rendering the Github page. Scroll down a bit and on the right side of the page, click on the latest release (2.1.2 at the time of writing):
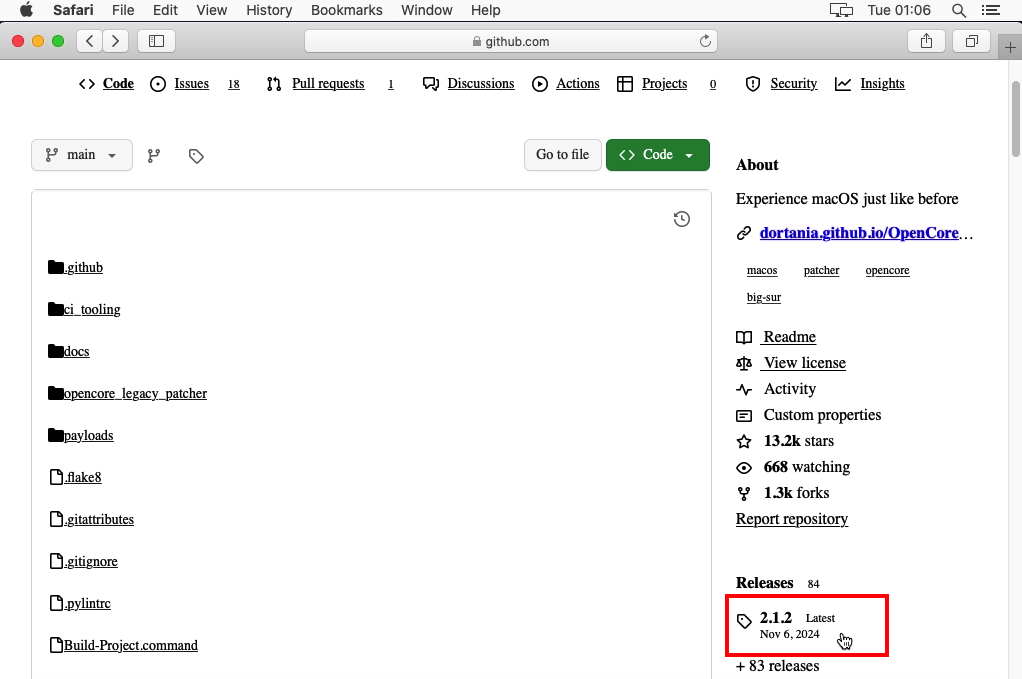
Since Safari is not able to render the Assets at the bottom of the latest release properly, we will need to change the URL to access those:

While you are on the page of the latest release (2.1.2 in my case), simply change the URL by replacing “tag” with “expanded_assets”. The URL of the page after clicking on releases looks like this:

Change it to the following:

This should allow Safari to bring up a list of assets for that latest release. From here we need to download “OpenCore-Patcher-GUI.app.zip”:

Once downloaded, go to your Downloads folder in Finder and start the application. When asked, provide the password of the macOS user from the VM:
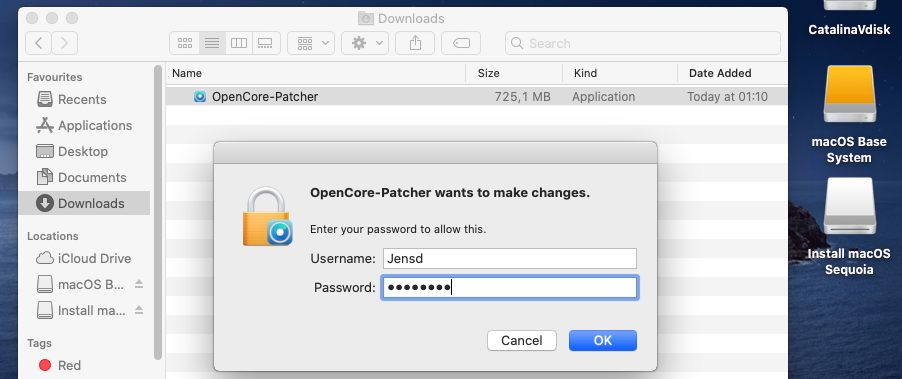
For some reason I needed to start the application twice before it would launch but eventually I got to OpenCore Legacy Patcher:
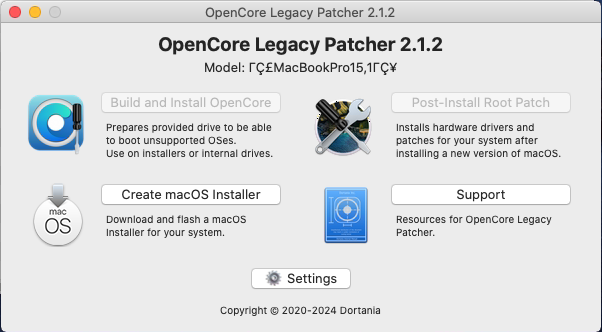
As you can see, the option “Build and Install OpenCore” is greyed out as OCLP does not know the model of Mac I’m running this on (as it’s a VM). Now to build this for a specific machine, for example a Late 2014 Mac Mini, we need to go to Settings and set the Target Model to the matching model identifier: Macmini7,1:

After clicking return, “Build and Install OpenCore” will become available. So let’s choose that option in the menu:
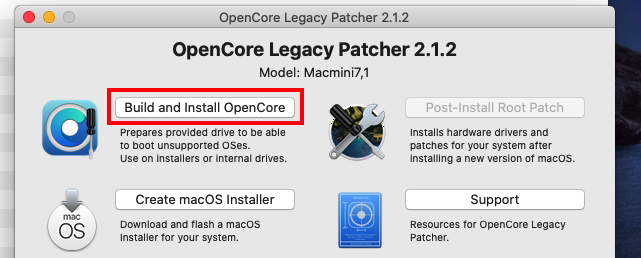
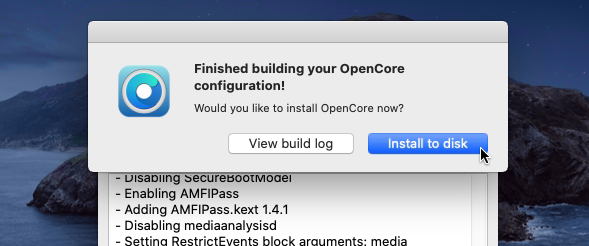
Straight away, OCLP will start to build OpenCore, specifically for the target model which we selected in the Settings. Once it is done, OCLP will ask you if you would like to install the build of OpenCore to a disk. Click on “Install to disk” here:
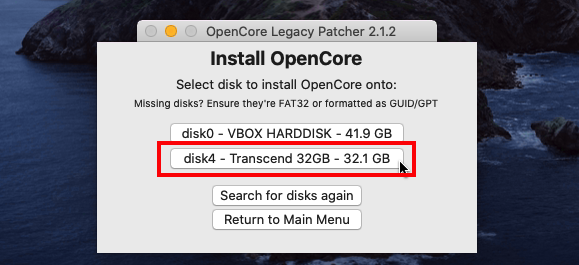
In the next step, select your USB drive from the list:
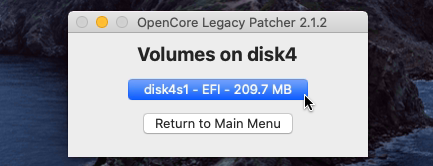
And choose the EFI partition that is on that drive as the destination for OpenCore:
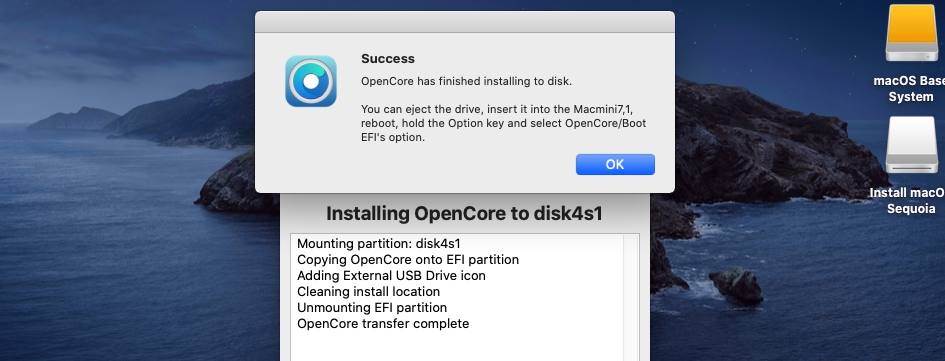
If all goes well, OCLP will copy the necessary files to the USB drive and it can now be used to install an unsupported version of macOS to the Mac Mini model which we selected.
Cleanup
As we downloaded and installed quite a bit of tools to accomplish our goal, you might want to clean-up a few things after you have create the bootable installation media.
The following steps can be done to clean-up everything. It is best to keep the same order:
- Shut down the MacOS1 VM
- Remove the VM and all of its files from VirtualBox by right clicking on it > Remove… > Delete All Files
- Close VirtualBox
- Delete all files in macosvm_virtualbox_windows-main
- Uninstall QEMU
- Uninstall VirtualBox
- Uninstall Python (optional)
Manually go through steps 1-4
For reference, in case you would experience issues with the provided scripts, or you want to experiment in a different way yourself, here are the manual steps to complete steps 1 to 4.
Step 1) Download a macOS Catalina recovery image
To get our hands on a recovery image of Catalina, we will make use of a script called gibMacOS: https://github.com/corpnewt/gibMacOS. This script allows you to easily download software packages directly from Apple.
After navigating to the Github page, just download the whole repository by clicking on Code > Download ZIP:

Once downloaded, navigate to your Downloads folder, right click the zip-file and choose Extract All…

For convenience, I will also move the extracted folder: gibMacOS-master to the Desktop. This will make it a bit easier to create the commands later but it’s not required if you know what you are doing:

At this point, we can open the gibMacOS-master folder on the desktop and run gibMacOS.bat from there:

This will start gibMacOS but the script will first check if you have Python 3 installed on your system. If it is not, when asked, type “y” to install Python 3 on your system:
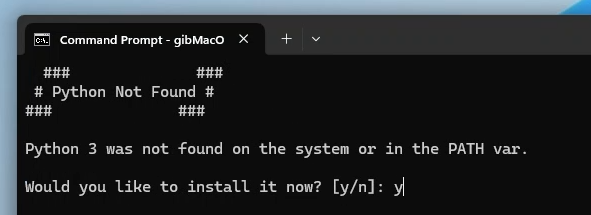
This will download and install Python 3 completely automatically and eventually the script will download the latest catalog from the Apple servers and present you with a list of available releases:
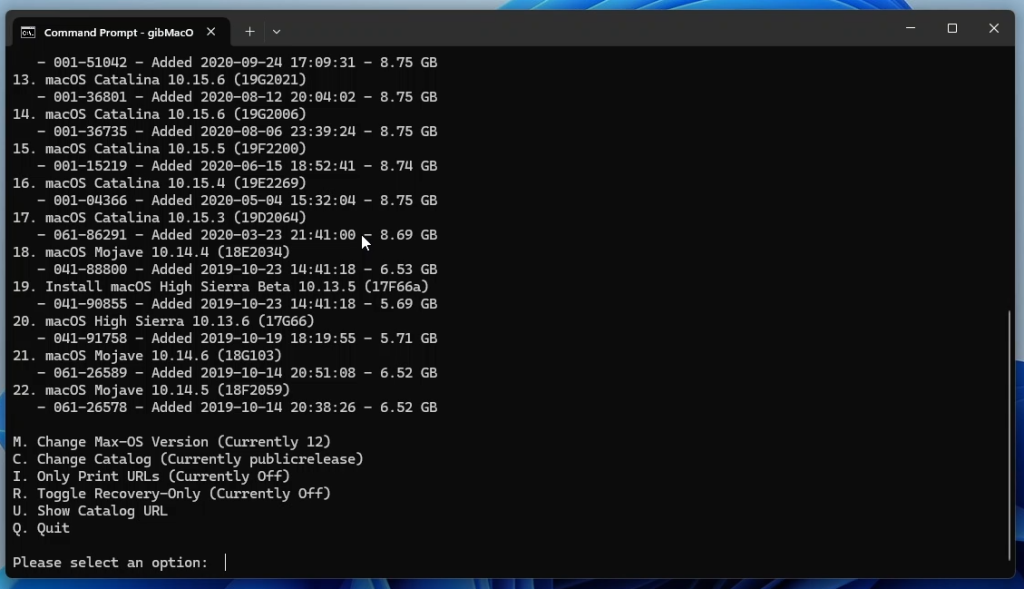
We just need to choose a number from this list that suits our needs. As mentioned, we need macOS Catalina so just search for the latest version of Catalina in the list. In my case, and this most likely won’t change anymore, this was 10.15.7 (19H15):

So in order to download that item, we simply need to enter the number the matching number (10) and press enter.

This will start to download the required files from Apple’s servers. We only need a single file: BaseSystem.dmg, for the next step so if you have limited data or simply do not want to wait, you can skip all other files by pressing Ctrl + C when they are downloading. For example with the file InstallESDDmg.pkg, which is several gigabytes in size and we do not need.
If all went well, you should end up with something like this. As you can see, I skipped InstallESDDmg.pkg and RecoveryHDMetaDmg.pkg since we don’t need these:
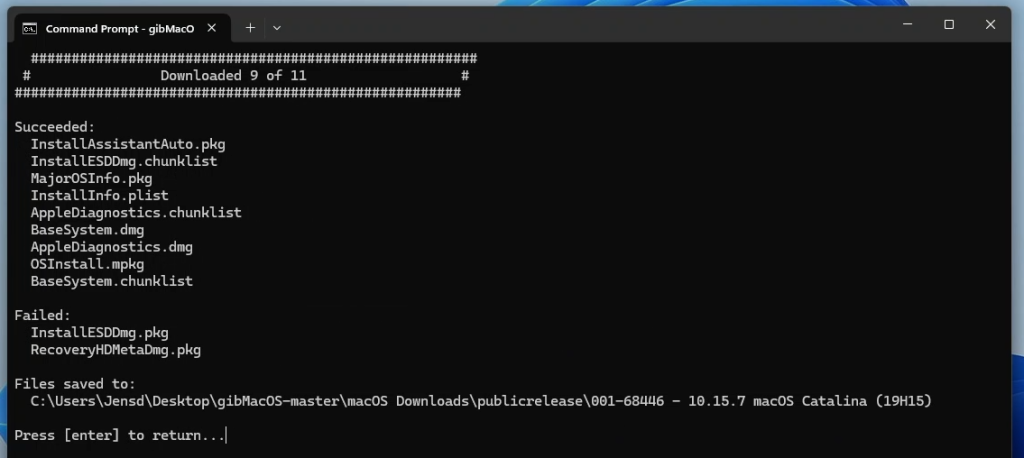
The downloaded files are now saved in a subdirectory (macOS Downloads) of that gibMacOS-master folder on the desktop as you can see:
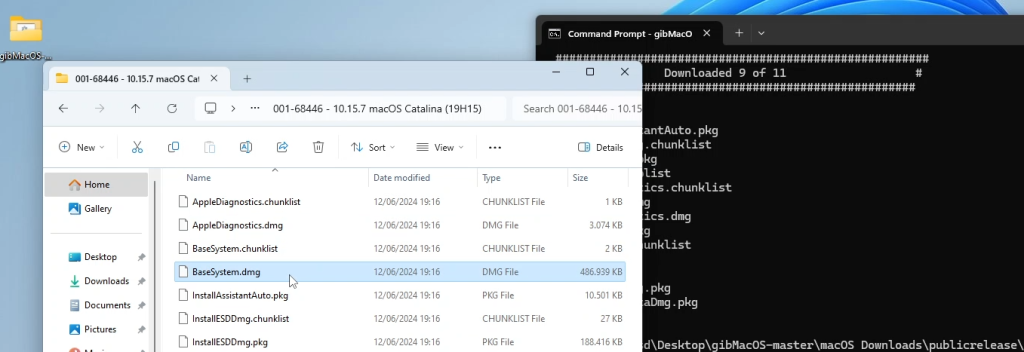
The file we need here, as mentioned, is BaseSystem.dmg. For convenience I will rename this file to Catalina-BaseSystem.dmg and also move this one to the desktop:

Time to move to the next step now where we will convert the format of this image to a VMDK-file, which can be used in a virtual machine.
Step 2) Convert the recovery image to a VMDK-file
The downloaded dmg-file cannot be used directly on a virtual machine to boot into macOS recovery. To make it usable, we need to convert it to a disk format that the VM will understand. We can do that using the QEMU tools for Windows.
First download and install the QEMU tools for Windows from: https://qemu.weilnetz.de/w64/. On this link, choose the latest version (in my case qemu-w64-setup-20240423.exe):
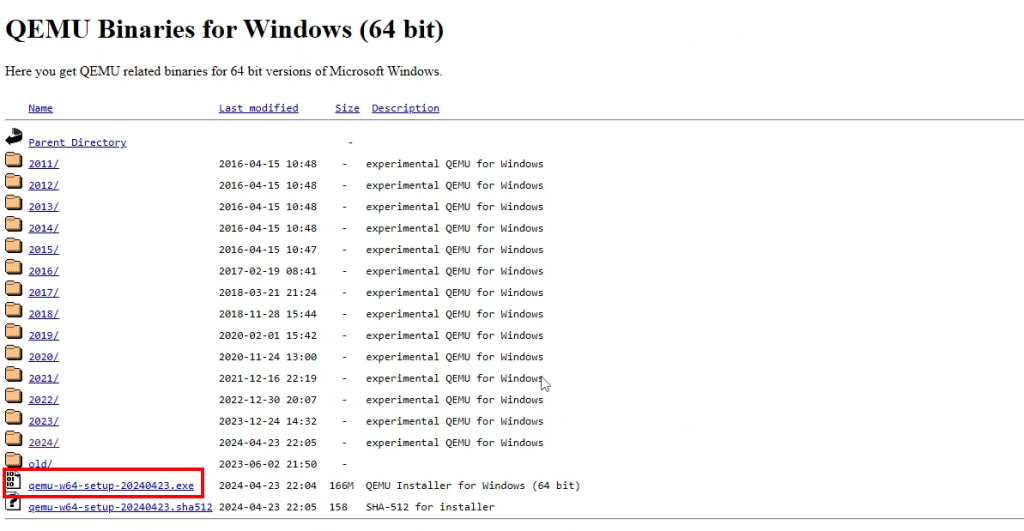
Once downloaded, run through the installer:

Now that QEMU is installed we need to open a command prompt and navigate to the desktop (or other location where you put the Catalina BaseSystem.dmg file). Then enter the full path to the qemu-img tool with the following arguments:
C:\Users\Jensd>cd Desktop
C:\Users\Jensd\Desktop>"c:\Program Files\qemu\qemu-img.exe" convert -O vmdk -o compat6 Catalina-BaseSystem.dmg catalina-installer.vmdk

This command will call the qemu-img tool and ask it to covert the Catalina-BaseSystem.dmg file on our desktop to a VMDK-file called catalina-installer.vmdk
If all goes well, you should now end up with that catalina-installer.vmdk file on your desktop:


Virtualbox gives me an error upon startup of the vm “VERR_INVALID_HANDLE” (I am running an AMD CPU and GPU)
Press: Windows + X
Select: Terminal (Administrator)
Access VirtualBox installation Folder:
cd “C:\Program Files\Oracle\VirtualBox”
Update VM Template downloaded, Adjusting the parameter to use your local SMC.
VBoxManage.exe setextradata “macOS1” “VBoxInternal/Devices/smc/0/Config/GetKeyFromRealSMC” 0
* Obs:
“macOS1” is the name of the VM created by Default just change this if you want or changed any other default parameter.
I have the same problem, but this simple procedure works for me :)
Are there alternative methods to create a macOS bootable USB on Windows without using a virtual machine?
google search and YouTube search for how to use the “gibMacOS” tool from GitHub. ChatGPT AI or Gemini AI may be able to explain it better.
after step 2.
== Step 2) Convert the recovery image to a VMDK-file using qemu-img
================================
“Downloading QEMU for Windows”
“Installing QEMU for Windows”
“Please choose ‘Yes’ in the UAC dialog”
“Converting BaseSystem_Catalina.dmg to VMDK-file”
C:\Program Files\qemu\qemu-img.exe: Could not open ‘BaseSystem_Catalina.dmg’: Could not locate UDIF trailer in dmg file
================================
== Step 2 complete
== File should be in C:\Users\Aggo\Downloads\macosvm_virtualbox_windows-main\BaseSystem_Catalina.vmdk
== You can now proceed with step 3…
================================
Press any key to continue . . .
Helpful
It is very useful, but Install the system on vm , it is very slow, it say 6 hours , i will keep update the status
Many thanks. It is all working until Catalina gets installed and at one point it stops. It says the virtual drive doesn’t have enough storage. Its showing 39.06GB and it requires 39.6GB. How can I extend the size of the virtual drive