
There are many possibilities to turn your machine into a host for virtual machines, emulating one or more separate and isolated computers. Among the popular commercial products from VMWare or Hyper-V on Windows, KVM is a great and mature alternative for full virtualization with great stability and performance. This guide will explain you step by step, from the start how to get this up and running.
Virtualization-terminology
To prevent things getting confused I would first like to clear out some terminology used for virtualization. For somebody working on a daily basis in virtual environments, these might be clear but can be rather confusing for others.
| Virtual Machine | An isolated compute environment that emulates hardware as if it was a separate machine. |
| Host | Machine that hosts other system, KVM will be installed on this machine. One host can run multiple VMs |
| Guest | System or VM running on the host, also referred to as VM, Virtual Machine or domain. A guest runs on top of a host. |
| Hypervisor | Piece of software that enables virtualization on the host. For example: KVM, ESXi, Xen |
Part1: KVM installation and preparation
KVM hypervisor and VM-extensions
As mentioned in the intro, KVM offers, as VMWare does, full virtualization. This means that a full system, which looks like a real physical system to the guest-OS, will be offered. Besides full virtualization, there is also such a thing as paravirtualization, as Xen can offer. Paravirtualization gives you higher performance but needs a modified guest-OS and is basically limited to *nix-systems. Full virtualization enables you to run unmodified guest-systems and thus also most proprietary systems as Windows . In order to be able to use full virtualization, you either need some virtualization-extensions on your CPU or use emulation.
First thing to do is to check if the host-machine supports VM-extensions. On the x86 platform, those are either AMD-V or Intel’s VT-X. In order to check if the installed CPU’s support those extensions, we need to check if the vmx (for VT-X) or svm (for AMD-V) flag exists in the cpuinfo-output:
[jensd@kvmhost ~]$ egrep -c '(vmx|svm)' /proc/cpuinfo
0
The resulting number should show the amount of CPUs your host has that have the feature enabled (which should be all of them).
When the output is 0, meaning that neither vmx or svm is found in the flags, it probably means that your CPU doesn’t support those extensions and there is little you can do. When the extensions are listed, be sure to check if they are enabled in the systems BIOS since that would cause problems later on. In case your CPU doesn’t support VM-extensions, you are limited to QEMU-emulation in combination with KVM, which delivers a much worse performance in comparison. For this tutorial, I’ll assume that the VM-extensions are supported and enabled in the BIOS of the host-system.
Networking
For the networking part, our KVM-host will perform NAT for its guests and we will need to create a bridge interface to allow the guest to communicate out of the host. Guests will use the bridge on the host to connect to the real network. To allow such type of setup it’s needed to allow ip forwarding in the kernel parameters.
[jensd@kvmhost ~]$ echo "net.ipv4.ip_forward = 1"|sudo tee /etc/sysctl.d/99-ip_forward.conf net.ipv4.ip_forward = 1
[jensd@kvmhost ~]$ sudo sysctl -p /etc/sysctl.d/99-ip_forward.conf net.ipv4.ip_forward = 1
After allowing the host to do ip forwarding, we need to change the network configuration. Basically we will keep our original physical interface as it is but will assign its IP-address to the brige. In the example host-machine there is one real interface called enp0s3 and the script in /etc/sysconfig/network-scripts/enp0s3 looks like this:
[jensd@kvmhost ~]$ cat /etc/sysconfig/network-scripts/ifcfg-enp0s3
NAME="enp0s3"
UUID="963cc260-e785-4ce7-8e9f-bcd6ea662bdf"
DEVICE="enp0s3"
ONBOOT="yes"
IPADDR="192.168.0.110"
NETMASK="255.255.255.0"
GATEWAY="192.168.0.1"
DNS1="8.8.8.8"
The first thing to change here, is to comment out everything that is IP-related and tell the interface which interface will be the bridge. Resulting in /etc/sysconfig/network-scripts/enp0s3 to look like this:
[jensd@kvmhost ~]$ sudo vi /etc/sysconfig/network-scripts/ifcfg-enp0s3
[jensd@kvmhost ~]$ cat /etc/sysconfig/network-scripts/ifcfg-enp0s3
NAME="enp0s3"
UUID="963cc260-e785-4ce7-8e9f-bcd6ea662bdf"
DEVICE="enp0s3"
ONBOOT="yes"
#IPADDR="192.168.0.110"
#NETMASK="255.255.255.0"
#GATEWAY="192.168.0.1"
#DNS1="8.8.8.8"
BRIDGE="br0"
Next, we can create the config-script for the bridge interface br0 in /etc/sysconfig/network-scripts/ifcfg-br0. Most details can be copied from the original script for enp0s3:
[jensd@kvmhost ~]$ sudo vi /etc/sysconfig/network-scripts/ifcfg-br0
[jensd@kvmhost ~]$ cat /etc/sysconfig/network-scripts/ifcfg-br0
DEVICE="br0"
TYPE="bridge"
ONBOOT="yes"
IPADDR="192.168.0.110"
NETMASK="255.255.255.0"
GATEWAY="192.168.0.1"
DNS1="8.8.8.8"
We could activate these settings now by restarting NetworkManager but since we plan to do a reboot at the end of the installation anyway, we can wait with this.
KVM installation
The last step in the KVM installation is installing the necessary packages. In CentOS 8, this can be done by installing the Virt module and some additional tools:
[jensd@kvmhost ~]$ sudo dnf install @virt libosinfo virt-manager virt-install
...
Complete!
Finish and check the KVM installation
Basically all components are now ok but before KVM can be used it’s a good idea to perform a reboot in order to load the kvm-modules and to reload the new network settings.
After the reboot, we should check if the necessary kernel modules are loaded, which means that KVM successfully can handle the VM-extensions of our CPU:
[jensd@kvmhost ~]$ lsmod|grep kvm
kvm_intel 294912 0
kvm 786432 1 kvm_intel
irqbypass 16384 1 kvm
Check if the bridge is installed and in an up-state:
[jensd@kvmhost ~]$ ip a show br0
3: br0: mtu 1500 qdisc noqueue state UP group default qlen 1000
link/ether 08:00:27:ae:55:a4 brd ff:ff:ff:ff:ff:ff
inet 192.168.0.110/24 brd 192.168.0.255 scope global noprefixroute br0
valid_lft forever preferred_lft forever
inet6 2a02:1811:ec80:400:a00:27ff:feae:55a4/64 scope global dynamic mngtmpaddr
valid_lft 258709sec preferred_lft 85909sec
inet6 fe80::1c15:5dff:fe45:8a25/64 scope link
valid_lft forever preferred_lft forever
Last thing to check is if we can connect to KVM by asking for a simple list of systems:
[jensd@kvmhost ~]$ sudo virsh -c qemu:///system list
[sudo] password for jensd:
Id Name State
And to check if networking using the virbr0 bridge in KVM is successfully started:
[jensd@kvmhost ~]$ sudo virsh net-list --all
Name State Autostart Persistent
default active yes yes
If it returns something else, then you should go trough the earlier steps to check where something went wrong.
Part 2: Using KVM with the CLI
After completing the KVM installation, it’s time to start using the host. First thing we need to do is to create a new domain or VM.
Adding a new VM
To create a new virtual machine using the CLI, we need to know which template we will use to install the system. To get a list of templates that are known in our KVM installation, you can do the following using the osinfo tool we installed as part of libosinfo:
[jensd@kvmhost ~]$ osinfo-query os
Short ID | Name | Version | ID
----------------------+----------------------------------------------------+----------+-----------------------------------------
alpinelinux3.5 | Alpine Linux 3.5 | 3.5 | http://alpinelinux.org/alpinelinux/3.5
alpinelinux3.6 | Alpine Linux 3.6 | 3.6 | http://alpinelinux.org/alpinelinux/3.6
alpinelinux3.7 | Alpine Linux 3.7 | 3.7 | http://alpinelinux.org/alpinelinux/3.7
alpinelinux3.8 | Alpine Linux 3.8 | 3.8 | http://alpinelinux.org/alpinelinux/3.8
alt.p8 | ALT p8 StarterKits | p8 | http://altlinux.org/alt/p8.starterkits
…
winnt3.51 | Microsoft Windows NT Server 3.51 | 3.51 | http://microsoft.com/winnt/3.51
winnt4.0 | Microsoft Windows NT Server 4.0 | 4.0 | http://microsoft.com/winnt/4.0
winvista | Microsoft Windows Vista | 6.0 | http://microsoft.com/win/vista
winxp | Microsoft Windows XP | 5.1 | http://microsoft.com/win/xp
Now, to add a new VM, we can use virt-install.
Example to add a windows-guest:
To install or create a Windows guest, we can start with an ISO that has the Windows installation files. For my example, I’ll be using a regular Windows 10 installation ISO.
[jensd@kvmhost ~]$ sudo virt-install --connect qemu:///system -n vmwin10 -r 4096 --vcpus=2 --disk path=/var/lib/libvirt/images/vmwin10.img,size=11 --graphics vnc,listen=0.0.0.0 --noautoconsole --os-type windows --os-variant win10 --accelerate --network=bridge:virbr0 --hvm --cdrom /var/iso/windows10_en-US_1909_x64.iso

Starting install…
Domain installation still in progress. You can reconnect to
the console to complete the installation process.
Explanation of the arguments that were given to virt-install:
- –connect qemu:///system : connect to KVM on the local system, we could also connect to another KVM-host and define our new VM there
- -n vmwin10 : name of the new VM: vmwin10
- -r 4096: amount of memory for the VM: 4GB
- –vcpus=2 : amount of virtual CPU’s for the VM: 2
- –disk path=/var/lib/libvirt/images/vmwin10.img,size=12 : where to store the virtual disk image of the VM and the size: 11GB
- –graphics vnc,listen=0.0.0.0 : how to display the VM’s console: via VNC accessible from outside
- –noautoconsole : do not automatically connect to the console
- –os-type windows –os-variant win10 : type of guest OS (from the list given above in the os-info query output)
- –accelerate : use KVM HW-acceleration
- –network=bridge:virbr0 : network bridge to use
- –hvm : full virtualisation
- –cdrom /var/iso/windows10_en-US_1909_x64.iso : location of the installation ISO
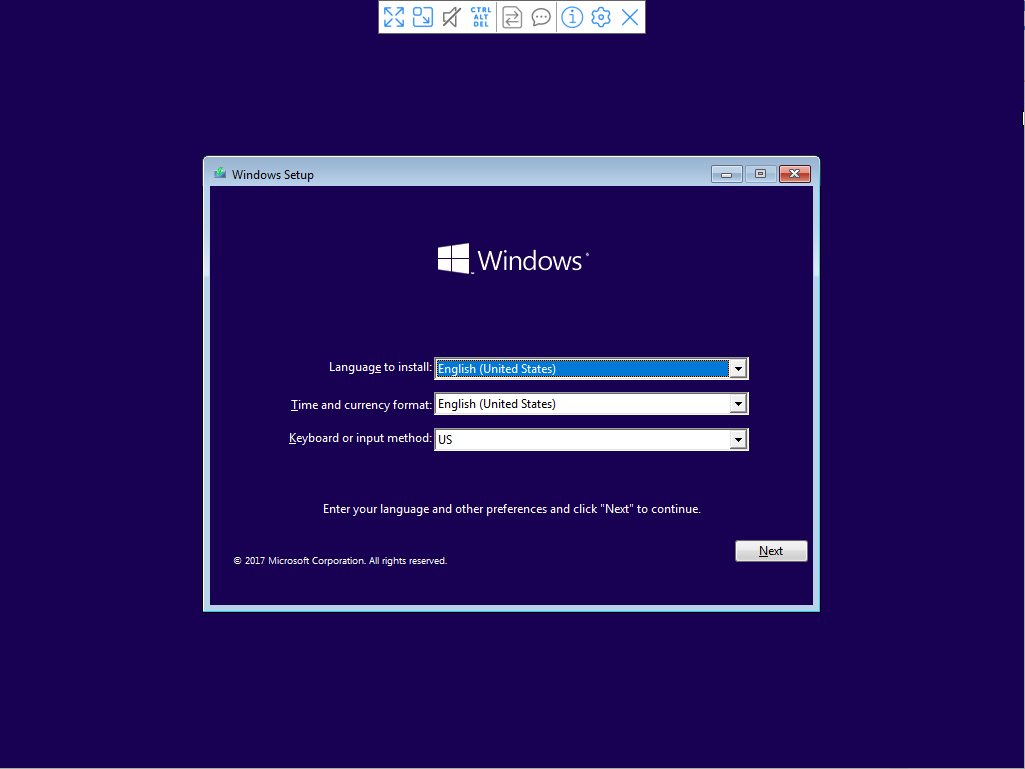
Once KVM has created and started the VM, we still need to click ourselves through the graphical Windows installation. This, as you will see in the arguments specified below, is done using VNC.
By default, VNC will use the first available screen on port 5900. To be sure which screen is used, we can use virsh to show the attached console-screens for VNC:
[jensd@kvmhost ~]$ sudo virsh vncdisplay vmwin10
:0
:0 means the first screen and real port 5900 as you can also see when checking with netstat which ports are currently listening:
[jensd@kvmhost ~]$ netstat -tln|grep :59
tcp 0 0 0.0.0.0:5900 0.0.0.0:* LISTEN
Before we will be able to access the guest over VNC, we need to allow access to port 5900 (default for the first VNC screen) through the firewall of our host system:
[jensd@kvmhost ~]$ sudo firewall-cmd --add-port=5900/tcp
success
Keep in mind that the above command will be removed after a reboot of the host (as there is no –permanent flag) but typically we only use VNC during the guest’s installation phase.
Once the port has been opened, we can use any VNC viewer to connect to our host on port 5900 in order to see the virtual screen of the newly created Windows guest system:
After completing the installation with VNC, we end up with a Windows-VM that is running on our KVM-host.
As for the networking part, we use the earlier created bridge (virbr0) to do NAT. This means that the KVM-host NAT’s all our connections to the real network connected to the KVM-host. If DHCP is active on that network, it can be used in the VM. Otherwise you will have to configure a static IP in the same subnet.
Example to add a Linux-guest:
To add a Linux guest, next to the already added Windows-guest is quite similar. We’re using the same approach and will use a regular installation ISO, for example for Debian 10, to create a fresh VM:
[jensd@kvmhost ~]$ sudo virt-install --connect qemu:///system -n vmdeb10 -r 1024 --vcpus=2 --disk path=/var/lib/libvirt/images/vmdeb10.img,size=2 --graphics vnc,listen=0.0.0.0 --noautoconsole --os-type linux --os-variant debian10 --accelerate --network=bridge:virbr0 --hvm --cdrom /var/iso/debian-10.6.0-amd64-DVD-1.iso

Starting install…
Allocating 'vmdeb10.img' | 2.0 GB 00:00:00
Domain installation still in progress. You can reconnect to
the console to complete the installation process.
As with the Windows-VM, after launching this command, you should be able to connect with VNC to the host and get on the console of the VM to complete the Debian installation.
To know which VNC-display number (and port) is used for a certain VM, the same command as used earlier should do:
[jensd@kvmhost ~]$ sudo virsh vncdisplay vmdeb10
 :1
Above command gives :1 as result, meaning that the guest vmdeb7 can be contacted with VNC on port 5901, so we first need to open that port in the firewall:
[jensd@kvmhost ~]$ sudo firewall-cmd --add-port=5901/tcp
success
Next, we can connect with VNC and go through the installation as we would do on a physical machine:
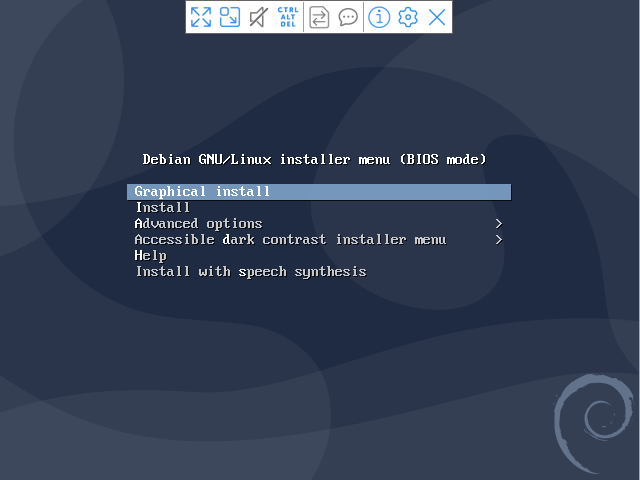
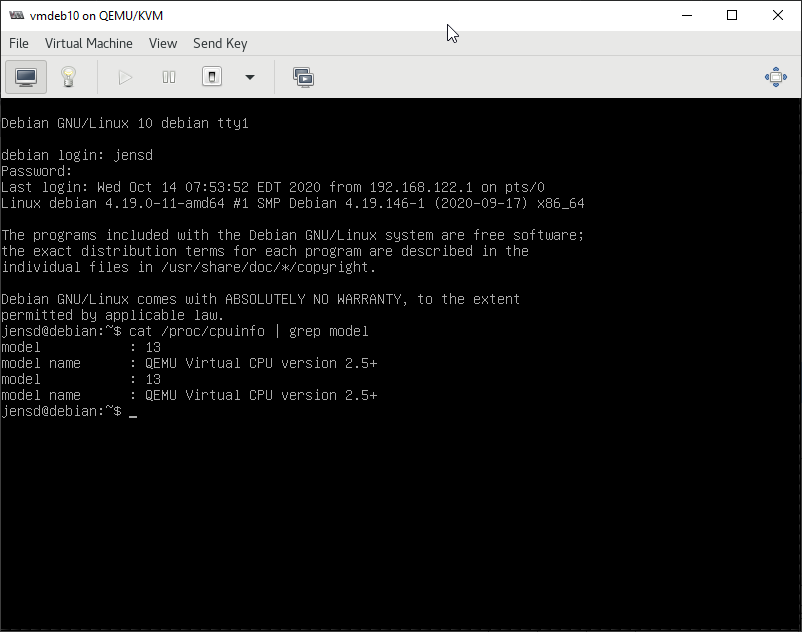
After finishing the installation, we end up with a Linux guest running on top of our KVM-host. Which Linux distro we are using doesn’t matter since we’re doing full virtualization.
jensd@debian:~$ uname -a
Linux debian 4.19.0-11-amd64 #1 SMP Debian 4.19.146-1 (2020-09-17) x86_64 GNU/Linux
jensd@debian:~$ cat /proc/cpuinfo | grep model
model : 13
model name : QEMU Virtual CPU version 2.5+
model : 13
model name : QEMU Virtual CPU version 2.5+
Considering network, the same as with the Windows VM applies here. Our connections are NATted trough the KVM-host and we can use the DHCP-server to receive an IP-address.
jensd@debian:~$ ping 8.8.8.8 -c1
PING 8.8.8.8 (8.8.8.8) 56(84) bytes of data.
64 bytes from 8.8.8.8: icmp_seq=1 ttl=117 time=28.10 ms
--- 8.8.8.8 ping statistics ---
1 packets transmitted, 1 received, 0% packet loss, time 0ms
rtt min/avg/max/mdev = 28.964/28.964/28.964/0.000 ms
More KVM actions using CLI
Besides creating VM’s, it’s a good thing to know some basic operations regarding VM-managent.
List the active virtual machines:
[jensd@kvmhost ~]$ sudo virsh list
Id Name State
1 vmdeb10 running
2 vmwin10 running
Get more information about a guest:
[jensd@kvmhost ~]$ sudo virsh dominfo vmdeb10
Id: 3
Name: vmdeb10
UUID: 15daaf71-1723-4e81-8d12-db3a3d1eb439
OS Type: hvm
State: running
CPU(s): 2
CPU time: 333.8s
Max memory: 1048576 KiB
Used memory: 1048576 KiB
Persistent: yes
Autostart: disable
Managed save: no
Security model: selinux
Security DOI: 0
Security label: system_u:system_r:svirt_tcg_t:s0:c152,c189 (enforcing)
Stop a running guest:
To stop a running VM in a clean way (as you would press the power button to start the shutdown sequence):
[jensd@kvmhost ~]$ sudo virsh shutdown vmdeb10
Domain vmdeb10 is being shutdown
This triggers a normal, clean, shutdown on the guest.
To force stop a running VM that doesn’t want to shutdown in a clean way:
[jensd@kvmhost ~]$ sudo virsh destroy vmwin10
Domain vmwin10 destroyed
Start a guest:
[jensd@kvmhost ~]$ sudo virsh start vmdeb10
Domain vmdeb10 started
Delete a guest:
First we need to make sure that the guest is stopped before it can be deleted. In case you don’t want the virtual disk image anymore either, you’ll have to delete it manually after undefining the guest.
[jensd@kvmhost ~]$ sudo virsh destroy vmwin10
Domain vmwin10 destroyed
[jensd@kvmhost ~]$ sudo virsh undefine vmwin10
Domain vmcen6 has been undefined
[jensd@kvmhost ~]$ sudo rm -f /var/lib/libvirt/images/vmwin10.img
After removing a disk-image, it’s a good thing to refresh the storage pool of KVM:
[jensd@kvmhost ~]$ sudo virsh pool-list --all
Name State Autostart
images active yes
iso active yes
[jensd@kvmhost ~]$ sudo virsh pool-refresh images
Pool images refreshed
Automatically let a guest start when the host starts
When rebooting your host, you probably want some or all the guests that are defined on that host to start at the same time. By default, the guest are not automatically started.
[jensd@kvmhost ~]$ sudo virsh  autostart vmdeb10
Domain vmdeb10 marked as autostarted
[jensd@kvmhost ~]$ sudo virsh dominfo vmdeb10|grep Auto
Autostart: enable
Change or add additional image locations
Virtual disk images for the KVM-guests can be placed in /var/lib/libvirt by default. In case you prefer to use another location to store the disk images, SELinux will, by default, prevent access and the security context of that location needs to be changed in order to use it for KVM. To change the SELinux context when storing the images in another location (/vm for example):
[jensd@kvmhost ~]$ sudo dnf install policycoreutils-python-utils -y
…
Complete!
[jensd@kvmhost ~]$ sudo mkdir /vm
[jensd@kvmhost ~]$ sudo semanage fcontext -a -t virt_image_t "/vm(/.*)?"
[jensd@kvmhost ~]$ sudo restorecon -R /vm
Part 3: Using KVM with the virt-manager GUI
Starting the GUI
Managing KVM with the CLI is not so difficult and it can be very handy to script certain day-to-day tasks. Sometimes, you just need to keep an overview and require a little more user-friendliness. For that, you can use virt-manager, which is a graphical interface for libvirt and is mainly built for KVM. When you want to manage your guest with virt-manager, you can either do it on the host itself, by starting an X-server locally or use X11 forwarding on a headless server (more information on how this works and can be setup, can be found over here).
Make sure that you have enough permissions to use virt-manager and simply execute virt-manager from the command line:
[root@kvmhost ~]# virt-manager
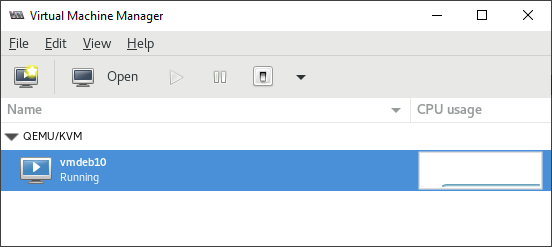
If all goes well, you should be presented with the virt-manager GUI:
Basic actions
From the initial start-up screen, you can immediately see a list of configured guests on this host and take actions on them like: Run, Pause, Shutdown, Reboot, Force off,…
When selecting a guest, you can also click on Open to display the console as we did earlier using VNC:
Advanced actions
Other possibilities using the virt-manager interface:
Connect to another host-system to manage the VM’s running there, using File -> Add connection (like using the –connect on the CLI)
Migrate a VM to another KVM-host: right click on the VM and choose Migrate…
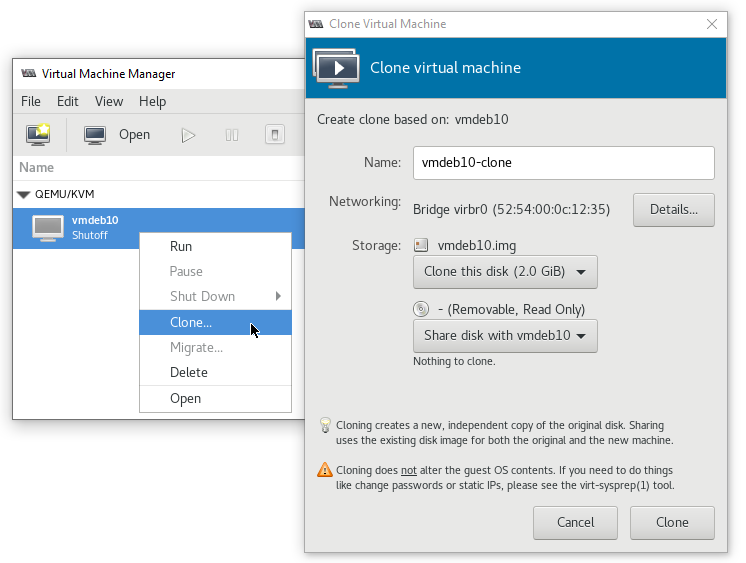
Clone a VM to the same or another KVM-host: right click on the VM and choose Clone…
As you can see, the virt-manager interface is not very complicated and most of the basic tasks don’t need any explanation.
After completing all of the above steps, basic installation and using KVM shouldn’t have any secrets anymore for you. The next thing to do is experiment and test a little more with KVM and hopefully start to use it in your production environment.
Pingback: Install and use CentOS 7 or RHEL 7 as KVM virtualization host | Jensd's I/O buffer