
macOS Sonoma has been released and traditionally that also means that the list of Mac hardware that no longer supports the latest macOS release has increased. In this post, the idea is to explain you how you can work around that limitation and still run macOS Sonoma on your unsupported Apple hardware. In a lot of cases, your unsupported Mac is still very much capable of running the latest version of macOS so it would be a waste not to try this.
YouTube Video
If you are interested, I also created a YouTube video from this blogpost. If you prefer classic text, you can just follow the rest of this article:
Introduction
Sonoma is the successor of macOS Ventura which got released last year. Then as well, I did a similar post on how to install Ventura on older and unsupported Apple hardware. As with each release, Apple drops support for a number of machines. For Sonoma, with the exception for the iMac Pro, anything that is a 2017 model or older, is no longer supported.
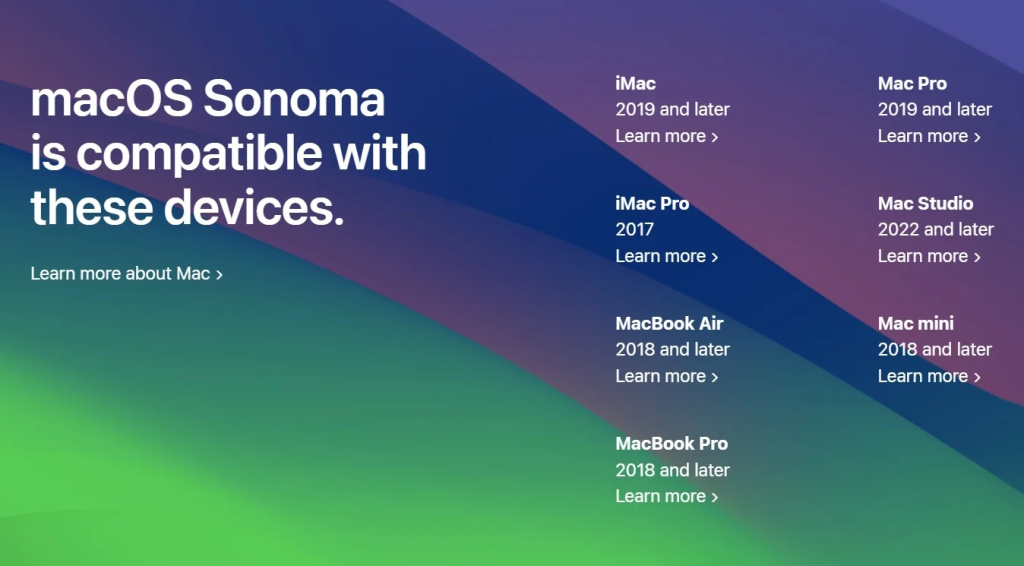
The Macs that officially support macOS Sonoma are the following:
- iMac from 2019 and later
- Mac Pro from 2019 and later (and 2017)
- Mac Studio from 2022 and later
- MacBook Air from 2018 and later
- Mac mini from 2018 and later
- MacBook Pro from 2018 and later
In essence this means that most models that are older than 5 years, which doesn’t necessarily mean that those machines were purchased that long ago, are no longer supported.
Earlier, before Apple had their Silicon-based machines, Apple would typically support a model for around seven to eight years, so this definitely has decreased. And although security updates will still be released for older macOS versions like Monterey or Ventura, a lot of applications on Mac require a very recent release in order to be able to use them.
Solution
Enough about the issue, which I’m sure you are aware of if you are reading this. The solution for this, as I explained in different posts earlier for Ventura and Monterey, is to use OpenCore and to extension OpenCore Legacy Patcher. OpenCore is a bootloader that will allow you to trick an unmodified macOS installer in thinking it is running on supported hardware and, in order to support hardware that no longer has the required pieces, like drivers, in Sonoma, OpenCore Legacy Patcher can apply root patches to fix that.
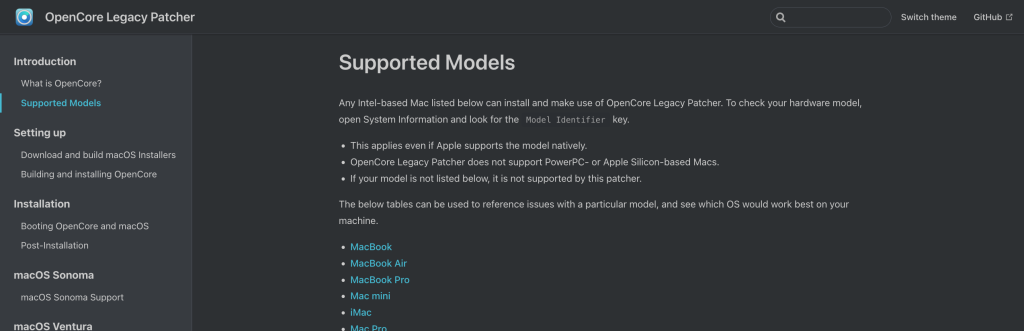
In terms of supported models for OpenCore legacy patcher, the list is long and in general, most x86-based Macs from 2008 and newer, be it a Macbook, Mac mini, Mac Pro or iMac, are supported to use OpenCore Legacy Patcher to install Sonoma. In some cases, there are some limitations, especially when you would have a non-Metal graphical card but even for that, there is a good chance there is a workaround or patch available.
On the website of OCLP you can find a detailed list over here with what is supported and what could be an issue, specifically for your model:
In practice
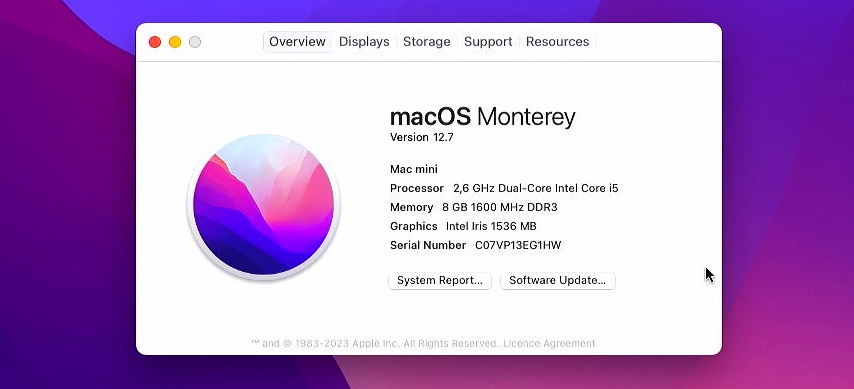
Now for this post, I will be using a late 2014 Mac mini. As we saw in the list before, this one definitely doesn’t support running Sonoma. At least not officially. The latest supported operating system for it would be macOS Monterey.
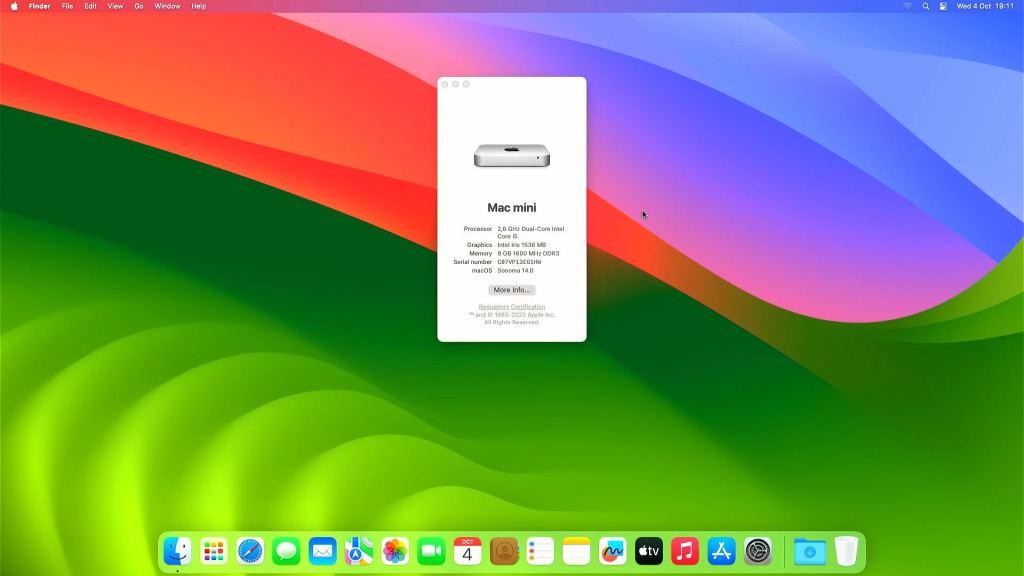
And as a starting point, Monterey is also what I currently have installed on this machine:
We will use this installation to do the necessary preparation. Later in the process we can choose then to
- Upgrade the current installation
- Perform a fresh installation of Sonoma and use it as the only OS
- Allow a dual boot with both the current installation and macOS Sonoma
Overview
We will need to go through the following steps in order to install macOS Sonoma on our unsupported Mac:
- Prepare a USB drive of 32GB or larger
- Download the latest OpenCore Legacy Patcher (OCLP)
- Use OCLP to download the latest macOS Sonoma installer
- Create a bootable macOS Sonoma installation USB drive
- Build OpenCore and install it onto that same drive.
- Do the actual installation by booting OpenCore from the USB drive and launch it from there.
- Verify if root patches are applied
- Rebuild OpenCore and install it on the internal drive
Step 1) Prepare a USB drive of 32GB or larger
The first step is to prepare that 32GB+ USB drive. This step is optional but can prevent problems later in the process so I recommend going through it.
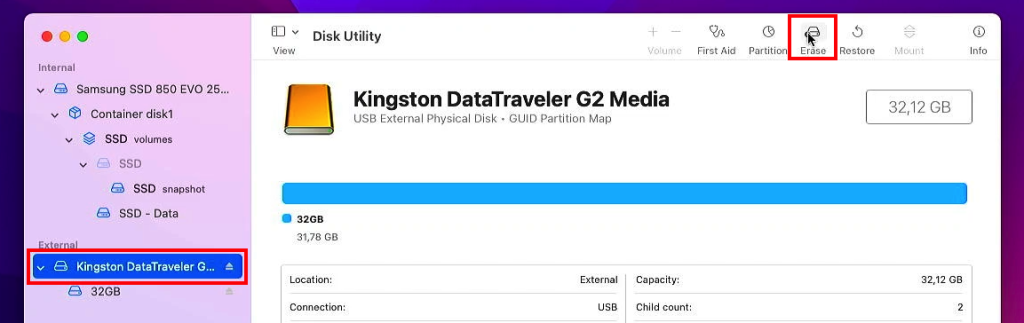
Insert the USB drive in your Mac, open Disk Utility and in there, in View, click on “Show All Devices”:
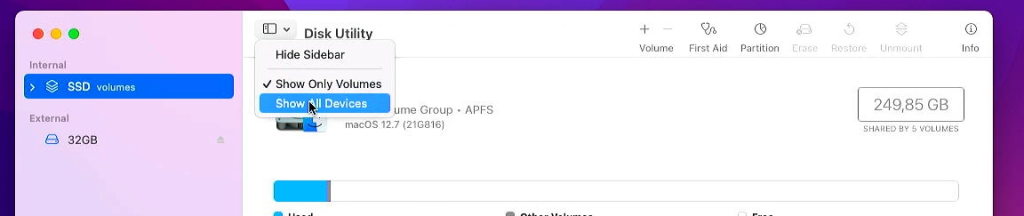
Then, in the left column, select your USB drive itself, not a volume that would already exist on it and click “Erase” on the top menu:
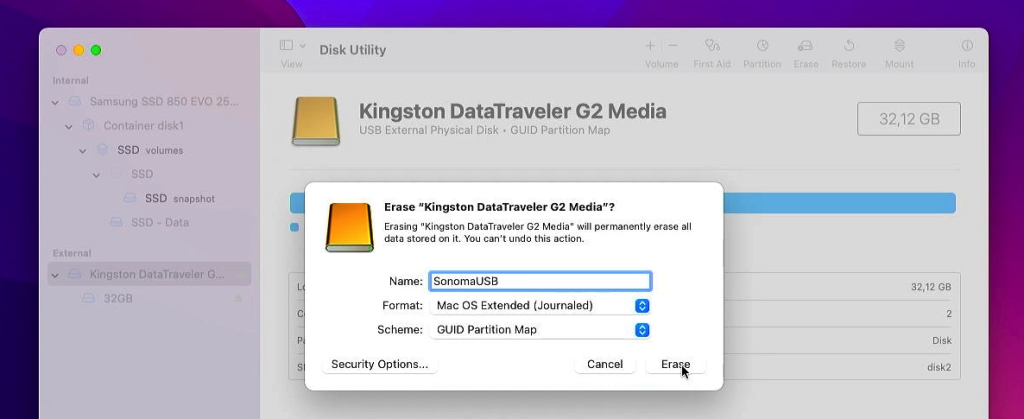
Give the drive a name, I chose SonomaUSB as you can see in the above screenshot. Select “Mac OS Extended (Journaled)” and “GUID Partition Map” as scheme and click “Erase”:
After a bit of waiting the USB drive should be ready and we can proceed with the next step.
Step 2) Download the latest OpenCore Legacy Patcher (OCLP)
Here we will download OpenCore legacy patcher from the Github page of OCLP. Open the following link in your browser: https://github.com/dortania/OpenCore-Legacy-Patcher/releases and scroll down to the end of the release notes for the latest release. From here, download the file called: OpenCore-Patcher-GUI.app.zip:
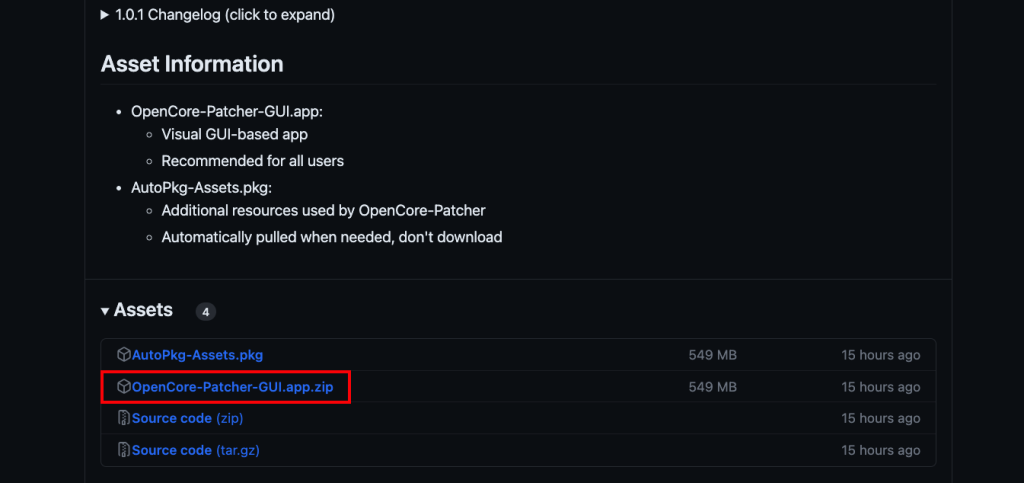
The most recent release at the time that I wrote this post was 1.0.1. If you would be reading this later, any newer release should be the one to use.
Step 3) Use OCLP to download the latest macOS Sonoma installer
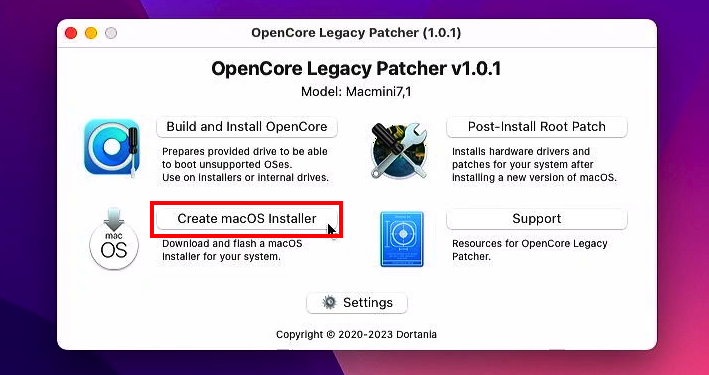
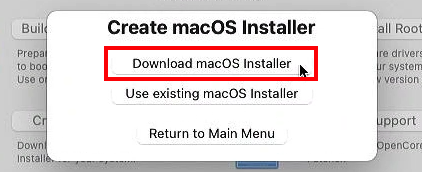
Once the download completes, we can launch OCLP and use it to download the latest version of the macOS Sonoma installer. From your Downloads folder, start OpenCore Legacy Patcher and click on “Create macOS installer”:
Choose “Download macOS installer” here:
As you can see, we can use the same method for older versions but for this post, we’re going for macOS Sonoma, so select the last entry here and click Download:
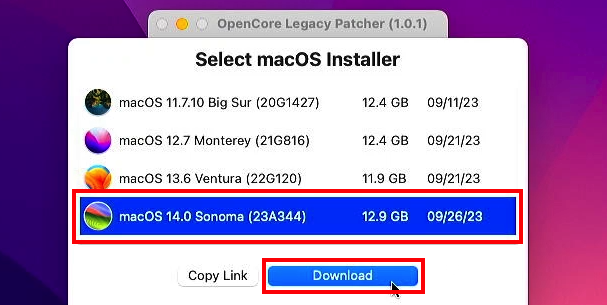
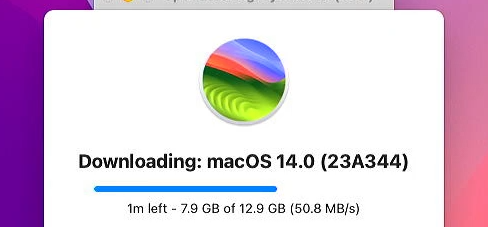
This can take quite some time as the installer is roughly 13GB in size.
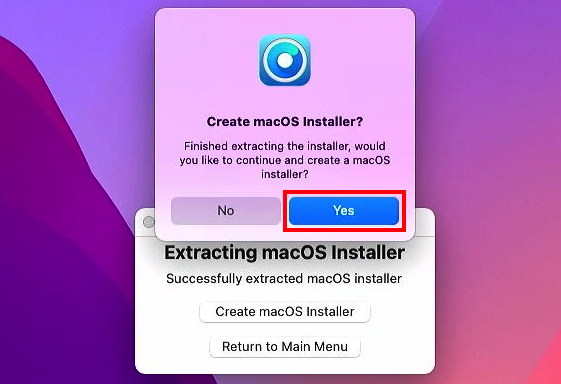
After the download completes and has been verified, the installer will be prepared on the system, which again is taking up some time:
Step 4) Create bootable macOS Sonoma installation USB drive
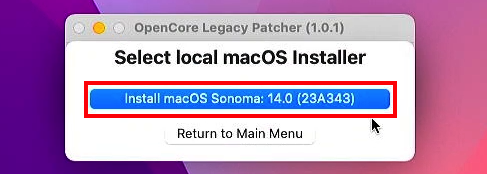
Once the previous step is complete, OCLP will propose if you want to continue to create an installer now:
First choose the installer which we downloaded earlier, which is the only option:
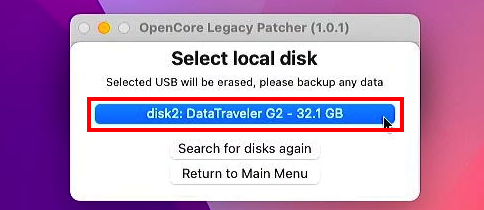
Then choose the USB drive which we prepared in step 1):
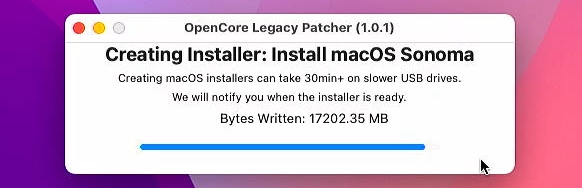
In this step, the installer is copied to the USB drive, which again takes a while, depending on the speed of your USB drive:
Step 5) Build OpenCore and install it onto that same drive
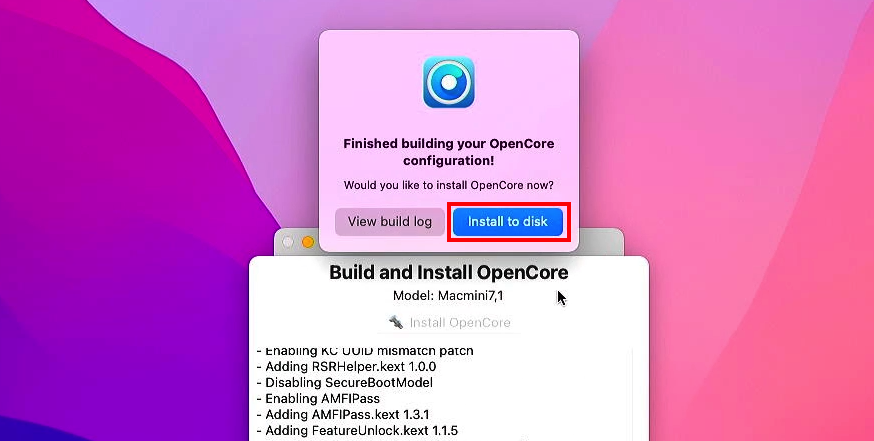
Now that everything is copied to the USB drive, the next step is to build OpenCore and install it on our USB drive. OpenCore Legacy Patcher will automatically propose you to do this:

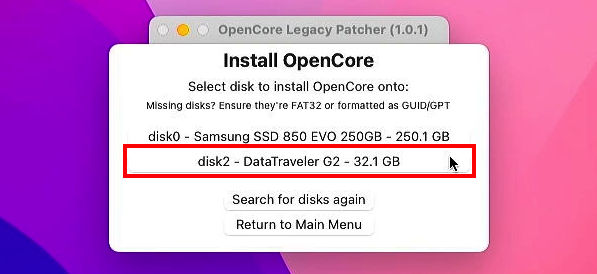
After OpenCore is built, which should not take a lot of time, OpenCore Legacy Patcher will ask you if you want to install that build to a disk, so click “Install to disk” here:
Choose the USB drive here, followed by the EFI partition on it in the next screen.
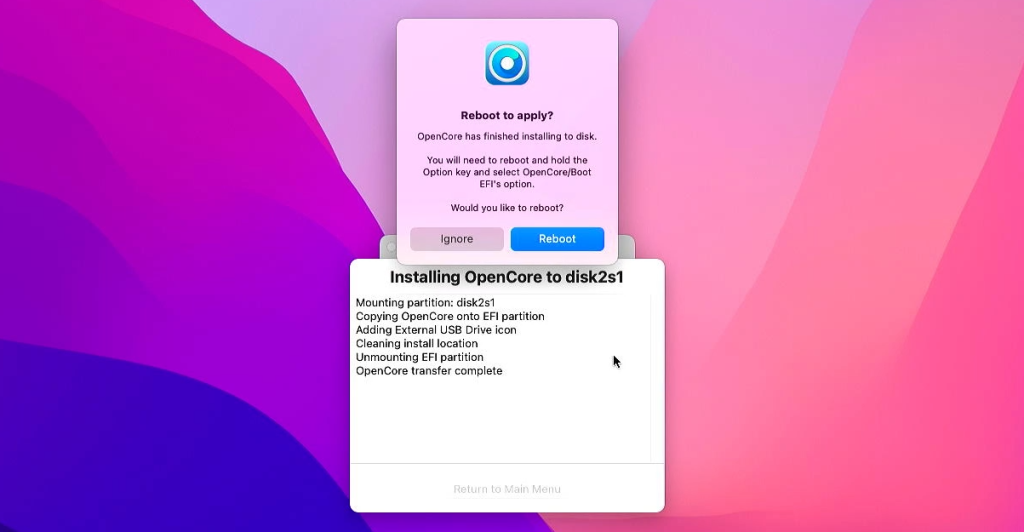
Once OpenCore installed on our USB drive, at this point, our preparation is complete and we have our USB drive which contains the Sonoma installer and has OpenCore on its EFI partition. By booting from this USB drive into OpenCore, we can use it to launch that Sonoma installer. If we would try to start that installer natively, from the regular boot loader, it obviously wouldn’t start as our model is not officially compatible.
Step 6) Boot OpenCore from the USB drive and install macOS Sonoma
In this step, we will now boot the Mac mini from the USB drive that we have prepared in the previous steps.. Simply restart the machine, with the USB drive present and hold the Alt or Option key while booting:
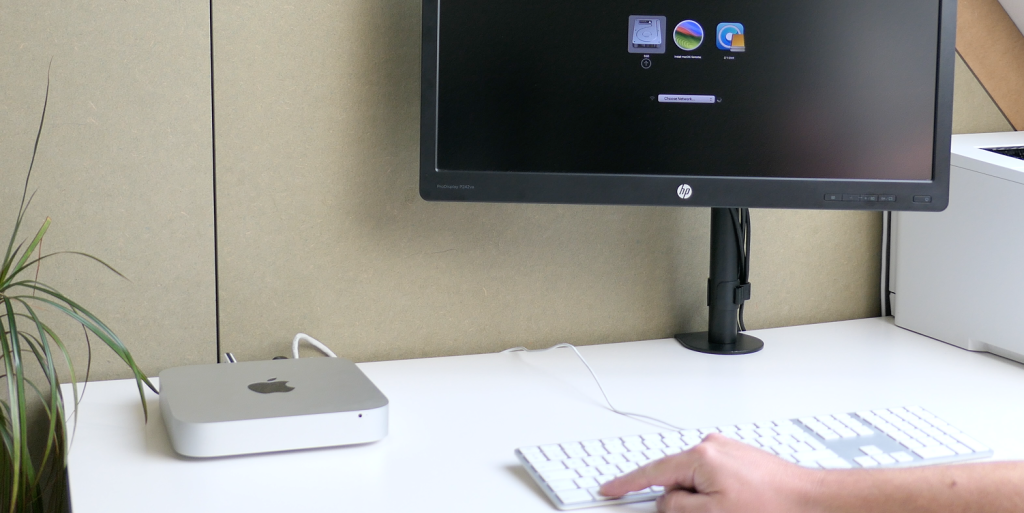
By doing so, we tell the Mac to show us the boot loader. If we would not do that, it would just boot from the default device which is your internal drive, and we want it to boot from USB.
I did notice that some Macs are sometimes picky in this phase of the boot process and a non-Apple or wireless keyboard doesn’t always allow you to bring up the boot loader.
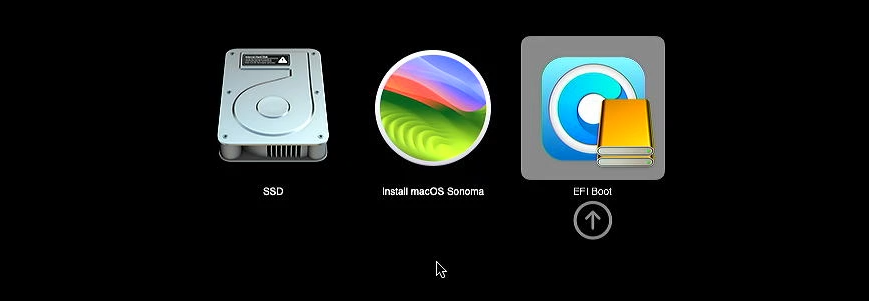
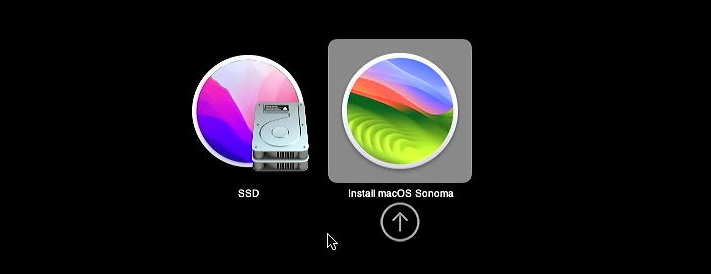
If all goes well, you should see a similar menu like the one below pop up on your screen. In this menu, which is the native boot loader menu, start the EFI boot entry with the blue OpenCore logo:
Directly starting the installer from here, even though it is shown, wouldn’t work as I already mentioned.
After choosing the blue logo, we end up in OpenCore. It looks very similar as the native boot loader so its easy to get confused. Here, we can see our existing macOS Monterey installation and the Sonoma installer:
Let’s launch that one and give it some time to boot up. Eventually we should end up in macOS recovery and at this point we need to choose:
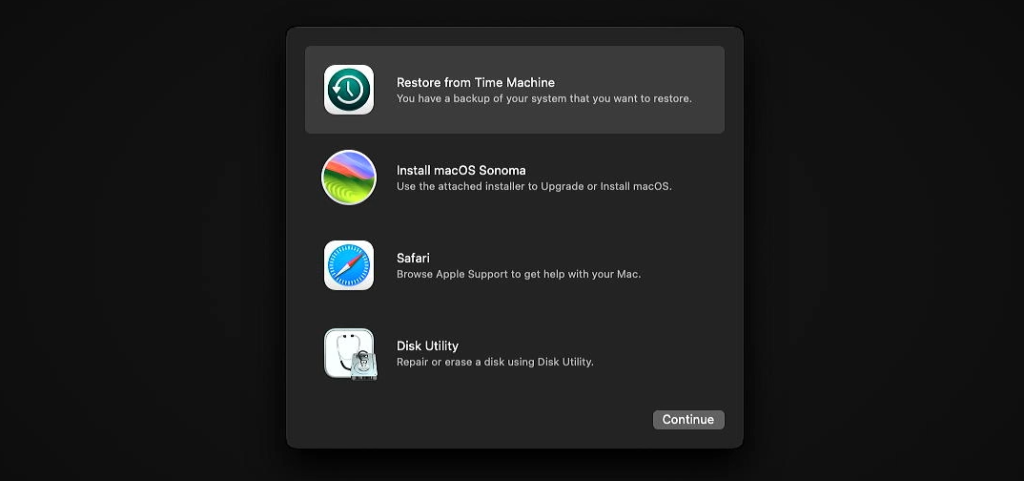
- Upgrade the current installation
- Perform a fresh installation of Sonoma
- Do a dual boot with both the current installation and macOS Sonoma
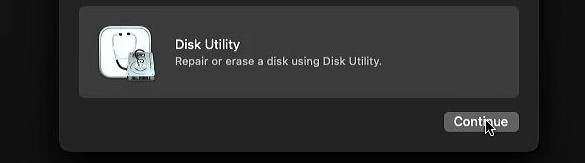
For 1), to upgrade our current version of macOS to Sonoma, you can skip the next step. To perform a fresh install or a dual boot, first go to Disk Utility in the menu:
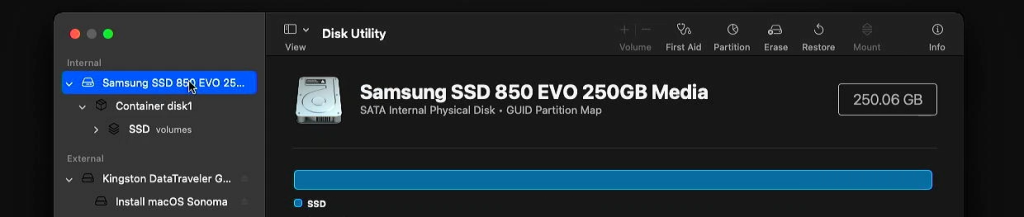
In Disk Utility, first, exactly as we did in step 1), where we prepared the USB drive, click on View, then “Show all devices”:
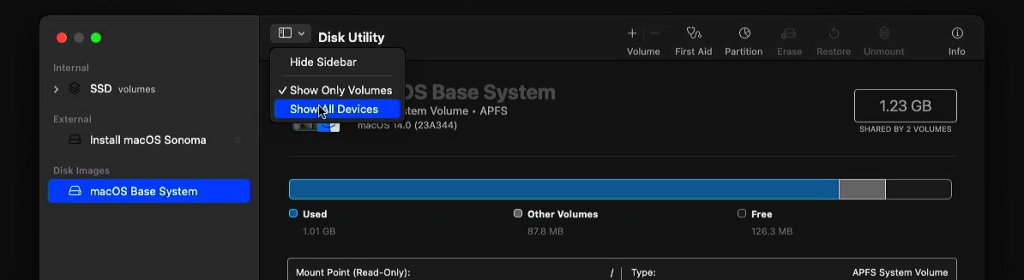
This time select your internal drive in the left menu:
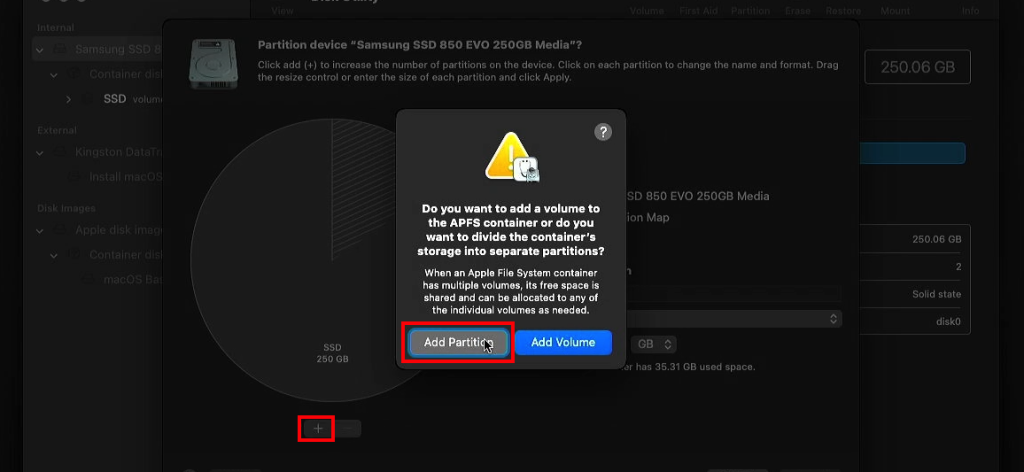
Then, for option 2), a dual boot, click on partition in the top menu:

Click the plus sign here to add a partition and choose partition rather than a volume:
You can change the size on the left side, name the volume and choose APFS as format:
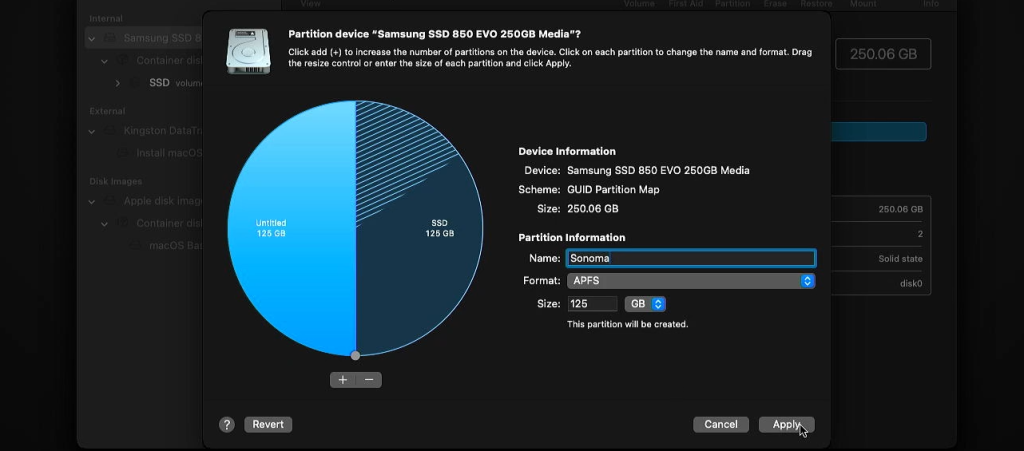
You will need the name which you set here to identify this partition in the next step.
For this post, I will go for a fresh install instead, so I will select the drive on the left, then click Erase in the top menu instead of partition:

In the dialog that comes up, give the volume a name and choose APFS as format:

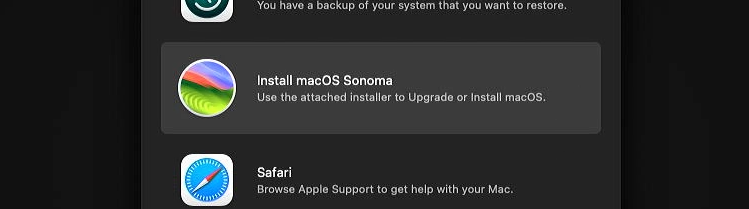
Once the actions complete, we can close Disk Utility and continue with install macOS Sonoma from the main menu:
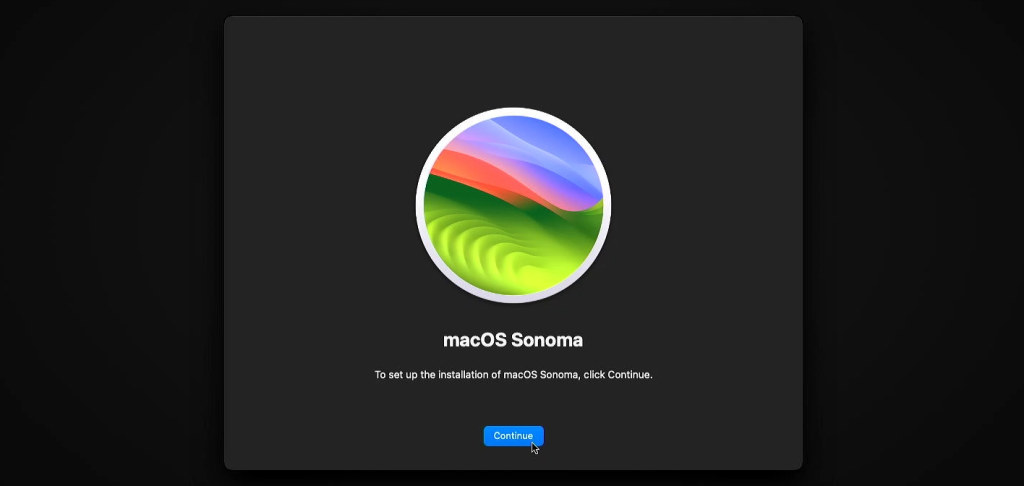
The installation starts and here we need to simply click continue:
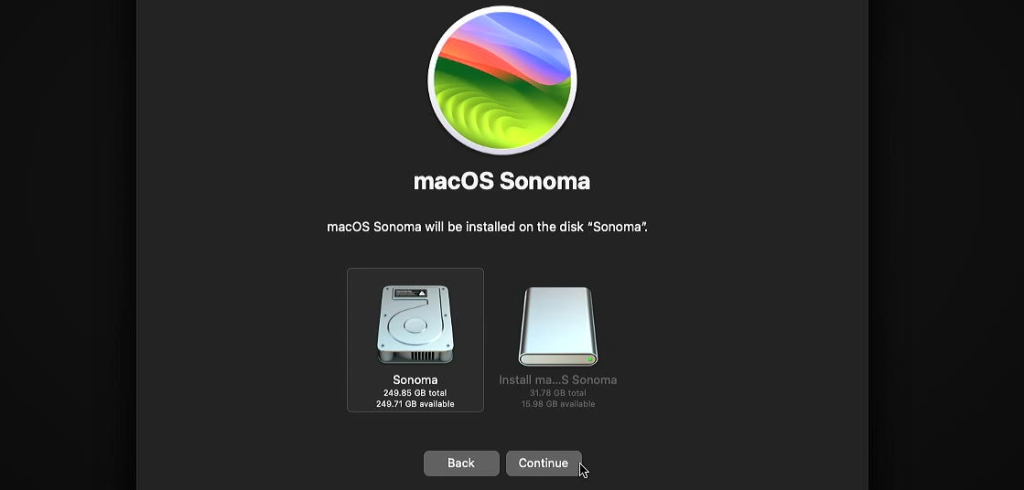
In the next screen, accept the license agreement an eventually we need to select the volume on which we want to install Sonoma.
If you chose to upgrade, simply select the volume that currently has your macOS installation.
For a dual boot, select the volume name of the partition which you added in disk utility (Sonoma in my screenshot). And in my case, for a fresh install, I can just select that freshly erased volume called Sonoma:
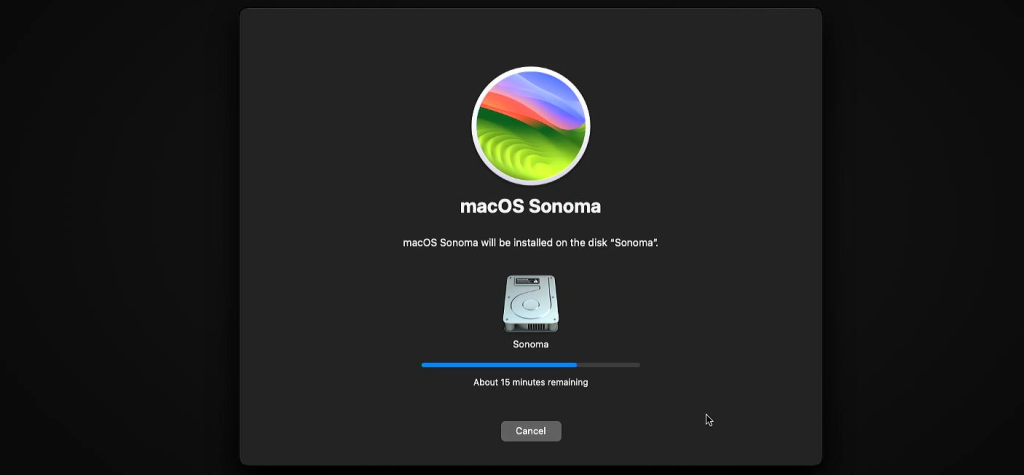
At this stage, Sonoma is being installed to your internal drive. Again this can take quite some time, so a bit more patience is needed:
As soon as the installation finishes, you will be greeted with the following dialog:
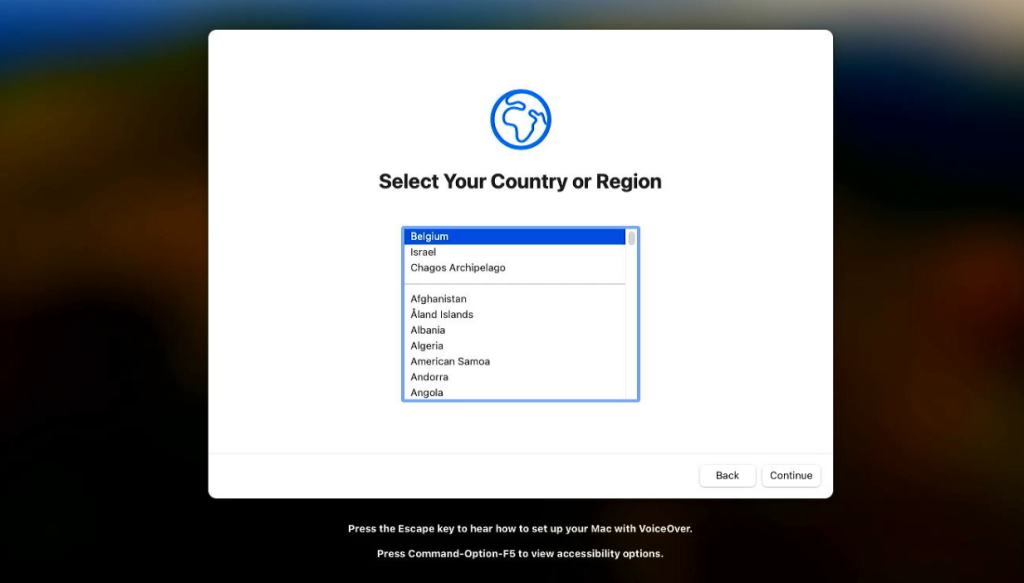
Simply run through the questions here to configure things like your location, create a new account, setting the time zone and so on. Eventually you will be greeted by, in my case, a fresh installation of macOS Sonoma:
We’re not completely there yet and still need to complete the last two, short, steps.
Step 7) Verify if root patches are applied
Now that macOS Sonoma is installed, OCLP should have applied the necessary root patches for your system automatically. This could be patches for an unsupported GPU, wireless adaptor, other older hardware and so on. It’s best to verify if that process went well and to check if there are no additional patches to apply.
To do so, from the Applications folder, start OpenCore Legacy Patcher:
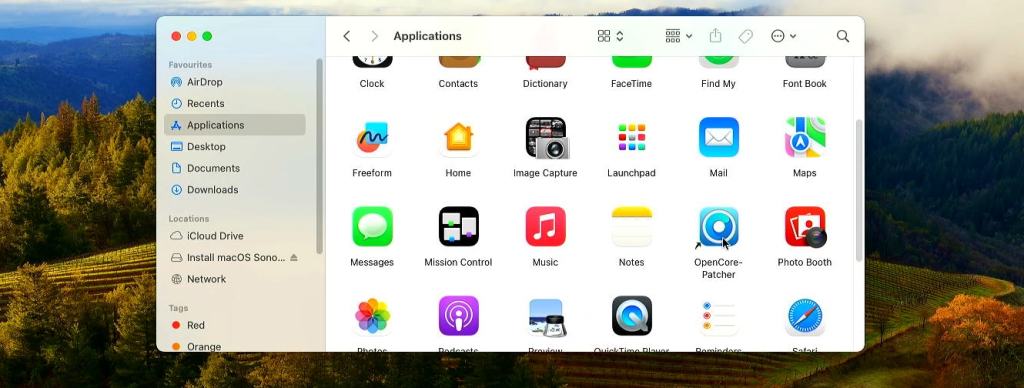
When we prepared the USB drive, the OCLP application got copied over and conveniently it is now easily available after the installation.
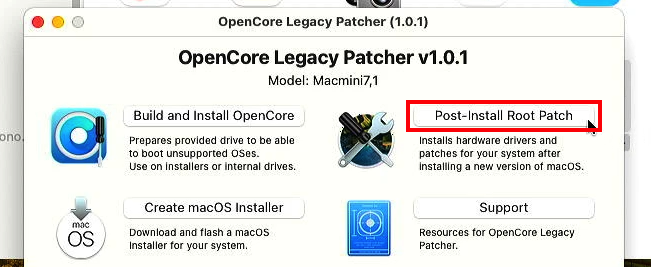
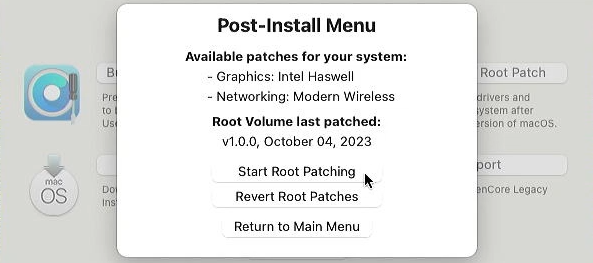
In OpenCore Legacy Patcher, click “Post Install Root Patch”:
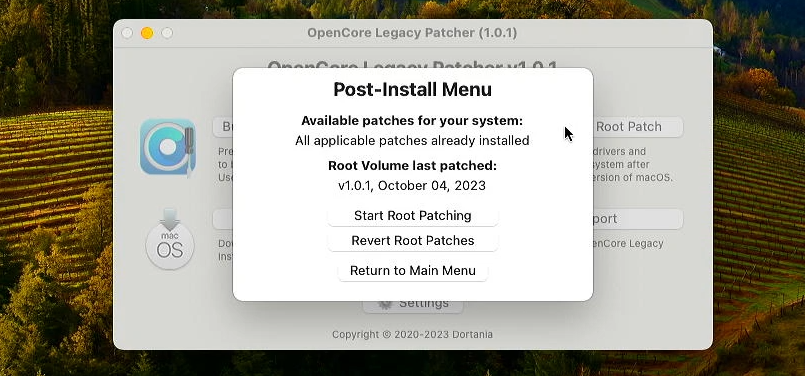
If you see that all patches have been applied, and your screen looks like the one below, you are good to go and can move on to step 8:
In case you see that there are still patches to apply or a new version is available, it is best to follow the provided steps and clock on “Start Root Patching”:
Once this is complete, which will most likely require a reboot, you can also move to step 8.
Step 8) Rebuild OpenCore and install it on the internal drive
One final step which we still need to do, is to build OpenCore again and to install it on your internal drive. At this point, although macOS Sonoma got installed on our internal drive, we still require the USB drive in order to boot OpenCore first and then that Sonoma installation.
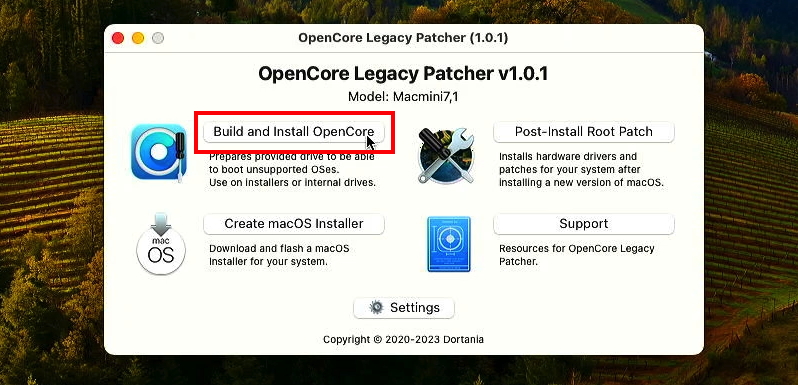
To fix this, simply launch OpenCore again from your Applications folder and choose “Build and Install OpenCore”
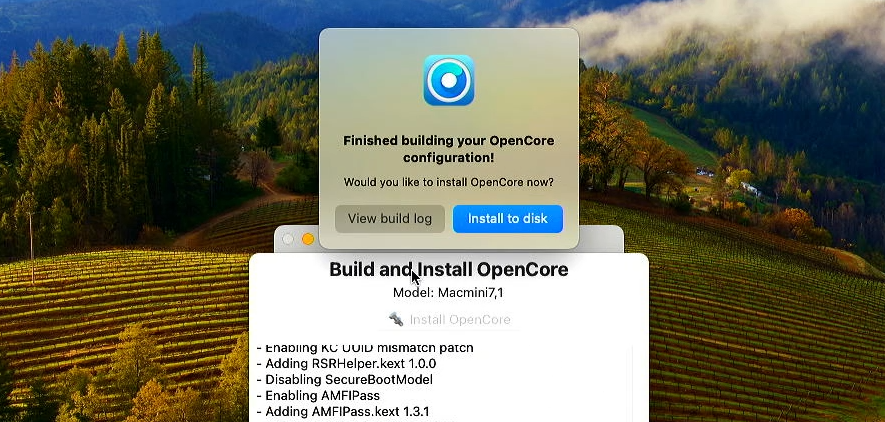
Wait for the relatively fast build process to complete and then choose “Install to disk”:
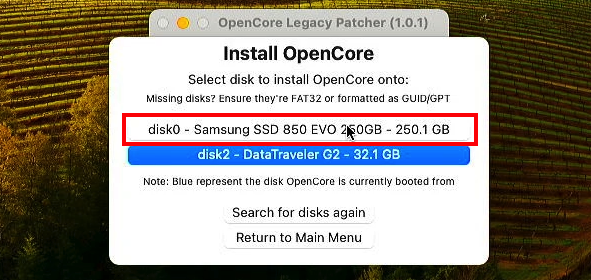
This time, select your internal drive, rather than the USB drive like we did before in step 5:
In the next step, choose the EFI partition on that drive. The previously built OpenCore will then be installed on your internal drive’s EFI partition:
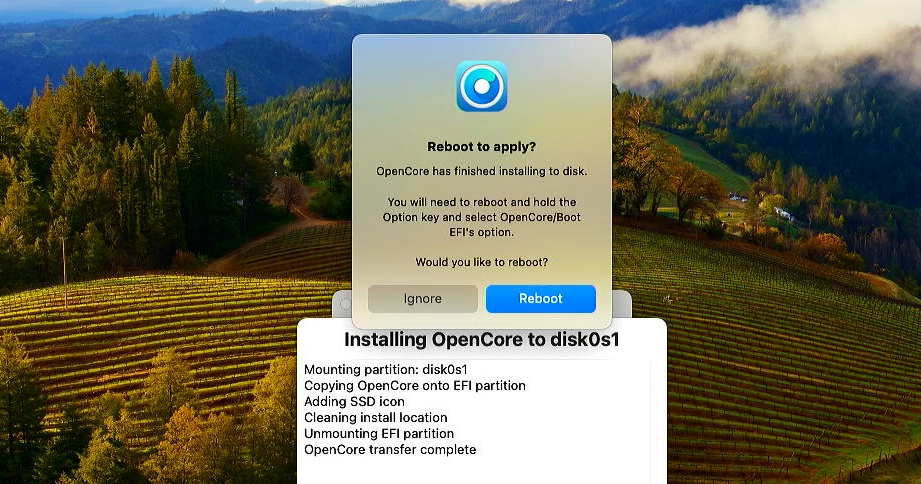
Once that completes, you can safely remove the USB drive and your mac should now boot into OpenCore and eventually in macOS Sonoma without the need for the USB drive to be present.
I hope this post will help you to get the latest macOS on your unsupported Mac. Let me know in the comment section here how this worked out for you as that’s always interesting to see.
Using OCLP to prepare a drive to use on another Mac
Building OpenCore Legacy Patcher is device model specific. That means that you cannot re-use the same prepared USB drive to install Sonoma on different models.
Nevertheless, it could be convenient to know that you can use OCLP on a different machine than the one you plan to install macOS Sonoma on. For example if your hard drive failed or you replaced it with an SSD and/or there no longer is a working macOS installation on that device. To do so, before staring, at step 2, in the first screen of OCLP, click settings:
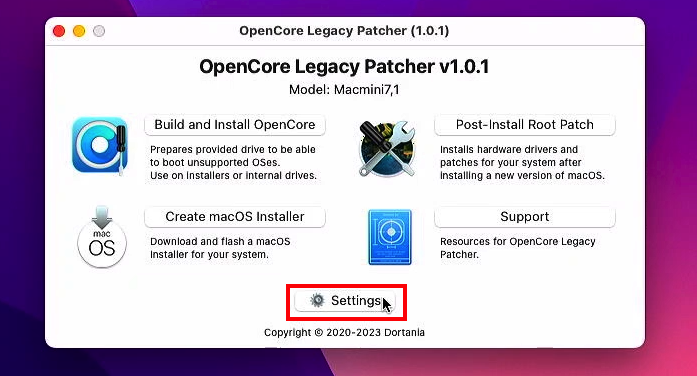
Then select the specific target model that you are creating the USB drive for:
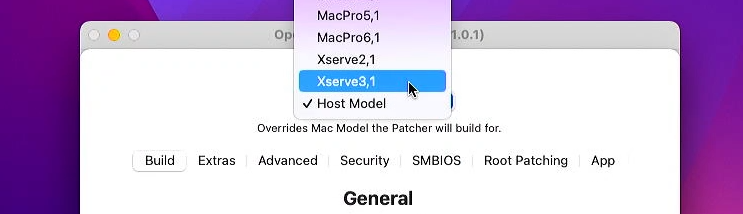
After choosing the target model, the rest of the steps to prepare the USB drive will all be the same from there on and the resulting USB drive should work on that specific model which you selected.
Perfect explanation with all details. Best on youtube.
have this done on my MacBook Pro late 2013 15 inch retina works awesome
Excellent tutorial. Thank you very much for putting this together so neatly.
Excellent piece – thank you. I have been told that we need a USB drive of 16GB only. Are you sure we need a USB drive of 32GB or larger?
Excellent guide, I already have my MacBook Pro running with Sonoma 14.3 (23D56).
Now my question is about the updates
Can they be installed normally?
Isn’t booting affected if they are installed?
Greetings
I got error during creating installer:
What seems to be the problem? Below is the message..
Error
Failed to create macos installer
Output: Started erase on disk3
Unmounting disk
Creating the partition map
Waiting for partitions to activate
Formatting disk3s2 as Mac OS Extended with name
OCLP-Installer
Initialized /dev/rdisk3s2 as a 28 GB case-insensitive
HFS Plus volume
Mounting disk
Finished erase on disk3
Copying essential files…
Copying the macoS Recoveryos…
my mac mini 2014 model 4gb ram can i give Mac OS sonoma please tell me what to do ?
In theory yes but it won’t run very smoothly with only 4GB of RAM unfortunately.
Thank you so much. worked like a charm
Which Mac models are officially supported by macOS Sonoma, and how does this compare to the models that can be patched using OpenCore Legacy Patcher?
Thanks man, works fine!
Hello Jens, great guide. I managed to get Sonoma loaded and running on late 2013 MacBook running Catalina via formatting / erasing the “container” but leaving the EFI Bootloader. However it would not see/find wifi. Tried booting a few times and same thing.
Ended up trying again from the beginning but this time erased the Mac EFI bootloader, thinking this would allow the installation of new OpenCore EFI with patches.
Install was going well then, black screen with Prohibited circle and support.apple.com/MacOS URL.
Tried booting via “Option” to try and run again off USB but it look like it can’t see USB now. Only get option for EFI off HDD or install Sonoma. Either option again crashes.
Any suggestions on how to force USB startup or other solution. So far looks like I have bricked MacBook.
This was a test run to do the same thing on wife’s iMac so she can use MS 365 which MS seems to have stopped supporting now in Catalina or Monterey.