
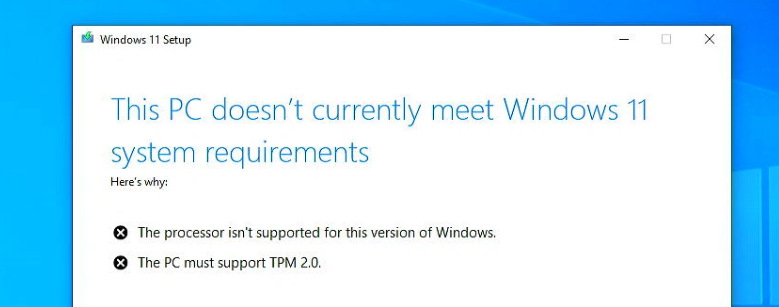
Since Microsoft released Windows 11 in October 2021, there has been some hardware limitations. These limitations include a limited list of processor support, the requirement for secure boot and a TPM 2.0 module. In case one of these requirements on your machine is not met, you have an unsupported system and without any workarounds, you will not be able to install Windows 11 on your machine.
As I did some earlier posts on getting Windows 11 on unsupported hardware, this one is no different and covers performing a fresh installation or upgrading from Windows 10 or another Windows 11 version to Windows 11 23H2 on unsupported hardware .
Update for Windows 11 25H2
As Microsoft released their 2025 update of Windows 11 by now, the instructions to upgrade to the latest (25H2) version are different. I documented these in a separate post which you can find over here:
Below you can find the article for 23H2 as reference but keep in mind that some things might no longer work since 25H2 is released.
Introduction
As Microsoft has released their 2023 update of Windows 11, better known as 23H2, some things have changed in order to get it installed or upgraded to on unsupported hardware. As mentioned above, Windows 11 comes with some hardware limitations and they might get into your way in getting Windows 11:
In this post, I will cover different scenarios, which each require a slightly different approach:
- Scenario 1: Fresh installation of Windows 11 23H2 on unsupported hardware
- Scenario 2: Upgrade of Windows 10 to Windows 11 23H2 on unsupported hardware
- Scenario 3: Upgrade from an earlier Windows 11 version to 23H2 on unsupported hardware
For all of these, I will use my trusty Dell OptiPlex 9020, which I also used for previous in the past to test and play around wit Windows 11. It is equipped with a 4th generation Intel Core i5 CPU, which is not supported and the machine doesn’t meet the TPM 2.0 requirement either:
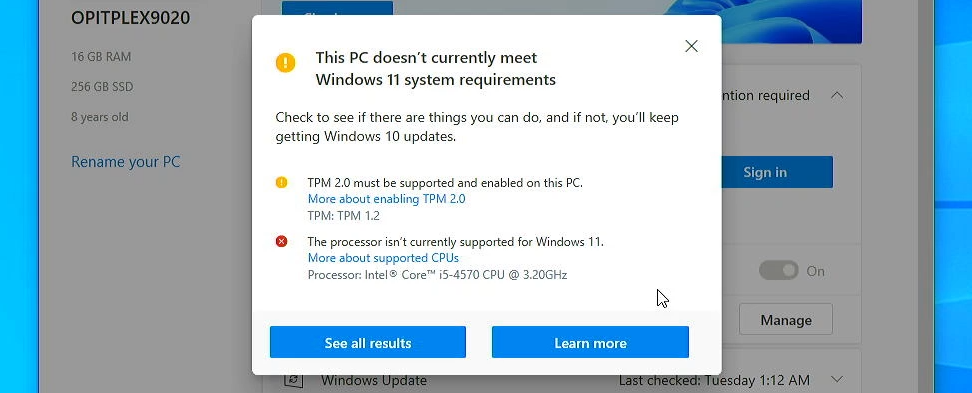
So in short, this machine is not officially compatible or qualified to run Windows 11 by Microsoft.
Scenario 1: Fresh installation of Windows 11 23H2 on unsupported hardware
Scenario 1 YouTube Video:
This first scenario is about performing a fresh installation of Windows 11 23H2 on a machine that does not have any installation yet or where you want to replace whatever operating system that is already there with a clean installation.
Approach
We will do this by creating a bootable USB drive, of at least 8GB, that can be used to do a fresh installation of on unsupported but also on supported machines. The preparation for this, to create that USB drive, can be done on another Windows-based PC. It doesn’t have to be supported or even run Windows 11 for that.
With the first version and also last year’s 22H2-version, doing a fresh installation consisted of using the Media Creation Tool, which is offered by Microsoft, to create a USB drive, then boot from it and disable the hardware checks by setting some values in the registry while installing.
After testing the same method for 23H2, when using the Media Creation Tool to create a drive and use it to install, you can still work around the limitation but the resulting installation is only on version 22H2. From there you can perfectly follow the upgrade from 22H2 to 23H2 for unsupported hardware but this takes extra effort, time and additional downloading.
The way to not have this, is to directly use the ISO from Microsoft’s website instead and use that to do the fresh installation. I did try this by booting from the ISO in a virtual machine. Using the known registry workarounds, you do end up with 23H2 directly. For most of us, using that ISO directly or to burn it to a DVD is not very handy as we tend to use a bootable USB drive instead.
So this time, for 23H2, the easiest method will be to use Rufus to create a bootable USB drive. This tool will allow you to use the ISO as a source and even better, you can also immediately disable the hardware checks while creating the USB drive.
Download Rufus
To start, we need to download Rufus. This can be done from the download section on Rufus’ website: https://rufus.ie/en/:
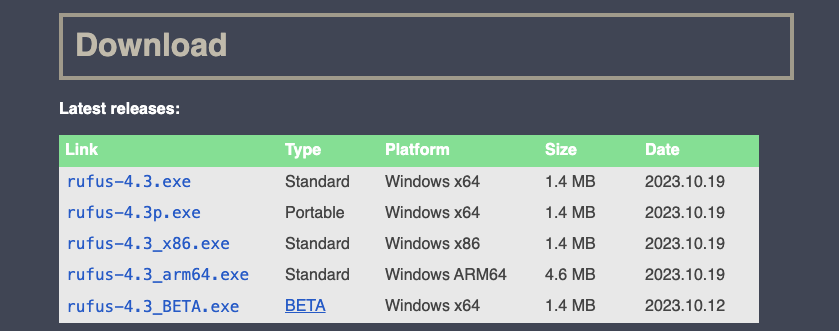
Scroll down to the download-section on the website and download the tool. I decided to go for the portable edition (rufus-4.3p.exe) at the time of writing) but the standard version would do as well.
Use Rufus to create a bootable USB drive
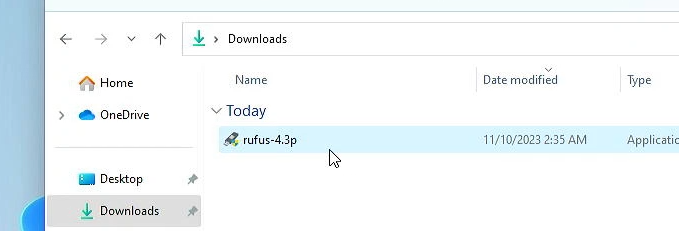
Once Rufus is downloaded, navigate to your downloads-folder and start the tool.
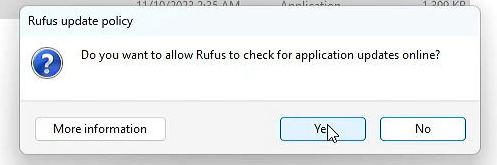
Click Yes to allow for application updates as without this, Rufus will not be able to download ISOs:
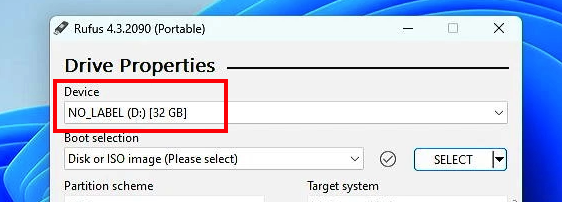
On top of the window, make sure that your USB drive is the one listed in the Device field and change this if needed:
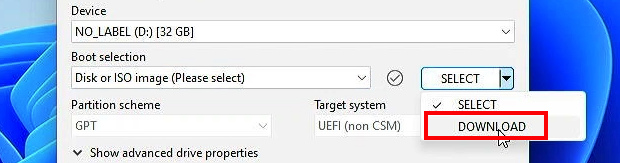
Then, in the boot selection part, click on the dropdown and select DOWNLOAD:
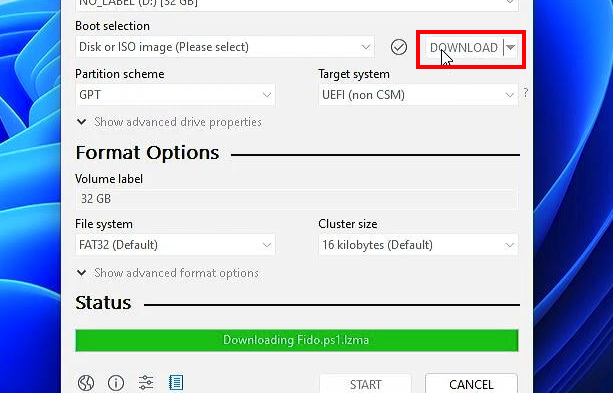
Next, click on DOWNLOAD itself in order to first download a list of available operating systems:
Once downloaded, you can select Windows 11 from the list and click continue. Select the only release available and do to the same for the edition, language and the only architecture in the list: x64. Then click Download:
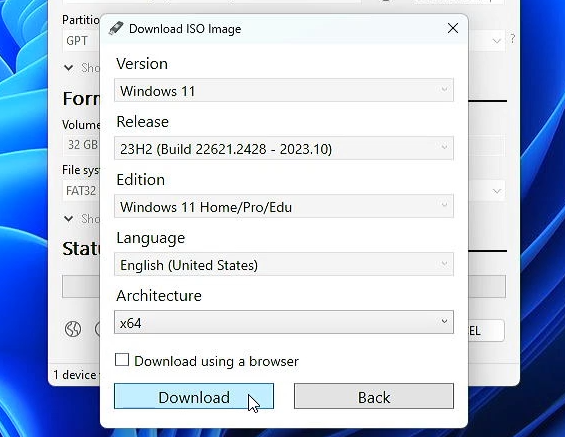
In therms of edition, the ISO will have all versions included, so it can be used for a Home or Pro installation, depending on which activation key you have.
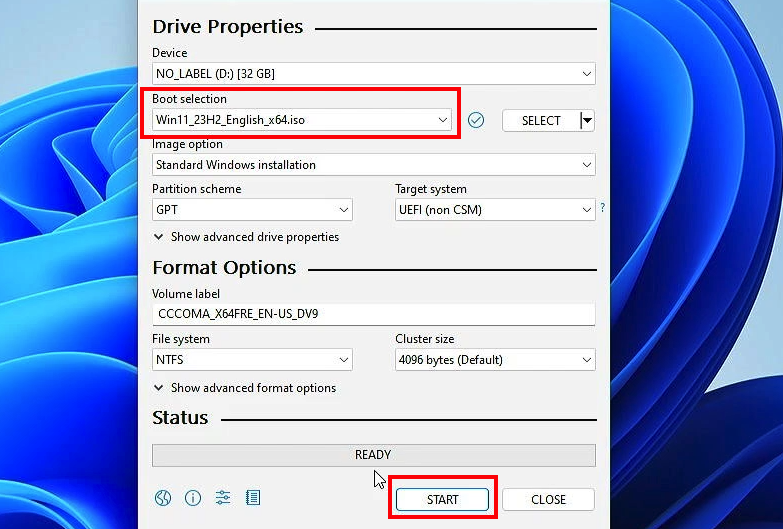
Once the download completes, the boot selection will be automatically populated with the ISO-file which just got downloaded and we can click START to continue:
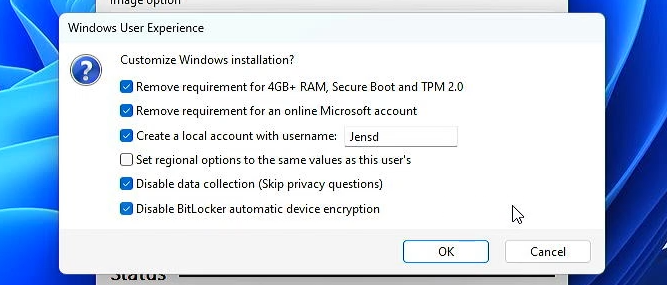
As soon as you click on START, the Windows User Experience dialog will pop up. This is very interesting as the first checkmark is exactly what we need in order to bypass the hardware checks for unsupported hardware. The other options are pretty useful as well and can save you some work later. I decided to also remove the requirement for a Microsoft account, automatically let the installer create my user account, disable the privacy settings and bitlocker encryption:
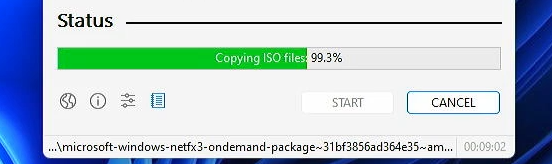
Click OK here, confirm your USB-drive that was selected in the device dropdown and press OK again to start creating the drive. This will take some time as all the data from the downloaded ISO has to be copied over to your USB drive:
Once the copy and customisation is done, The status will be READY and we can use it now to do a fresh install.
Use the USB drive to perform a fresh installation
Now that we have that USB drive fully ready, we can use it to perform a fresh installation. To do so, insert the drive into the machine where you want to perform the fresh install and boot it up.
Press the required key-combination to bring up the boot menu, in my case this is F12:

As we can see that the machine is configured for UEFI boot,so I need to select the USB drive under the UEFI entry and press enter:
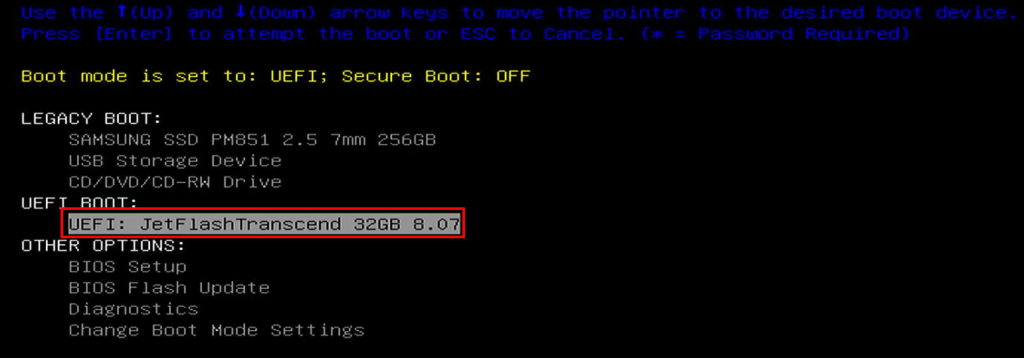
If your machine would be configured for legacy boot, the easiest is to enter the BIOS setup and change this ti UEFI booting. If this is not an option, you can re-create the USB drive with Rufus but select the MBR option instead of GPT in the partition scheme section.
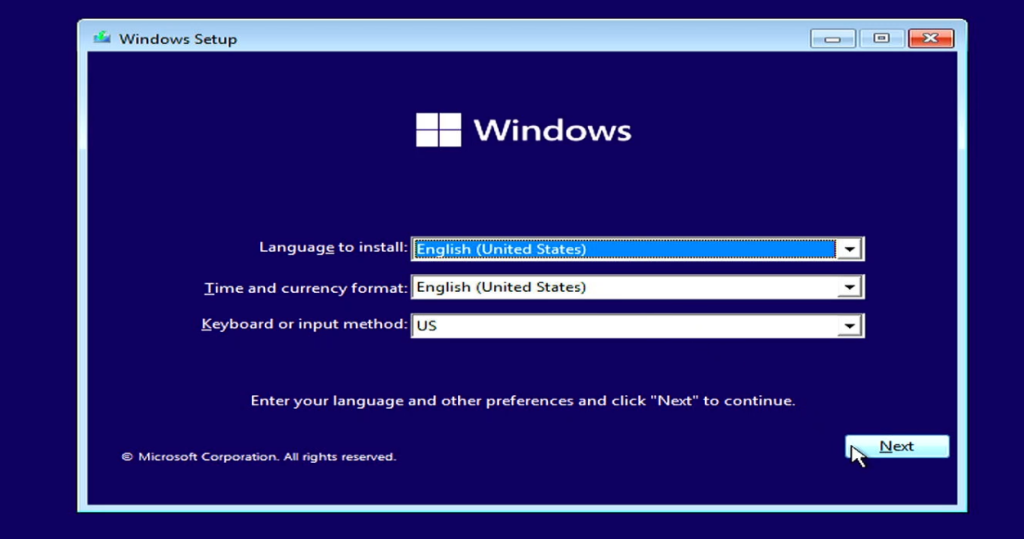
If all goes well, this will start the Windows installer from the USB drive. From here, the installation is just like any other Windows 11 install. Select the language, regional settings and keyboard layout and press next:
In the next screen, click Install now, then Accept the license terms, click next and choose for a Custom installation:

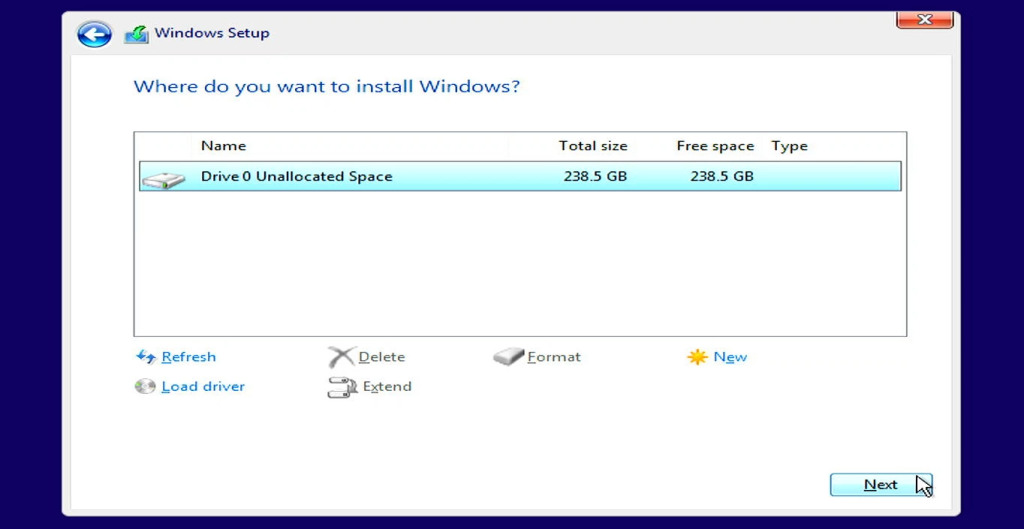
In the next screen: Where do you want to install Windows?, as we want to do a clean installation, I will select each existing partition on my internal drive and delete it first. Then we can just select the full unallocated space and click next. This will let the installer create whatever is necessary and use the whole drive:
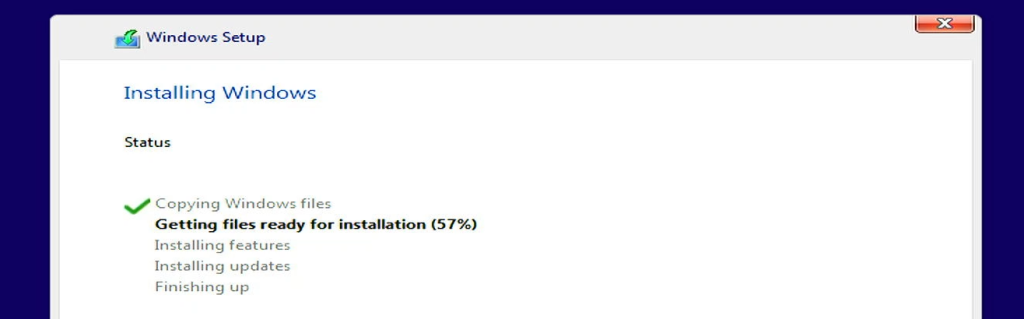
From here it is mainly waiting as the installer will copy all files to your internal drive, perform a reboot and complete the installation:
If all goes well, you should end up in this setup dialog:
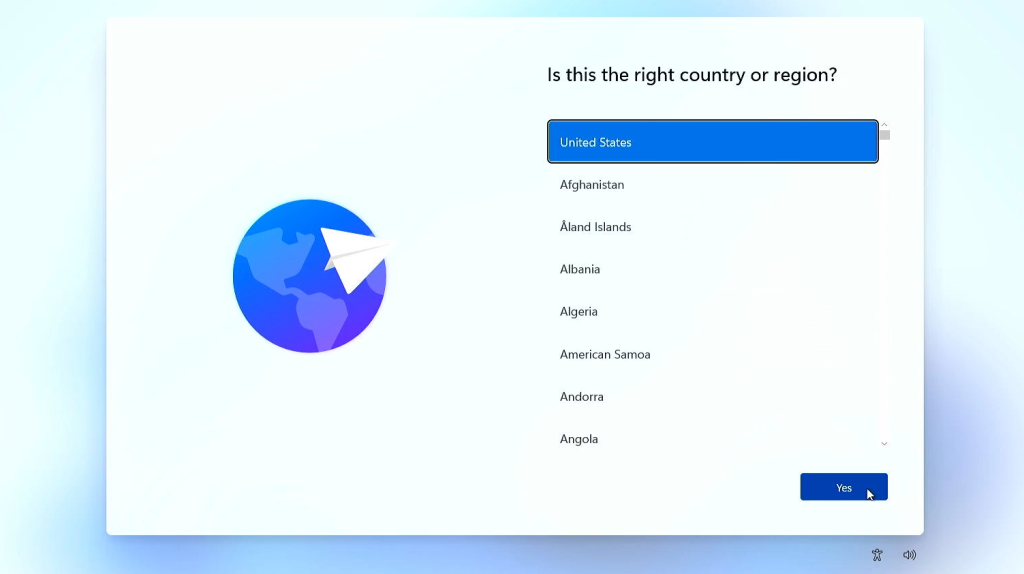
Typically here, I would work around the requirement for a Microsoft account, but since we already did that while creating the USB drive, we don’t need to do that and you only need to go through a small amount of steps here: select country or region, choose a keyboard layout and optional second keyboard layout. After that, the installation will continue with the last steps and eventually you should end up on your fresh Windows 11 23H2 desktop:
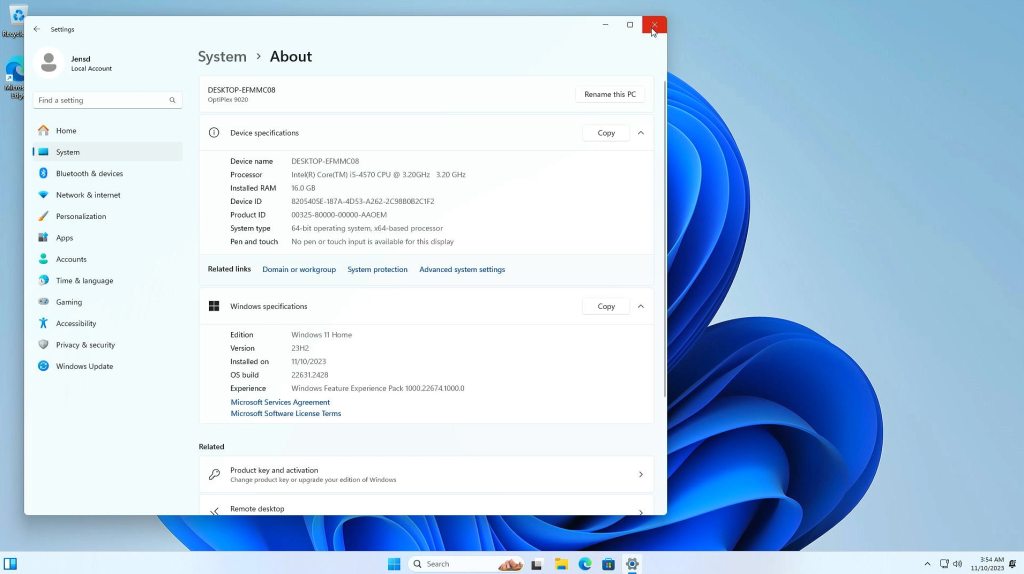
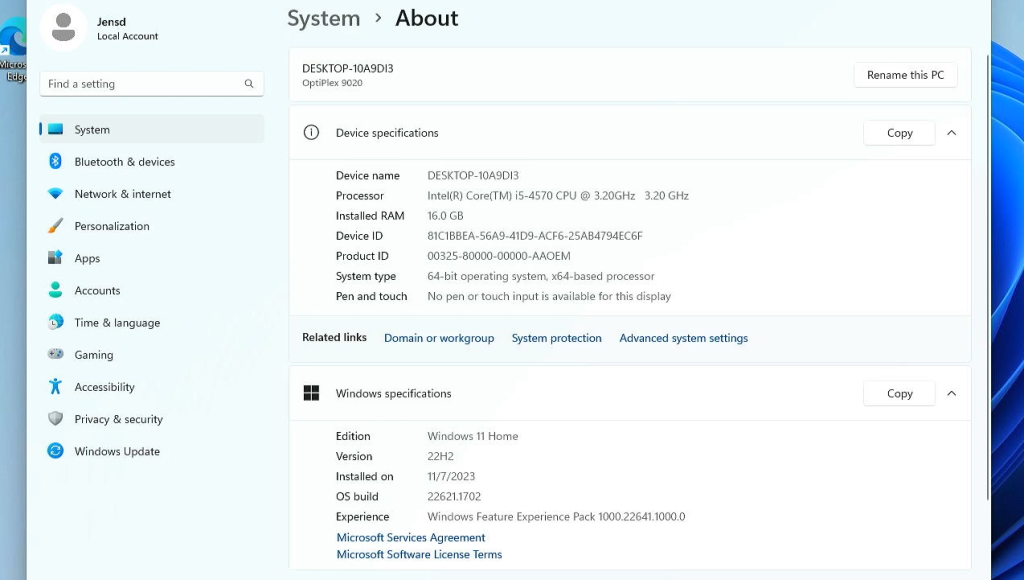
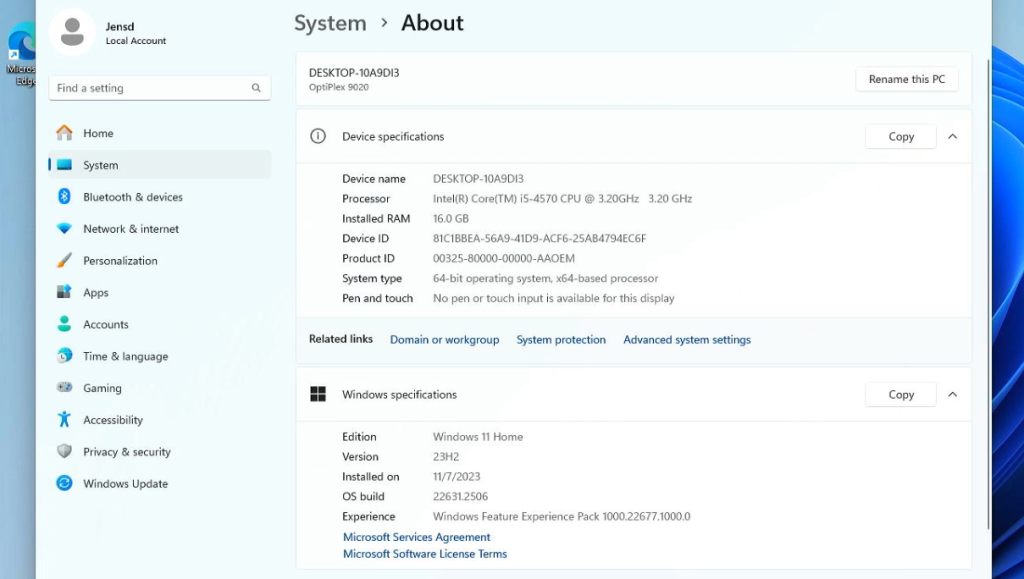
As you can see on the above screenshot, Settings > System > About shows us that we have Windows 11 23H2 on our unsupported hardware.
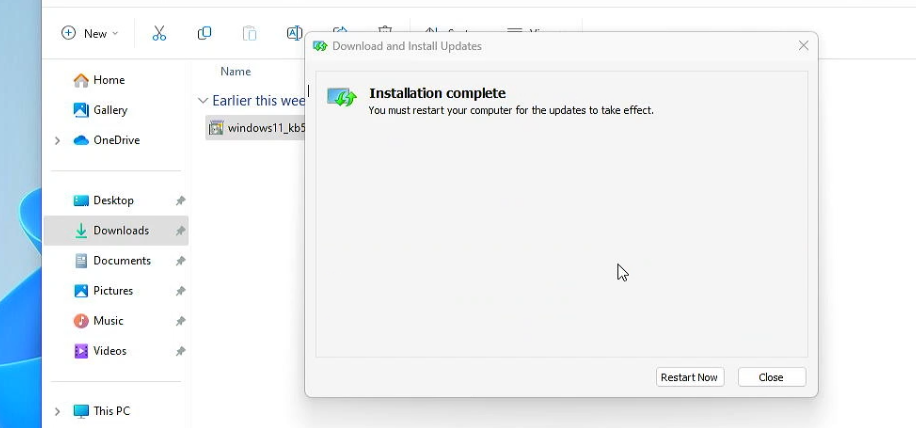
One last which is a good idea to do, is to install the missing drivers through Windows Update, so navigate to Settings > Windows Update and install all updates.
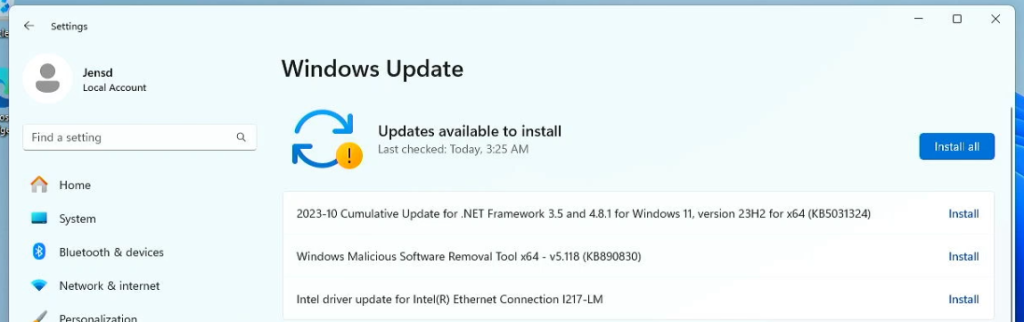
Once those are done, I would typically also install all optional driver updates. This can be done from Settings > Windows Update > Advanced options > Optional Updates > Driver Updates:

And this answers a question which you might have got right away as well. Yes, Windows updates do come in just fine on here.
Scenario 2: Upgrade of Windows 10 to Windows 11 23H2 on unsupported hardware
Scenario 2: YouTube Video
The second scenario is to upgrade an existing Windows 10 installation straight away to Windows 11 23H2, while keeping all your files, applications and settings. Although this process has been tested multiple times, it is still not a bad idea to have a proper backup if you will go through this, as there is never a 100% guarantee that nothing goes wrong.
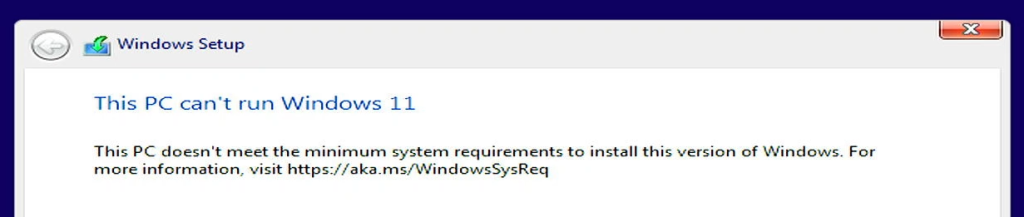
If you are in this situation, with all updates installed, Windows update will show you a banner to tell you that your machine does not meet the minimum system requirements to upgrade to Windows 11, as is also the case for my machine.
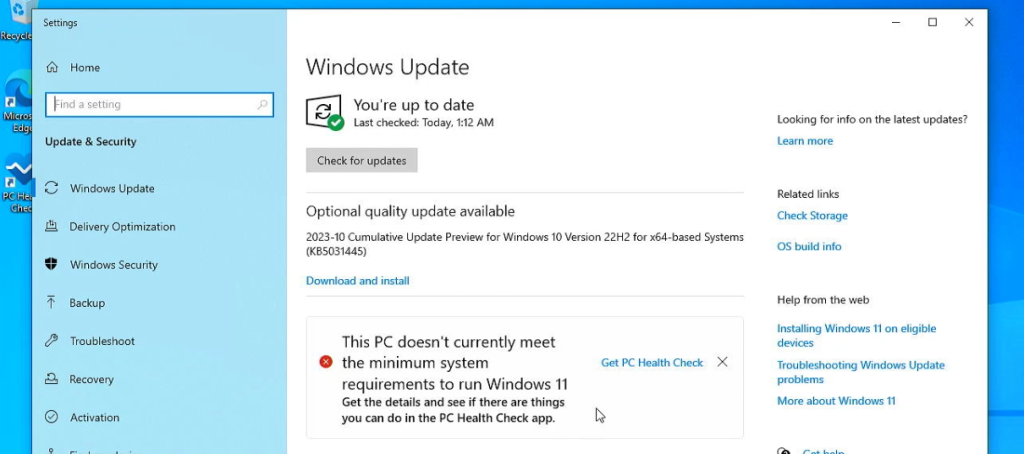
If you want to know exactly why it does not meet those system requirements, as the banner says, we can use the PC health application. In my case, it showed the following:
So we do not meet the requirements because we don’t have a TPM 2.0 module and our processor is too old.
Approach
To upgrade from Windows 10 on this unsupported hardware, we will need to download the Windows 11 ISO from Microsoft’s website, copy the contents to our SSD and modify a single file. This file is responsible for the hardware checks. After the modification, the installer will allow us to continue and upgrade to Windows 11 23H2 installation although our system is not officially supported.
Download the Windows 11 23H2 ISO
The first step is to download that Windows 11 ISO. This can be done from Microsoft’s website directly. So start your browser and head over to Microsoft’s Windows 11 download page: https://www.microsoft.com/en-us/software-download/windows11
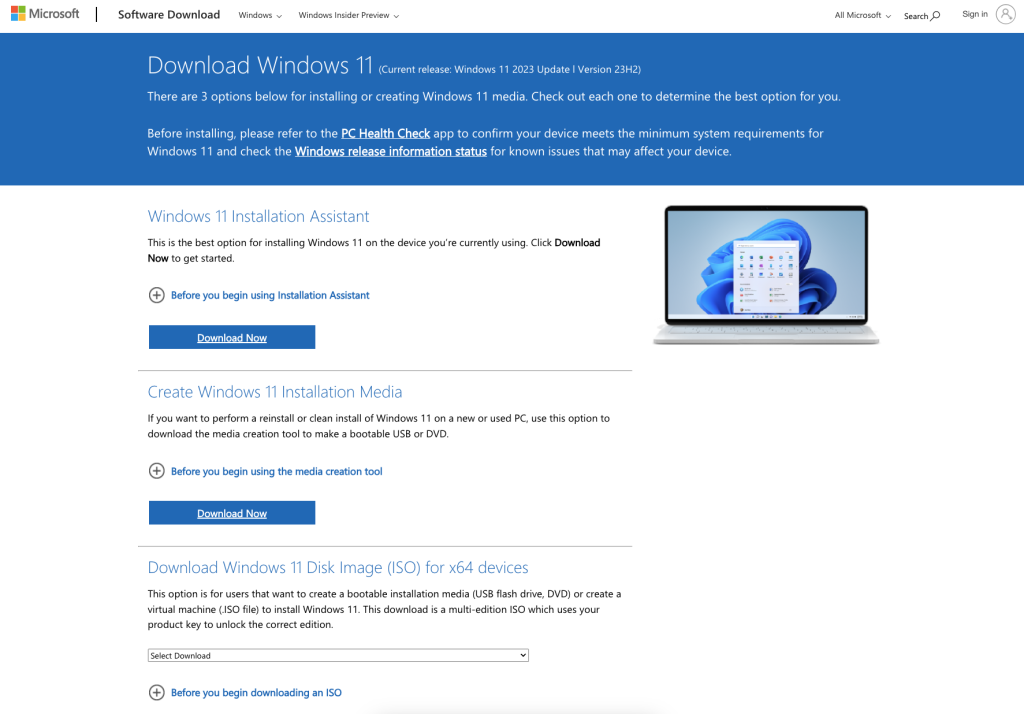
On the download page, you have several options. Earlier, for 22H2, I recommended to continue here by downloading the Media Creation Tool. For Windows 11 23H2, I noticed that if you use an ISO that is generated with that tool, it would only upgrade to 22H2 and you’d need to further work around the upgrade limitation from there. This is the same as in scenario 1, for a fresh installation.
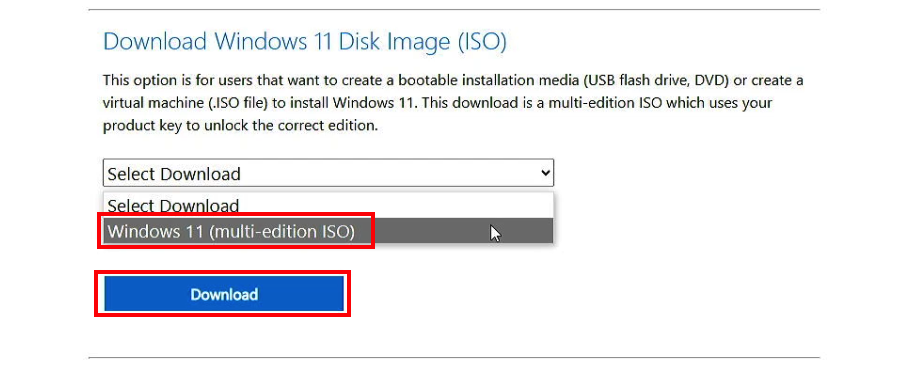
Since we need to download a lot anyway, it is easier and faster to instead download the ISO directly from here. So select the only option in the Download Windows 11 Disk image section: Windows 11 multi-edition ISO, from the list and click Download:
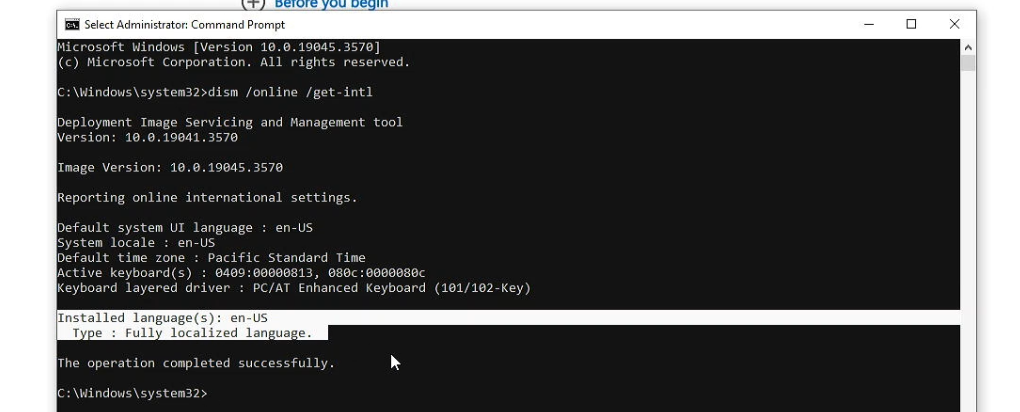
Now comes a tricky part. We need to select the correct language for the ISO and that’s more important than you might think:
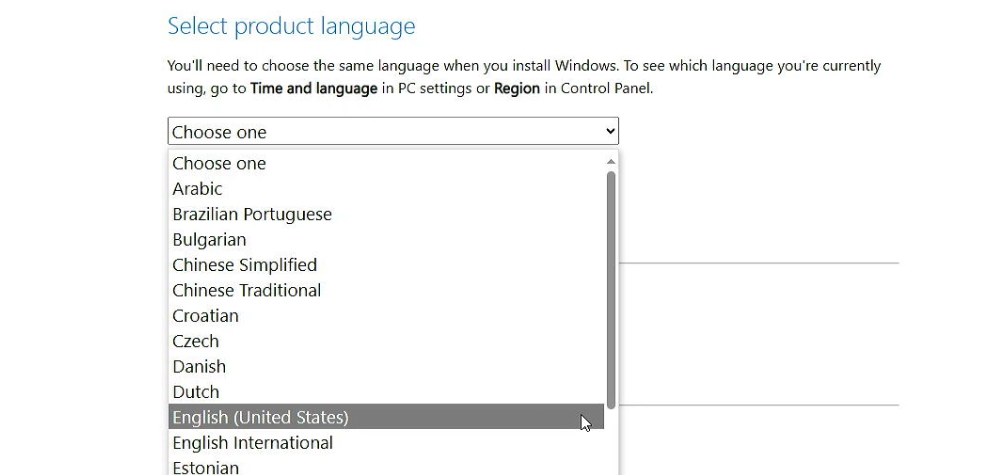
The language that you select here has to match with the base-installed language of your current installation. That does not mean it necessarily matches with the current display language. In case you would use the wrong langue for the ISO, when trying perform the upgrade, you will not see the option to keep your applications and data.
In order to check what is the base installation language, we need to launch a command prompt as administrator. To do so, press the windows key or the start button and type cmd. This should select the command prompt and click Run as administrator here.
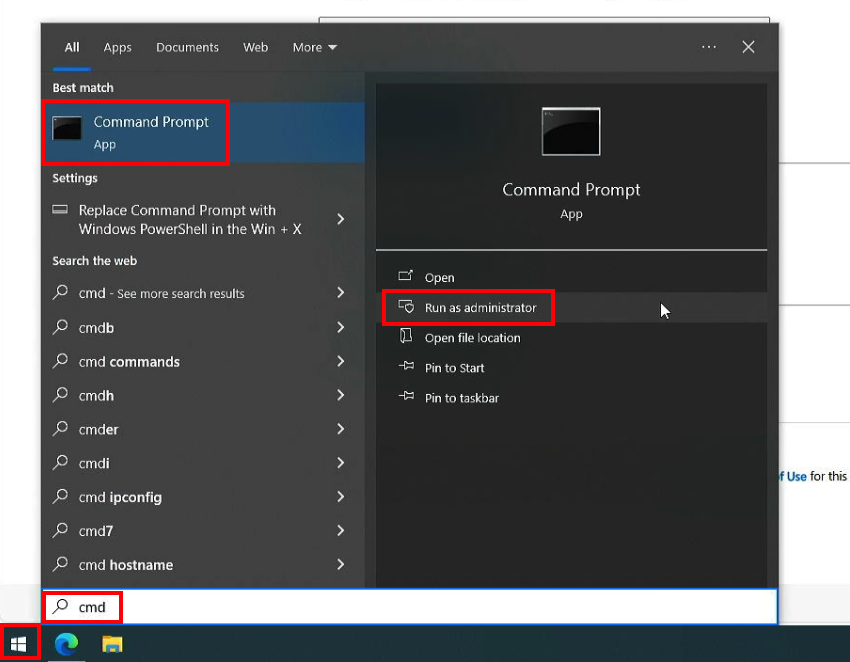
In the command prompt, type the following command and press enter:
dism /online /get-intl
In the output you get here, you should find the base language of your Windows installation. In my case it is English – United States, so that is the language I need to to select for the download:
After selecting the language, continue the process and wait for the 64-bit download button to appear, then click on it to start downloading the ISO-file:

As you can see, 64-bit is the only available option and that also means that there is no upgrade path from a 32bit Windows 10 installation. In that case only a fresh install will work for you and you will need to take a proper backup and go for scenario 1.
Once the download completes, we need to mount the downloaded ISO-file. This can simply be done by double-clicking on the file from where you have downloaded it:

This action results in an additional virtual drive with the contents of the ISO:
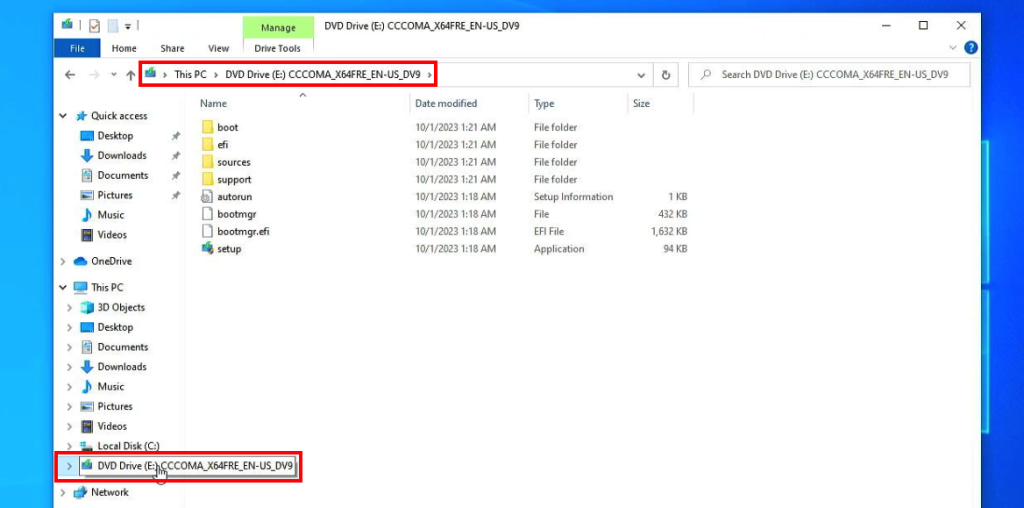
In case double-clicking wouldn’t work, you can also right click on the ISO and choose mount:

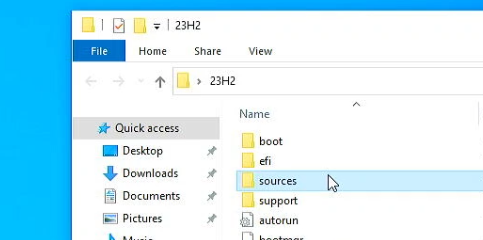
The mounted ISO, that virtual drive, has all required files right here but these are read-only. Since we need to modify that file to bypass the hardware checks, we need to copy the contents of the ISO to a new folder on the desktop first.
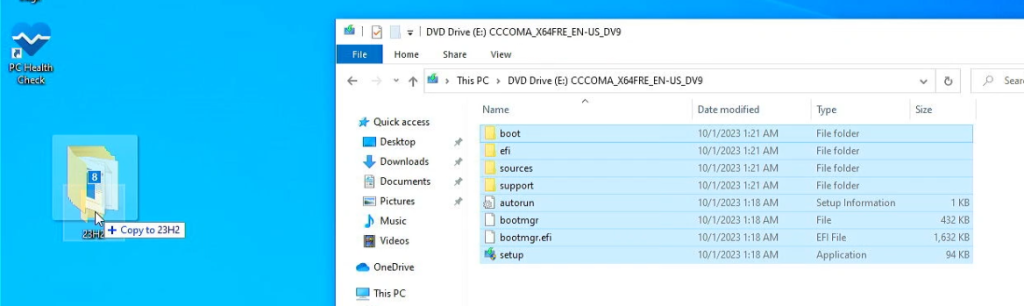
Start by creating a new folder on the desktop. I will call it 23H2:

Then we can simply drag all the files from the mounted ISO to that new folder:
After all files are copied, you can unmount the ISO file by right clicking on the virtual drive and choosing Eject:
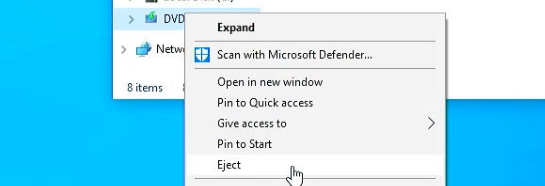
If you are low on space, you can also delete the downloaded ISO-file from your Downloads folder. From here we will only work with the copy on the desktop.
If now we would try to run the setup.exe without any further modifications, this is what we would see:
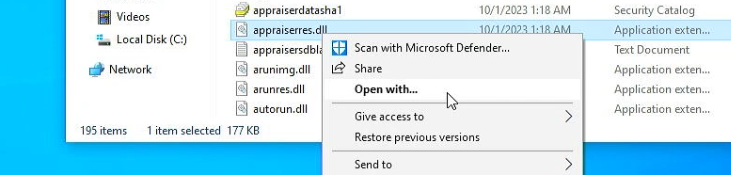
To work around that, we need to edit a single file in the copy that we did. So, navigate to the sources folder in the copy of the files on the desktop:
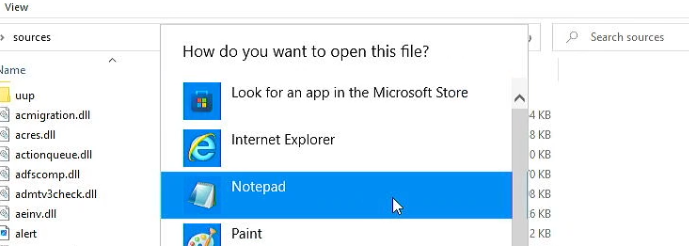
And look for a file called appraiserres.dll. Right click on it and choose Open with…:
Click show apps and choose notepad from the list:
This brings up the binary contents of the file. Just press control-a or go to edit – select all to select everything that is in the file:
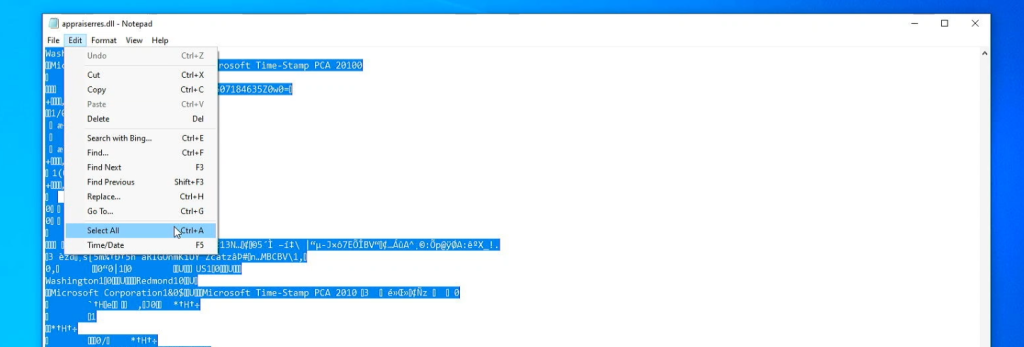
Then press the backspace or delete button to delete everything in there and save the file:

That’s all it takes to stop the hardware check from preventing you to upgrade to Windows 11, so lets navigate back to 23H2 and run setup.exe
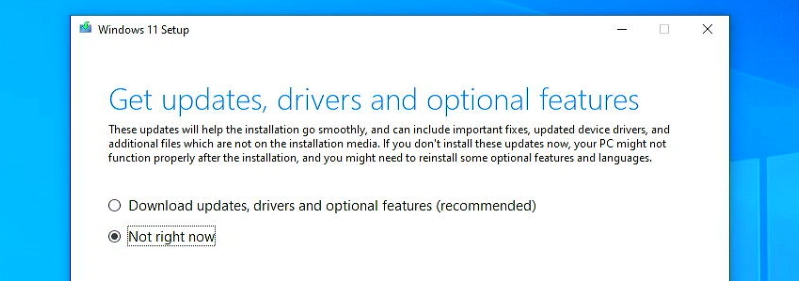
On the first screen, click on “Change how setup downloads updates”:
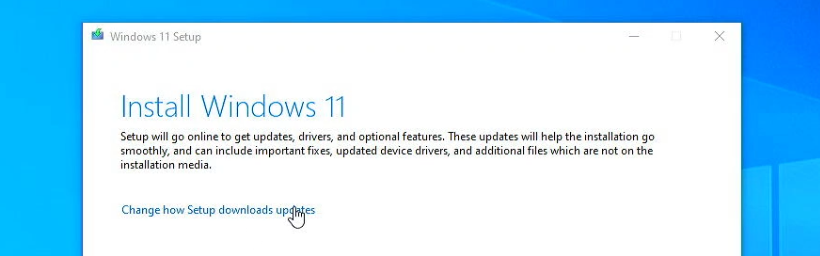
And choose for Not right now. This will prevent the setup from re-downloading that modified file:
Click Next now and as you will see, the “checking your PC”-step will only take a very short time to complete and does not complain, simply because we removed the contents of that DLL-file.
Once the license agreement comes up, click “Accept” and eventually you should end up with the Ready to install screen:
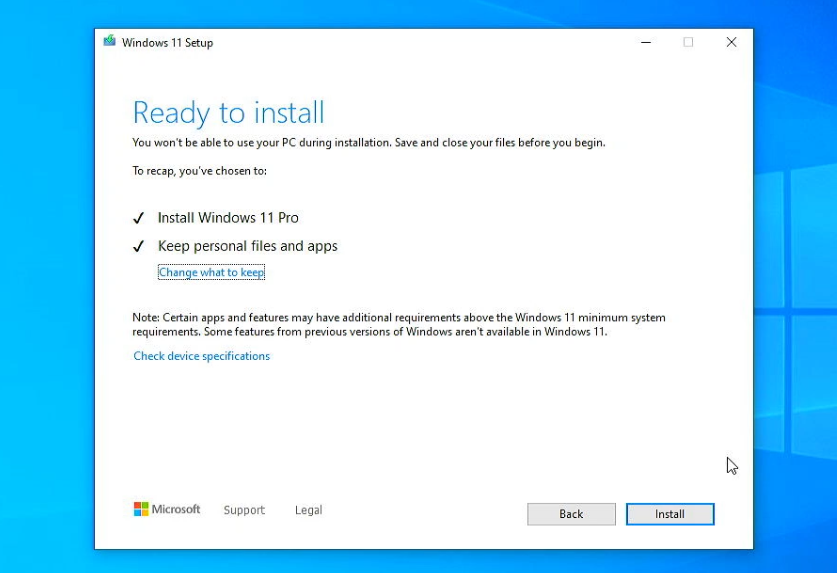
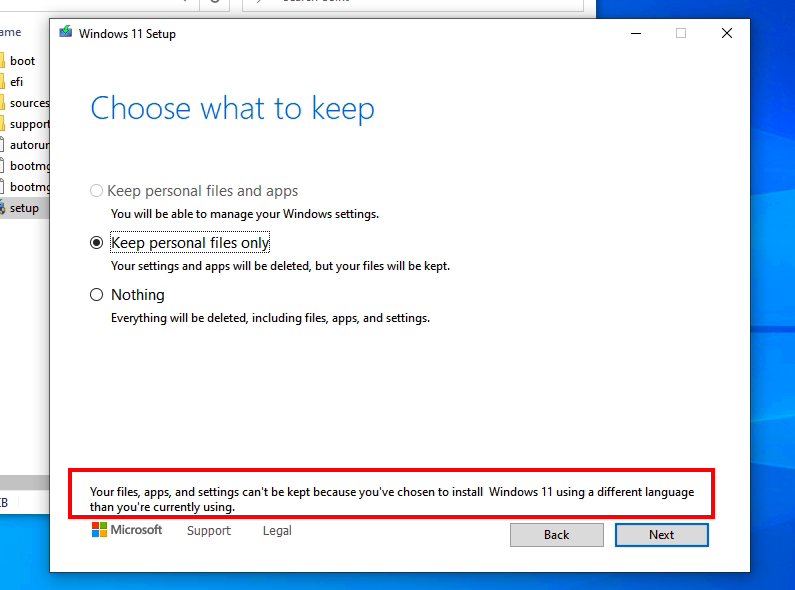
This is what you need to get here: Install windows 11 and keep personal files and apps. If you don’t get the option to keep your files and apps, something went wrong and in most cases this is due to the earlier mentioned mismatch with the language.
This is how that would look like and as you can see this is clarified as well at the bottom of that window:
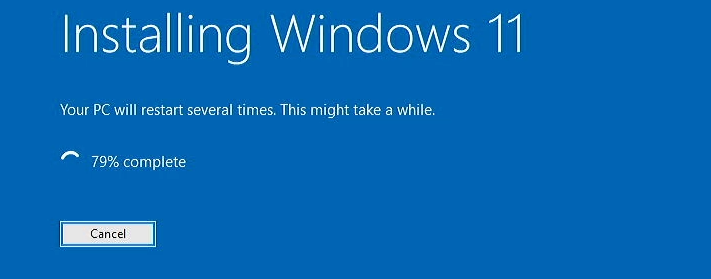
If you do get everything as expected, all we need to do now is to click “Install” and then be patient:
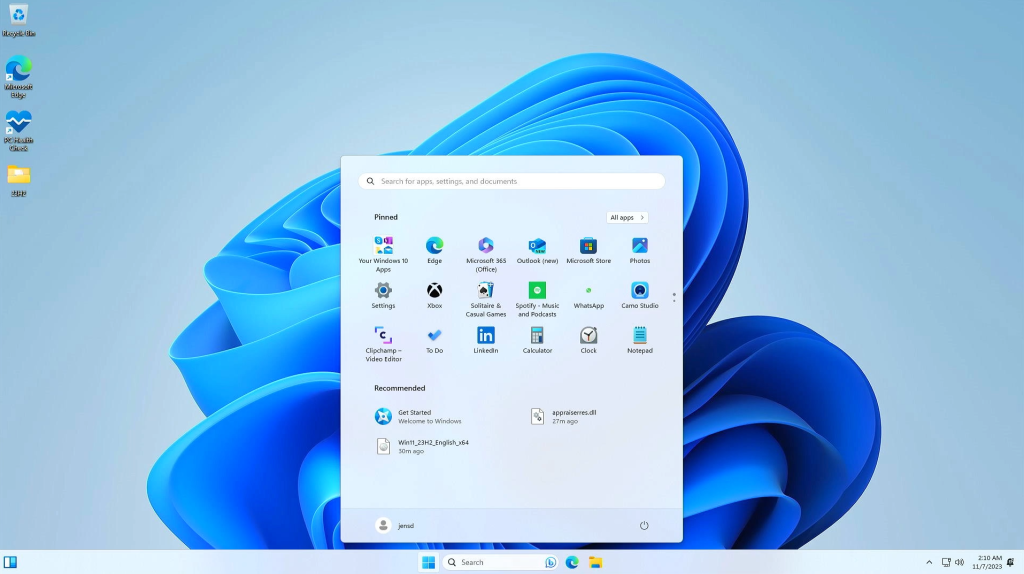
After roughly 30 minutes on my machine, we are greeted with our fresh Windows 11 desktop:
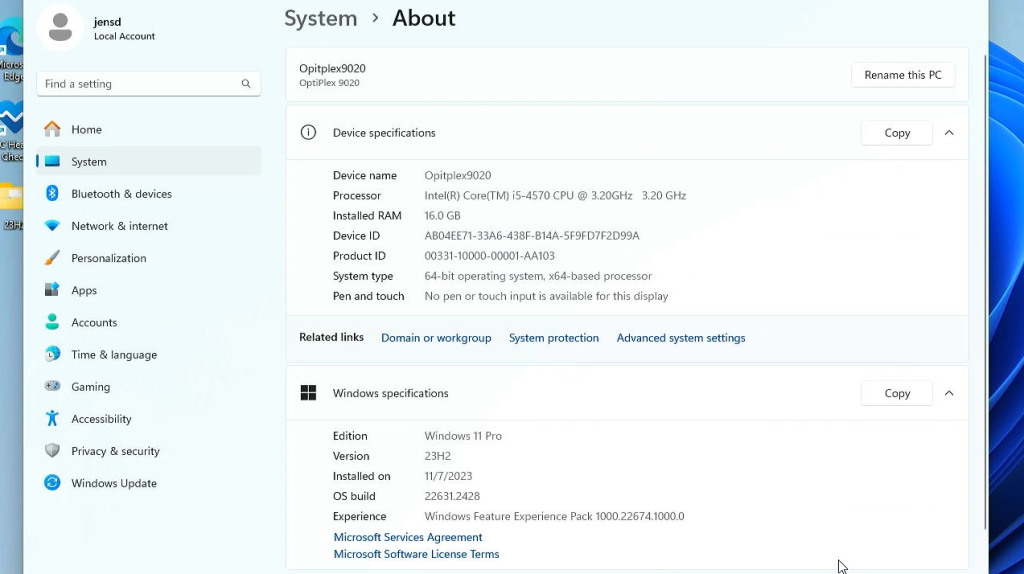
In Settings > System > About, we can see that we’ve succesfully upgraded our Windows 10 install to Windows 11 23H2:
At this point, you can delete the copy of installation files we made on the desktop as they are no longer needed and they take up quite some space. If you had kept the downloaded ISO file, you can delete that one as well.
Scenario 3: Upgrade from an earlier Windows 11 version to 23H2 on unsupported hardware
Scenario 3: YouTube Video
The third scenario is for an upgrade from an earlier unsupported version of Windows 11 toward the latest version: 23H2. There are two options here. The first is valid for most systems that are already on version 22H2. The second one works as well to upgrade from 21H2 directly to 23H2 or in case you would experience issues with the first option.
Approach
So far, minor feature and also security updates seem to come in just fine through Windows Update on unsupported hardware. Last year, with the release of 22H2, an unsupported system would not automatically update to that new version.
This time, for 23H2, the situation is a bit different. While for the previous version, the new features came in a single, large update package, which was not seen on unsupported machines, this time the updates are offered through a few separate update packages in Windows Update. With KB5031455 as being one of the important ones. It looks like these are being offered on unsupported and enable all the features that are in 23H2, at least for now.
What does not get offered to unsupported systems, is the 23H2 enablement package called KB5027397. This is a very small update that moves the version of the OS to 23H2. Fortunately, it can just be downloaded and installed manually on an unsupported system to bring that fully to 23H2. On a supported system, this is how that would look like in Windows update.
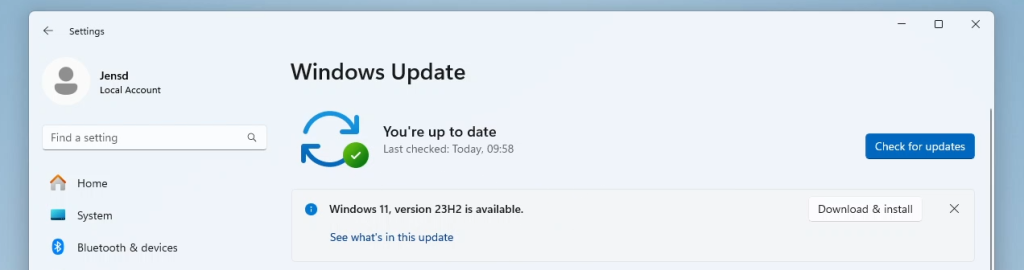
So in short, you should get the required updates automatically and once everything is up to date, you can manually install that enablement package to fully move your install to 23H2.
First option: Use Windows Update to upgrade from 22H2 to 23H2
Let’s start with the first and easiest option, using Windows update. The starting point, as you can see here in Settings > System > About, is Windows 11 22H2:
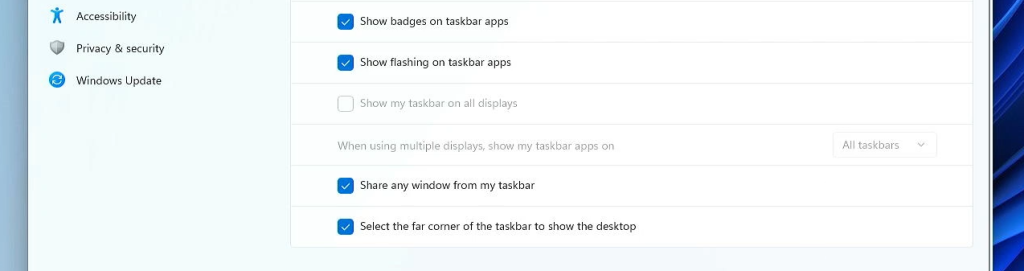
If we check some of the new features that would be present in Windows 11 23H2, like the ability to never combine or hide labels for taskbar items, at this stage, we can also see these are not available yet:
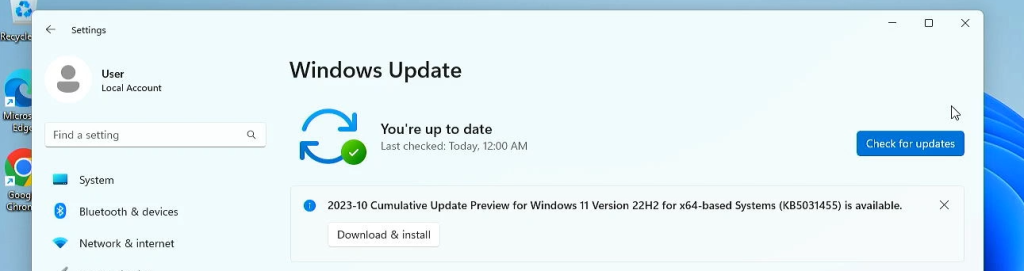
From here, all we need to do first, is to go to Windows update and check for updates. Then let Windows install all updates. We’re looking specifically for the update called KB5031455:

I did notice that in some cases, the update which we need gets installed automatically, without the need for further confirmation. Like in the screenshot above here. In other cases, you need to click Download and install on a banner like this one. Not sure why that difference exists:
Once the update is installed, restart the system as suggested and wait for the update to complete. After the reboot, you will see that Settings > System > About will still show your system on 22H2. Since we do have KB5031455 installed, that means that now all new features, despite the version still being listed as 22H2, are already available.
So if we go to taskbar settings, then taskbar behaviors, we do have the never combine option here:

The next step now, as mentioned, is to install that 23h2 enablement update. You can download the required file from here: https://jensd.be/download/windows11_kb5027397_x64.msu:

As you can see, this is a pretty small file. Once downloaded, just run the executable and restart the system once again when asked:
And after that reboot, if we go again to Settings > System > About, we can see that we are fully on 23H2 now:
2nd option: for systems still on 21H2 or when the first option does not work to get to 23H2
In case you would still be on 21H2 and want to upgrade directly to 23H2 or in case you experience issues with installing the updates that are mention above, you can also perform the upgrade in another way.
The way to do this, is by downloading the Windows 11 ISO from Microsoft’s website, copy the contents to our SSD and modify a single file, which is responsible for the hardware checks. This will allow us to continue and upgrade while bypassing the hardware checks.
In other words, this is exactly the same method as I explained in scenario 2 here. You can follow the exact same steps, including checking the language-version of your current installation to upgrade any Windows 11 21H2 or 22H2 installation to Windows 11 23H2.
Conclusion
This post became a lot longer than I had anticipated but hopefully this will help you to upgrade your system all the way up to 23H2 on your unsupported hardware.
Pingback: Install Windows 11 on unsupported hardware | Jensd's I/O buffer
Thanks for this very clear and well-written set of instructions. Successfully updated on my Lenovo T440 from W11 21H2 to 23H2 with my apps and personal files intact. Good stuff!
Thank you for writing one of the best explanations of how to upgrade Windows 11 from various scenarios. I needed to upgrade from 21H2 but my Dell XPS-13 i7-7Y75 CPU 1.60 GHz isn’t on the approved CPU list. I had set HKEY_LOCAL_MACHINE\SYSTEM\Setup\LabConfig BypassCPUCheck to 1 and found when I performed the upgrade, it never complained about unsupported hardware without the need to modify the DLL. I did note that after the upgrade, the HKEY_LOCAL_MACHINE\SYSTEM\Setup\LabConfig key was deleted.
Somehow my Windows 11 install is English International, though I live in the US. If you hadn’t the notes about checking the language before the installation I wouldn’t have thought to check for this or understand why my apps weren’t being upgraded.
Hi, thx for this! Would you know any workaround to upgrade from 21H2 to 23H2 on a Windows 11 installed on a USB flash drive? I have tried your scenario two above, but it unfortunately did not work around the flash drive check – and upgrades also fail via Windows Update. Thanks,
thank you, awesome post
Thank you Jens ! The article helped. I was trying to upgrade a 22h2 VM (without TPM configured, a restriction required for Dell Image Assist Mastering). I hoped several days to get the enablement upgrade via windows updates, but no success there.
Installing the “clean” Win11_23H2_English_x64.iso, downloaded via the Mediacreationtool worked. (your scenario 2)
But in the end, I chose to use your enablement upgrade file (which by the way i could not find in the windows catalogue ?) windows11_KB5027397_x64.msu. (without first installing KB5031455; my windows was up to date with the regular updates up until today) and bingo…
Very detailed guide. This file helped me to upgrade windows11_kb5027397_x64.msu
Thanks.
The register updates shown below before initiating the upgrade did not work on their own bypassing TMP, CPU and SecureBoot.
The 2nd description did the job upgrading from 22H2 to 23H2.
Had following DWORDS with value 1 set for following registry keys:
HKEY_LOCAL_MACHINE\SYSTEM\MoSetup\
AllowUpgradesWithUnsupportedTPMOrCPU
HKEY_LOCAL_MACHINE\SYSTEM\Setup\LabConfig\
BypassSecureBootCheck
BypassTPMCheck
What if HP Pavilion Touchscreen Desktop Computer that I got? It has windows 10 and I am the only one to upgrade windows 11 and without it? My PC Touchscreen is crash. What did I do that?
Hoi Jens, denk je dat de upgrade vanuit windows 10 (met behoud van documenten) ook zal werken op een Acer Aspire VN7-791G-755C – Laptop?
Alvast bedankt voor het antwoord!
Upgrade (German version) on a HP Z420 without TPM 2.0 module went without issues, but prior to installation I got a warning message that I will not get updates, and this is what I actually experience. Windows update still offers updates for Win 10, not Win 11. Is there any way around this?
Awesome post!
The windows10 to 11 update helped me to get installed and upgraded to 23H2. But now I have trouble installing the 2024-02 cumulative update to 23H2. Any good suggestions?
Thank you very much. I tried it and it worked for me.
At the out set I thank you very much for the splendid service. you have explained (video as well as written instructions ) in detail and in very easy steps . I followed your guidance and upgraded today, my windows 11 21h2 to 23h2 very easily .
Pingback: Upgrading from Windows 10 to Windows 11 | Ray Woodcock's Latest
I’ve been following your blog for a while, and it keeps getting better!
Nice to hear, thanks!