
The last official Apple-supported operating system for the classic Mac pro 1,1 or 2,1 is OS X Lion. With some workarounds it is possible to go up to OS X El Capitan but that’s where it stops. Since El Capitan got released back in 2015, most software developers dropped support for it a while ago and as good as all popular tools and applications are no longer running on El Capitan. As a valid alternative to macOS, Windows is an option here. This post covers how to get Windows 11 on your Mac Pro 1,1 or 2,2, which will allow you to install the latest software versions and get the latest patches and updates.
YouTube Video
If you are interested, I also created a few YouTube video from this blogpost. If you prefer classic text, you can just follow the rest of this article:
Introduction
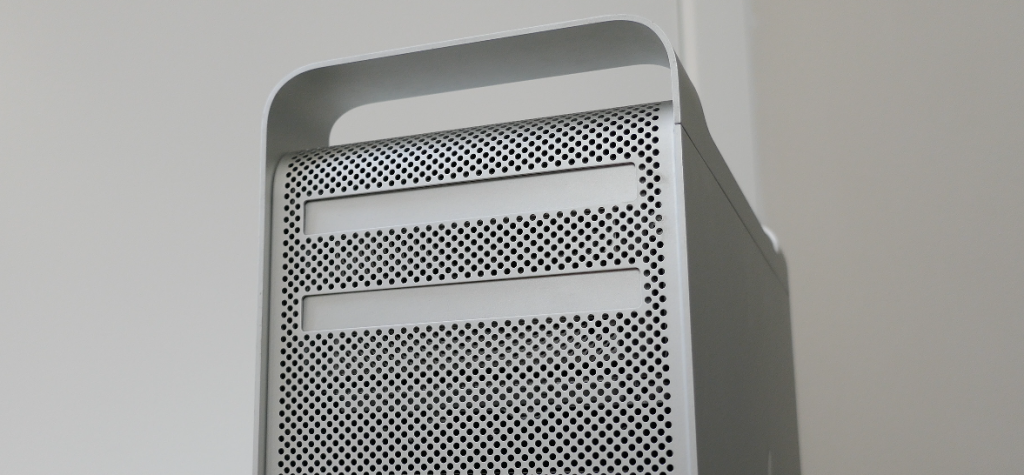
In this post, the plan is to try and install Windows 11 on a Mac Pro 1,1 or 2,1, which is up to 15 years old at the time of posting as it got released back in 2006.
Apple is more or less releasing a new operating system every year and that results in dropped support for older OS versions from most software developers. As good as all popular tools and applications no longer run on El Capitan. This is not only annoying but might also expose you to security risks. That’s why running Windows 11 on this hardware is not such a bad idea.
Obviously running Windows 11 officially not supported on this hardware but if you’ve looked at some of my other posts or YouTube videos, that’s exactly what makes things interesting.
One thing that is different from a regular PC is the BIOS or better EFI. In short, this is the piece of code that is responsible for initial hardware support and launching the operating system. This machine has only 32 bit EFI support and that was also the reason why Apple dropped support for this device so soon. Versions newer than OS X Lion support only 64 bit EFI.
Part 1) Prepare a Windows 11 Installation DVD for the Mac Pro 1,1 or 2,1
We will install Windows 11 the oldschool way by booting from DVD. Windows is able to handle the 32 bit EFI in theory but since Windows 7 there are some issues with the initial boot message, when trying to boot from DVD. Without any modification, it will either be stuck at “Press any key to boot from CD/DVD” or “Select CD-ROM Boot Type“
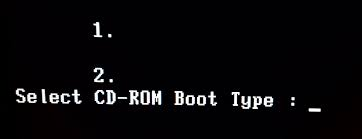
Pressing that any key or choosing a 1 or 2, to boot from the DVD needs a very very specific timing to work and it has driving people crazy.
Fortunately there is workaround for this issue. Simply by changing the way that the DVD will boot. Instead of showing the boot menu, we can let the DVD boot directly into the installer.
To do so, I will use a Windows-based machine. There is probably a way to accomplish this on Mac as well but that would make things complicated. Since we will boot from DVD, you will also need an empty DVD and obviously, the PC you’re using needs to have a DVD writer.
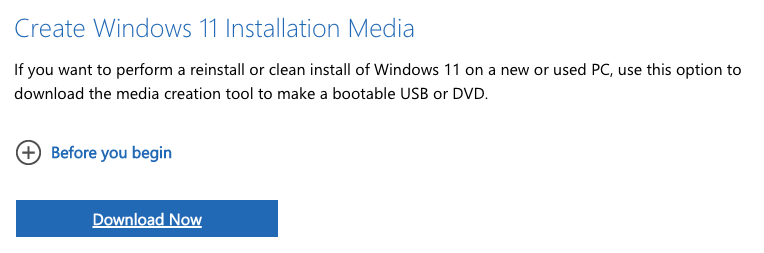
Step 1) Download the ISO with the Media Creation Tool
As a starting point, we need to download a recent copy of the Windows 11 ISO. We can do so with the media creation tool from Microsoft’s website: https://www.microsoft.com/en-us/software-download/windows11
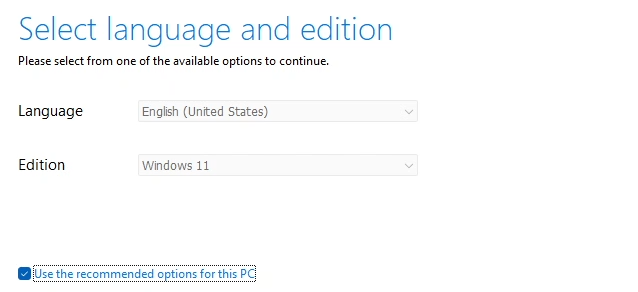
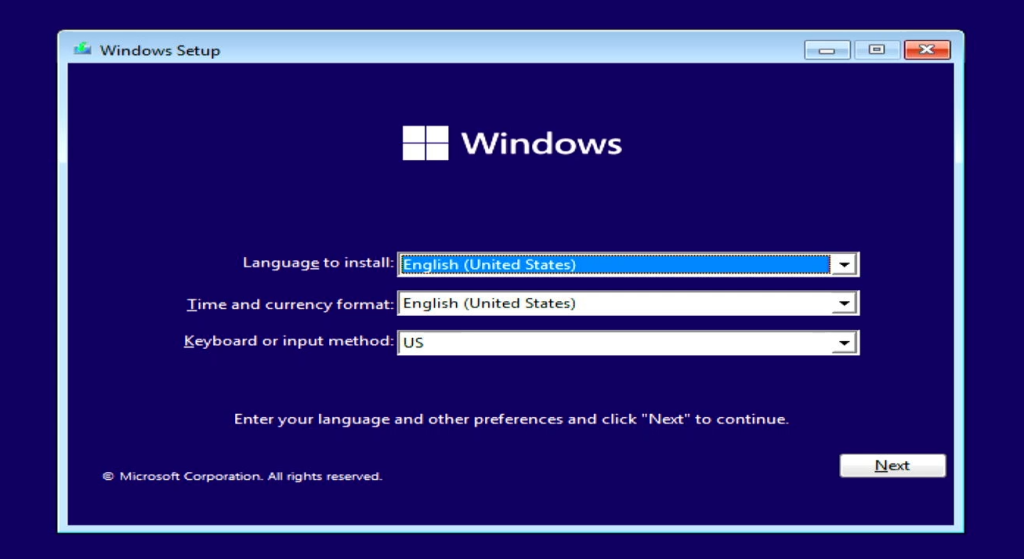
Download and start the Media Creation tool. Then accept the licensing terms and select the language:
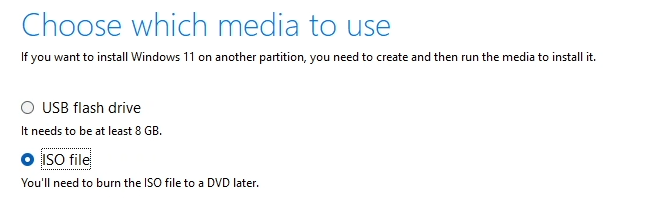
Click Next and choose to download the ISO in the next screen:
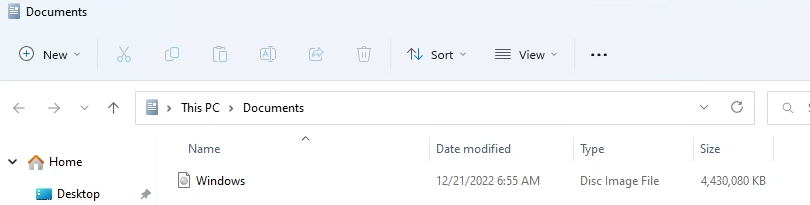
Continue and wait for the download and creation of the ISO to finish. As a result, you should have a Windows.iso file:
Step 2) Extract the ISO to a folder on your PC
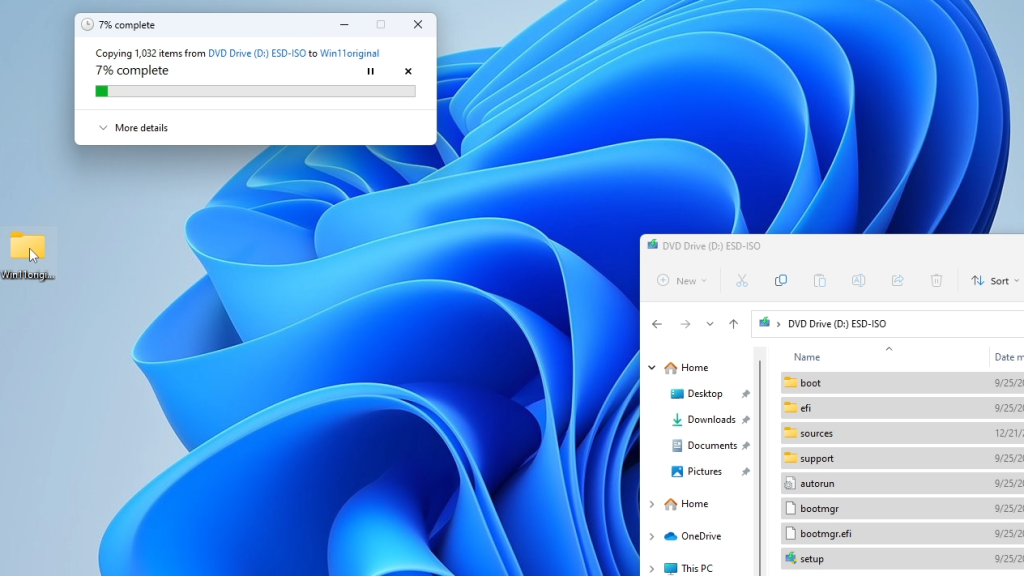
The next step is to extract the contents of the ISO into a folder which we will use as source for the tool. I created a folder called Win11original on the desktop. Then we can mount the ISO by double-clicking on it or right click then mount and copy all files from the mounted ISO to the folder:
Step 3) Create a modified ISO with a single boot option
To create the new, modified ISO, we will need a tool from Microsoft called oscdimg. You can download it from here: https://jensd.be/download/oscdimg.exe.
This tool allows to customize a Windows install and generates a new ISO with the changes. You can find documentation for it over here, in case you’re interested: https://learn.microsoft.com/en-us/windows-hardware/manufacture/desktop/oscdimg-command-line-options?view=windows-11
To make things easy with the paths to use, I copied the oscdimg.exe file to the desktop and also created another new folder called Win11modded. This one will contain the new ISO file as output of the tool:

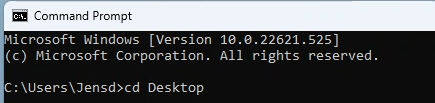
Now All preparation is done so we can open a command prompt and navigate to the Desktop:
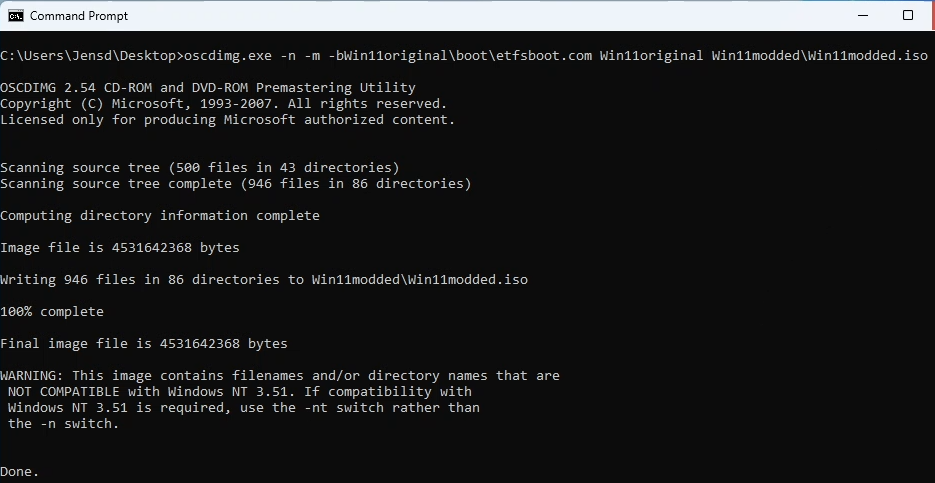
The next command will instruct oscdimg to generate a new ISO image. The command line options instruct to boot directly into what is called the “El Torito File System Boot” or etfsboot.com instead of that broken boot menu.
This is the full command:
oscdimg.exe -n -m -bWin11original\boot\etfsboot.com Win11original Win11modded\Win11modded.iso
The rest of the arguments are the source of the files, which is that Win11original folder and the destination, Win11modded.iso.
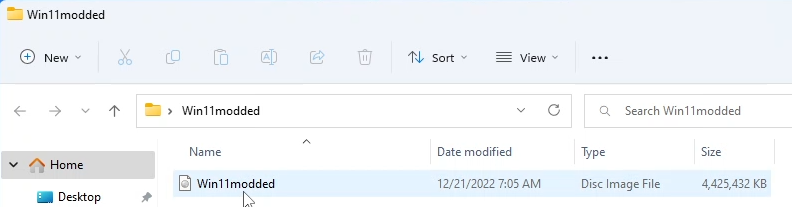
After the command completes, we can find the modified ISO in the folder we created (Win11modded):
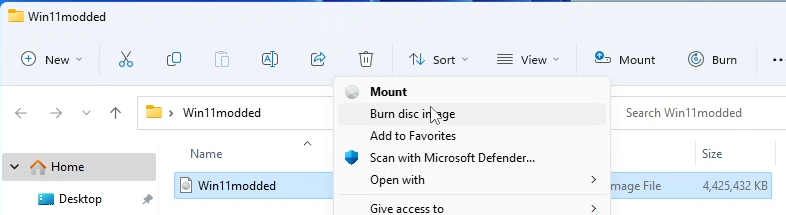
Step 4) Burn the ISO to disc
All that’s left to do on this PC, is to burn this ISO to an empty disk. In Windows you can just right click the Win11modded.iso file, choose “Show more options” and click on Burn disc image:
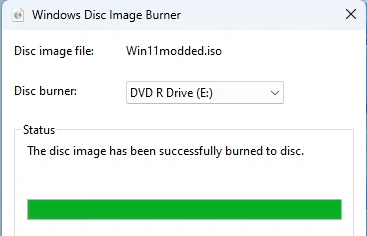
It was a long time since I did that to be honest. Probably that’s a good thing. After some patience, if all goes well, the process finished and the ISO image is now succesfuly on the disc:
Part 2) Install Windows 11 on the Mac Pro 1,1 or 2,1
Now that the DVD is ready, we can use it to boot from it on our Mac Pro. Simply insert the disc in the DVD drive and reboot while holding the Alt or Option key on the keyboard.
For this post, I removed all other drives present in the system and just kept one fresh SSD on which I will install Windows 11. Depending on the other drives present in your system, the boot menu should pop up and show you the option to boot from the DVD:

Just press Enter here and if all goes well, after some patience and a lot of noise from the DVD drive, the Windows installer should show up. During my test, this took over 3 minutes:
Here we can just walk through the Windows installation like on any other PC. All we need to do different, to work around the unsupported hardware, is to apply a workaround. I’ve documented that before in a separate post: https://jensd.be/1472/windows/install-windows-11-on-unsupported-hardware.
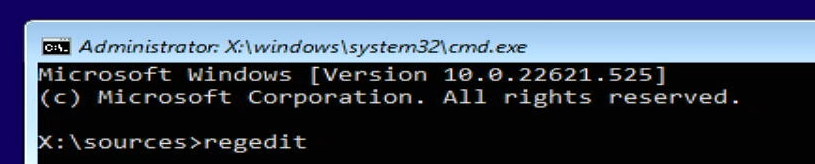
Click Next in the first screen after selecting your location and keyboard layout. On the “Install now” screen, open a command prompt by using Shift + F10 on the keyboard.
In the command prompt, type regedit and press Enter, to open the registry editor:
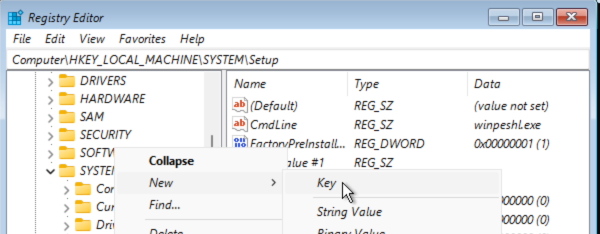
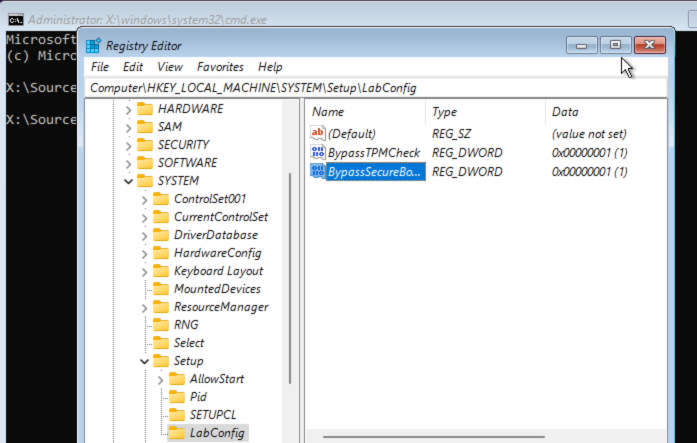
In the registry editor, navigate to: Computer\HKEY_LOCAL_MACHINE\SYSTEM\Setup and add a new key there called LabConfig. To do this, right click on Setup and choose New > Key:
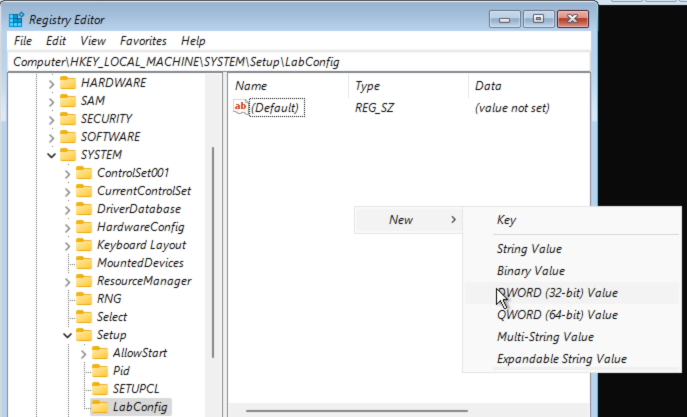
Give it the name LabConfig and in the key, right click and choose New – DWORD (32-bit) Value:
Give the name BypassTPMCheck to this DWORD. Repeat these steps a second time but nowgive the name BypassSecureBootCheck. Then double-click on each of these two DWORDs and change the value to 1. As a result, you should get the following:
Now that’s done, we can close the Registry Editor and the command prompt we opened and continue with the install by clicking “Install Now”
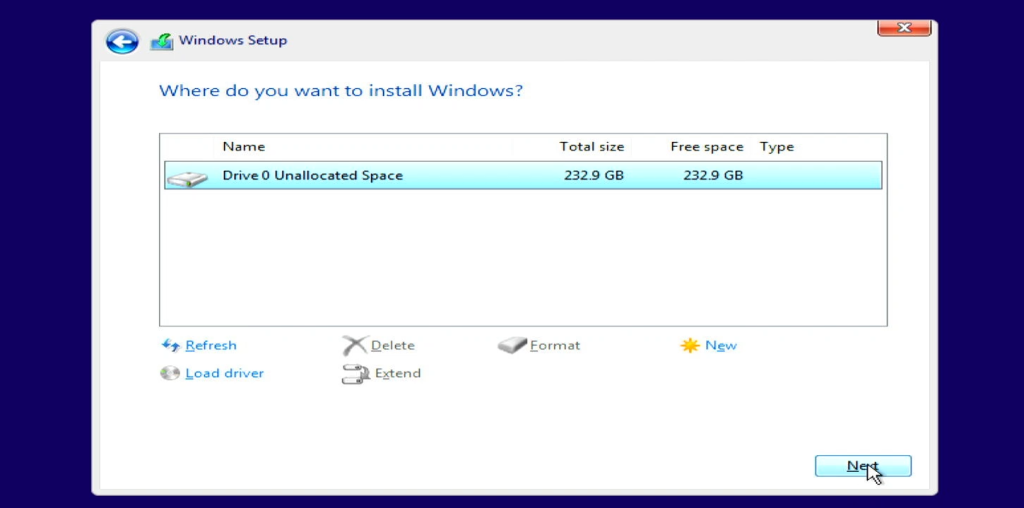
In the next screens, choose: “I don’t have a product key”, if asked. It can be added later. Accept the license and choose for: “Custom: Install Windows only (advanced)”. You should end up with the “Where do you want to install Windows?” dialog eventually:
As I only have that single SSD in here, I can select that drive and click Next. If you kept your other drives in the system, make sure to select the correct drive where you want to install Windows to:
The rest of the installation is pretty much the same as any other Windows 11 installation. First, the installer will copy the required files to your machine and then reboot. It took around 9-10 minutes between clicking Next on the above screen and the first reboot in my case.
It is possible that during that reboot, the Mac tries to boot again from the DVD. If that is the case, quit the installer and hold Alt/Option to show up the boot menu.

From there you can choose to boot from the hard drive or SSD (left icon) or eject the DVD and continue.
If al goes well, you will end up with the initial setup dialog:

Here, again, this is just like any other regular Windows 11 installation. You can continue through these steps as you would usually do. In case you’re interested in skipping the need for a Microsoft account, have a look at this blogpost I did about that: https://jensd.be/1799/windows/avoid-the-need-for-a-microsoft-account-on-windows-11.
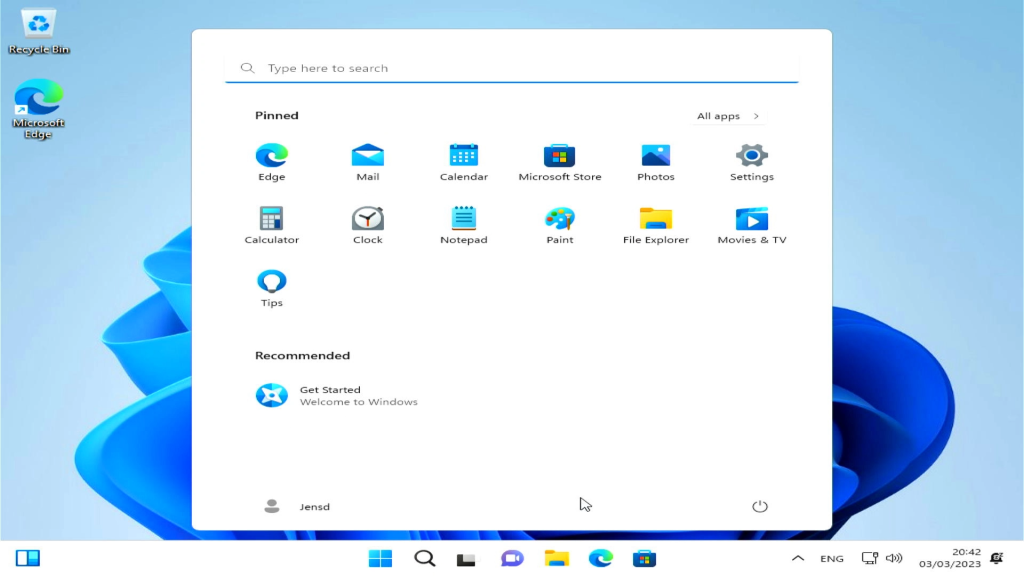
Once you went through all steps, you will need to be a bit more patient again but eventually you should end up with a fresh Windows 11 desktop:
Part 3) After the installation
Windows Update
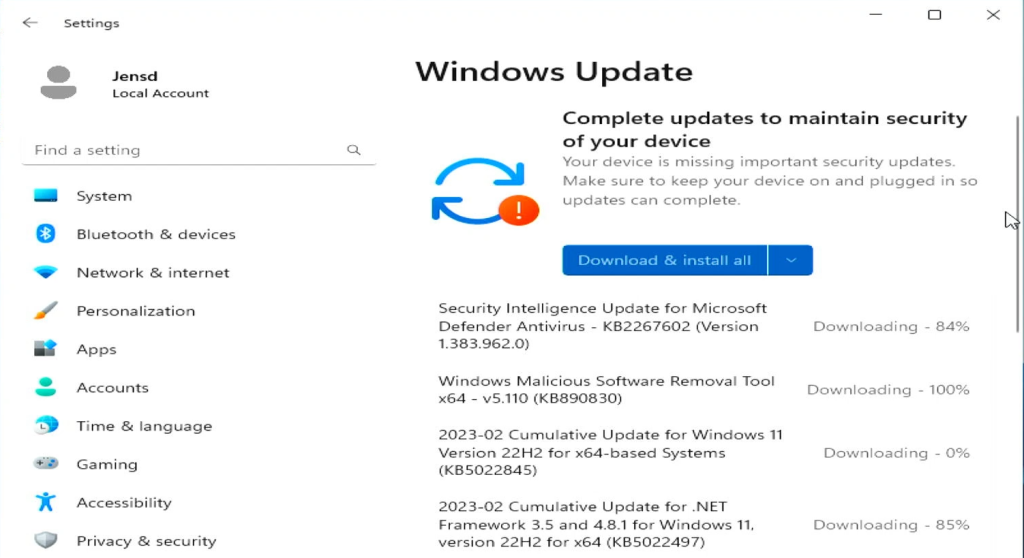
As you can see in the previous screenshot, there is still some work to do. Mainly this is related to installing drivers. The easiest way to do this is by running Windows Update and install all optional drivers it suggests:
So go to Start – Settings – Windows Update – Check for updates and install all proposed updates:
Video card and drivers
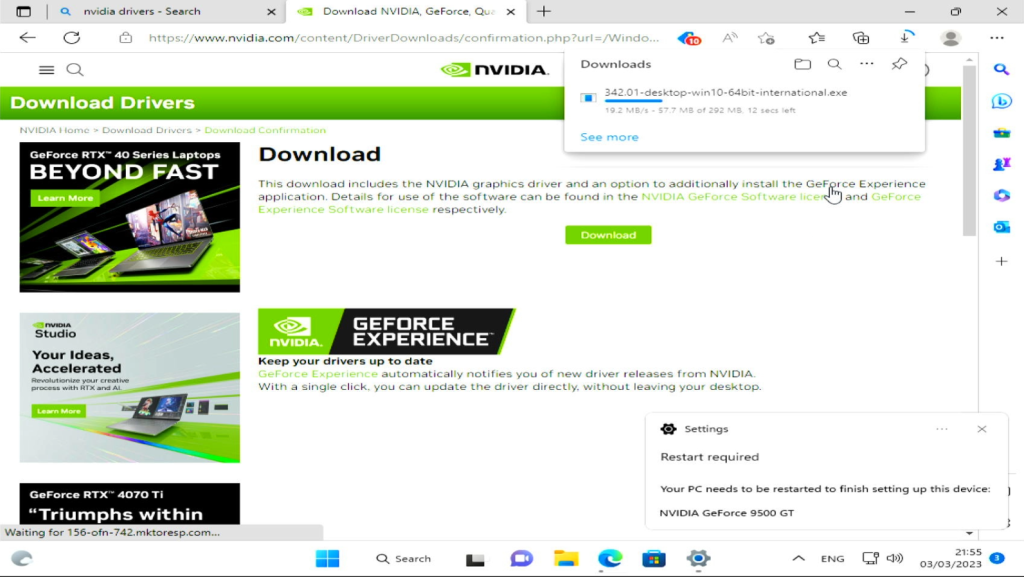
One issue I came across is that I did not manage to find drivers for the original video card. This is the Geforce 7300GT with 256MB. I tried to install the drivers through Windows Update and by running the driver tool from NVIDIA but without success.
I didn’t really try very hard as I had another video card with better performance anyway, a NVIDIA GT120:
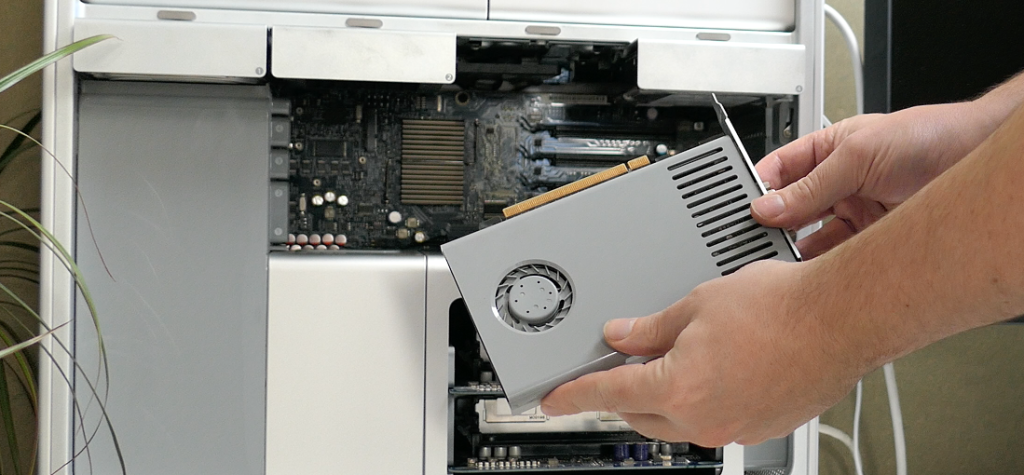
After shutting down the Mac and installing that card, I downloaded the drivers from NVIDIA’s website. Even during that process, Windows Update already installed the correct driver:
Another reboot later, everything looked as expected:
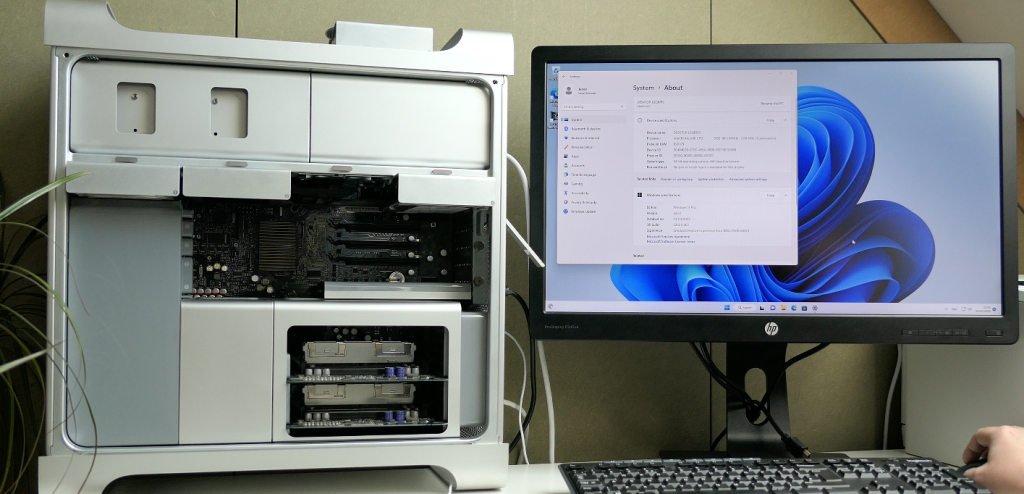
Conclusion
After going through these steps, which were not really hard, we managed to get Windows 11 running smoothly on the Mac Pro 1,1. Despite the age of the hardware, Windows 11 works pretty well so far. I can again install recent versions of the applications I want to use and take advantage of the latest patches and upgrades.
Still a bit strange that Windows became a better option for one of Apple’s top models but it definitely extends the life of this hardware.
Hi Jens… this is amazing if it works (for me). I’m currently clearing/moving files I need to an external 4TB hard drive before trying this on my MacPro 1,1 — I finally gave up with getting any sort of web browser to work with various cloud storage systems. SpiderWeb works but cannot access Google Drive due to outdated security functionality in that browser.
Questions:
• I have a Nvidia 8800GT card in mine so not sure what will happen for the drivers for this…. any tips?
• Would the install ISO work off a 32GB Flash Drive as well?
• I have 3 extra drives in the mac besides the 256 SSD boot drive, will Windows recognize those or should I format those using ExFat before trying this Windows install? Thank you in advance for any response!
1) Just install the latest NVIDIA drivers available for your card (normally Windows Update should do that for you already)
2) Booting from USB to install Windows 11 won’t work as far as I know
3) These should be seen under Windows, no need to format them in advance. If you no longer use them for something else, you can format them as ExFat or NTFS using Disk Management.
Hello, I already solved it, apparently one of the memory modules would be with some fault even though it recognizes it. and also the way they are grouped in the slots also influenced the fact that it only recognized 4 of the 8 slots.
Hi,
I have completed the installation, but the sound is very low. What is the audio device in macpro1.1? Or did you have the sound problem?
Hello, I was able to install windows 11 on my mac pro 1.1 2006, the only thing that happens is that it recognizes 4 of the 8 memory slots and I have modules in the 8 slots, besides I don’t know which slot it is recognizing. Do you have any idea of a possible solution to this inconvenience? thank you
My image file is 5.2gb big so was also wondering how else to make a bootable drive. I cant find dual layer dvd discs anywhere locally.
I’m currently struggling with this as well; I’ve created a Win11 ISO using NTLite with a filesize less than 4GB using these modifications:
– only Dutch and English
– TPM setup req removed
– IE (32-bit) removed; Edge (legacy) removed
– most metro apps removed (see below)
– removed all other editions
– removed amd64 from boot.wim for PE
– highly compressed (ESD instead of WIM)
– ?? a few small things I forgot ;-)
Maybe I will also try to put the installation directory on a Firewire external disk but I’m not sure it will boot.
Hey just out of interest is it possible to copy this same method for a 4.1/5.1 if all you want to have is a single copy of windows and no Mac OS? I see lots of talk of open core etc but is it really required? I don’t intend to use a Nvme drive, just a SATA SSD in a 4.1 that’s been flashed to a 5.1
If you plan to use only SATA, then the easiest way on a 4,1/5,1 is to boot from a DVD to install Windows 10 or 11.
Don’t boot from USB to install Windows on that machine though.
I did a video on exactly that subject recently, have a look here: https://youtu.be/yZPKLmmjKSQ
Thank you for the guide.
A problem I ran into was that I couldn’t start the installation process if there were other drives present. I would get error messages when trying to select the disk, and was unable to create new partitions etc.
I disconnected the drives that contained my OS X installs and started again and it worked first try.
I went thru all the process, created the DVD but my Mac Pro 1,1 won’t boot. It doesn’t recognize the DVD as a bootable. What do I miss?
Installed Windows 11 on Mac Pro 2,1 with 64GB memory and Quad 3.0 processors. For graphic I use HD7950 3GB. I have question about Macs Fan Control. Can I use it without Bootcamp drivers. Is anyone try this? If someone need version with TMP Off I can send it (mail me on dieselnino@gmail.com)
Hi jensdbe i used the same command as yours, same file names but I’ve go error 87 error I am on windows 11 latest update
The most common reason you get an error 87 while running the DISM command is that you’ve typed the command incorrectly. You may have added an extra space or removed a space where it’s absolutely required. To get around that, enter your DISM command just as it should be: with a single space between your parameters.
I keep getting it to say that Im missing D:\Sources\install.wim and ehen I did the process again and made another DVD and this one says I’m missing D:\Sources\install.esd. I can’t find out what I did wrong. I did some ejecting the disk as it tried to load and got to where it wanted to find drivers, couldn’t get pass that cause it couldn’t find any.
Windows23H2 is not working
I tried windows22H2
it’s working
Hello, I know this remarkable and informative post is several months old, but I am struggling to find a Windows 11 iso that will fit on a DVD, and I am looking for help.
Can anyone point me to an iso that will fit a regular DVD or share it with me?
Thank you.
Hi Jens,
Great tutorial.
Given that I don’t mind having no boot screen, can I use any (or pretty much any:) ) PC video card?
I’d appreciate your help with that.
Best regards,
Tomek
Hi I was struggling with the same issue. I tried to solve it using an old ide HDD I used instead of the original optical drive. I managed to get the HDD recognized under snow leopard, I formated it, paste the win11modded file but I cannot managed to boot onto the ide HDD. I know that it can boot on ide HDD because I managed to boot on another older ide HDD I had in my storage with windows XP installed on it, and that worked fine (without any modifications)! I will retry to install from ide HDD using windows 11 22H2 instead of 23H2 or even using W10… BR, To
This process worked fantastic on my 2006 Mac Pro 1,1, with a couple adjustments:
#1: After booting from the DVD, all I saw was a blinking cursor in top left corner. It appeared stuck, like it’s not going to boot, but just WAIT 5-10mins, it will eventually boot into the setup.
#2: After booting the DVD and clicking “Install Now” you will probably get an error:
“Windows cannot open the required file \Sources\install.wim. Make sure the files requires for installation are available, and restart the installation. Error code: 0x80070026.”
The install.wim file is too big for most DVDs & USBs to handle. So you have to split the file into multiples. Run Command Prompt as Admin, then run this command:
dism /Split-Image /ImageFile:E:\Win11original\windows\sources\install.wim /SWMFile:E:\Win11original\windows\sources\install.swm /FileSize:3500
Change the drive letters to whichever drive you are working from. Once done you will now have two files: “install.swm” and “install2.swm”. Yes the file extension is different, this is normal, Windows setup is smart enough to know the file is split and will read both during install. Delete the original install.wim file.
Then you can proceed with the document starting with Step 3 of modifying the boot loader, etc.
#3: During the Windows install, if you get error 0x80300024 when selecting the drive to install onto, or trying to delete/format it, shut down the Mac, remove ALL other physical drives and try again. (You do not need to move your drive to Bay 1. Mine was in Bay 2). After the install is completely done, you can put your hard drives back into the system.
Hope this helps. Thank you for the guide and for helping us extend the lives of these units!
“Change the drive letters to whichever drive you are working from.”
what if i put the Win11Original on desktop
how should i change the drive letters to? what would the command be?
please help, i dont want to mess with the system with command prompt. Thanks!
my modded file is 5.5 GB, cannot burn on dvd. what can i do? pls help
You could purchase a larger DVD. They make them in 8.5 GB sizes as well.
hello
Windows 11 installation was successful using the method above. After that you have successfully installed graphics card RX550. The overall power consumption of the Mac Pro was high.
While looking for a low-power CPU, I found the L5420 XEON that ChatGPT told me about. ChatGPT said it would be compatible
When I searched on Google, it said it was not compatible.
Is the L5420 compatible with Mac Pro with Windows? I’m curious
Im having issues getting my mac to load the boot dvd. After waiting about 3mins on ablank screen the windows logo breifly shows up then isappears and the mac reboots. been stuckin this look for a while. any help will be greatly appriciated.
did you ever figure out the problem im having the same problem now
I have an issue that the mac will only boot the Windows Install with the dvd drive in the slot, My SSD (Single) is in SATA port 4, marked by 4 on the metal cowling, do i need to move it to SATA 1?
Why is it necessary to use a Windows-based machine to prepare the installation media for installing Windows 11 on a Mac Pro 1,1 or 2,1?
Hi Jen
I just wish to thank you for creating such precise instructions to perform this install on this vintage hardware. I was fortunate to have a copy of the first W11 installation disk. My Mac 1.1 is on version 21H2. I have been using it connected to my 4kTV via HDMI for about 18 months now, and it has not missed a beat. For the video card I use an NVIDIA GeForce GT 730 which is perfectly ok for this machine. I upgraded the memory to 32GB and was careful to fit genuine Mac heatsinks to all the memory modules.
Thankyou
Mark.
Has anyone been able to get Windows 11 version 23H2 or 24H2 to work? I loaded version 22H2 but it won’t let me update to the newer versions. Thank you.
Just got Win11 working on a Mac Pro 1,1 (updated to 2,1) after 4 days of hell. DVDs and USBs failed, but this worked 100%:
✅ Used my M1 iMac with Terminal
✅ Installed QEMU via Homebrew:
brew install qemu
✅ Identified my SSD:
diskutil list
✅ Unmounted it:
diskutil unmountDisk /dev/diskX
✅ Used this command to emulate install:
sudo qemu-system-x86_64 \
-machine pc-i440fx-7.2 \
-cpu SandyBridge \
-m 4096 \
-drive file=/dev/diskX,format=raw,if=none,id=usbdisk \
-device ich9-ahci,id=ahci \
-device ide-hd,drive=usbdisk,bus=ahci.0 \
-cdrom ~/Downloads/Win10_22H2_English_x64v1.iso \
-boot d
⚠ Replace /dev/diskX with your SSD path!
Used a regular Win10/11 ISO (mine was Win10 22H2 x64 v1). Once setup files copied and reboot started → I shut down QEMU manually, ejected the SSD, plugged into Mac Pro → booted right up!
No USBs, no rEFInd, no patched ISOs needed. Thanks Jensd — you’re a legend (and chatgpt lol)
Thanks Alexg, I’ve gone through the same thing and have tried your method but I’m on a different setup and no success yet. If you could have shared an image of the drive just before you booted that would be amazing.
I plugged the SSD to the Mac Pro already so I dont have the image before I booted. Is that what you mean? which set up is yours? I had no clue what to do. I asked chatgtp the whole time. if you get my comment above put on that and say which set up you have it would give you new command lines for your terminal to do it.
I used a bare metal system, not a VM. Ran the installer from USB on an Ivy Bridge (3rd Gen) CPU, stopped it on the reboot and plugged it into the mac. But it didn’t recognise it holding down option. I used Rufus to make the Win11 USB and selected MBR and BIOS, as partition scheme and target system.
Based on the fact that a “pc-i440fx” is for sure BIOS – but I’m thinking some how maybe it still booted as UEFI. I’m assuming the Mac Pro needs a BIOS based install to work on its EFI boot?
I might try on older hardware still, only had a P4 on hand and Win11 install just got stuck on that.
Success! What worked for me was using your install method (boot and run Win installer until first reboot, then remove and boot drive in Mac Pro), using “Windows 11 Tiny 23H2 (22H2)” ISO on a Rufus bootable USB in an AMD Athlon X2 Laptop.
Rufus Settings:
• Partition scheme: MBR (Master Boot Record)
• Target System: BIOS
• Selected Add fixes for old BIOSes
• Selected remove hardware check, sharing questions and add local user when prompted.
Caveats:
• I didn’t try this with an older version of Win 11 official ISO, only the newest 24H2 and it didn’t work – wouldn’t boot installer on the AMD Athlon X2.
• One change I made on the Mac was updating the firmware to 2.1 before this, but I doubt that made a difference in it recognising the windows drive.
How did you upgrade to windows 11 from windows 10?
C:\Users\PowerUser\Desktop>oscdimg.exe -n -m -bWin11original\boot\etfsboot.com Win11original Win11modded\Win11modded.iso
OSCDIMG 2.54 CD-ROM and DVD-ROM Premastering Utility
Copyright (C) Microsoft, 1993-2007. All rights reserved.
Licensed only for producing Microsoft authorized content.
Scanning source tree (1000 files in 95 directories)
Scanning source tree complete (1056 files in 103 directories)
Computing directory information complete
Image file is 5558405120 bytes
Writing 1056 files in 103 directories to Win11modded\Win11modded.iso
0% complete
WriteFile failed (Win11modded\Win11modded.iso, off=4D800 len=74000 status=103)
Error 87: The parameter is incorrect.
Hi Jensd.
Great Video, very helpful.
Just a tip, VERY important,
I f you are going to run windows on ANY mac you need to install a boot manager to protect the macs Boot rom from windows,
windows has a nasty habit of destroying mac boot ROM’s and making the machine totally unusable, and you will have to replace the logic board to get it working again.
Best two boot managers for intel macs are:
REFind = intel macs with 32bit EFI boot rom (2006 to 2008)
its only the boot rom that is 32bit your OS and app running in 64bit
Openrcore legacy Patcher = Intel Macs with 64bit EFI boot rom 2009 and newer
boots in 64bit and runs in 64bit
just thought i would mention these in case you or your readers where not aware of
these facts.
Edit: You can run Opencore lagacy patcher on the 2008 Intel mac Pro
you just need to have to have High Sierra installed using dusdudes High Sierra patcher
Allah razı olsun senden güzel insan, uzun zamandır uğraşıyordum şimdi kurabildim windowsu. Teşekkürler..
right now i will try to install a win 11 on a macpro 1,1.i will let you know if it working. thanks annyway
not working.i start the mac and it take out the cd.nothing happend