
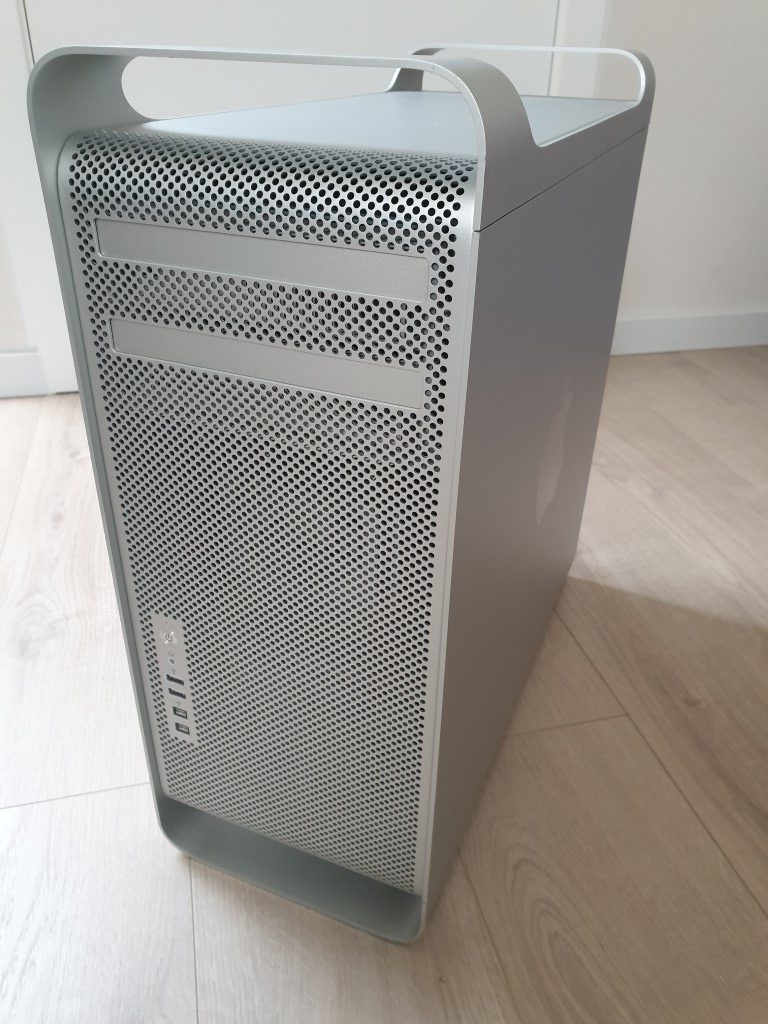
The classic Mac Pro has always intrigued me in some way. There is something about the whole concept and design that really attracts me. From the outside, now more than 10 years after the release of it, it still looks nice and up to date. Everything about it tells you that this is a powerful machine. Internally, the design is different from what is considered standard but it works very well. Although Apple did their best to restrict this, after performing some minimal and relatively cheap upgrades to a Mac Pro 4,1, it is still more than usable in 2021. In this post I will go, step by step, through the upgrade process for a cMP 4,1 from both hardware as software perspective, all the way up to a performant Big Sur Mac Pro machine.
YouTube Video
If you are interested, I also created a YouTube video from this blogpost. If you prefer classic text, you can just follow the rest of this article:
In the meanwhile, I also did several follow-up videos on different machines and dual CPU models:
- macOS Sonoma on Mac Pro 4,1 and 5,1 with RX 580: https://youtu.be/8fsMVZDGc7o
- Windows 11 on Apple Mac Pro 4,1 or 5,1: https://youtu.be/yZPKLmmjKSQ
- Mac Pro 4,1 and 5,1 – Dual CPU Upgrade and NVMe: https://youtu.be/zTl1lL1zfkg
Introduction
The Mac Pro 4,1 and 5,1 have been released more than 10 years ago now but a quick search online clearly shows that they are still alive and even popular today. This is not without reason. As mentioned, the hardware still looks very nice and thanks to the large community around these devices, it’s still very well usable today. If you know that some newer Apple Macs are less performant for a multitude of the price, one cannot be suprised.
The Mac Pro which I will use for this article is not the first one that I’m upgrading from both hardware and software perspective but it’s the first time that I will try to document this properly. I bought the Mac Pro at an auction for around €100, not knowing what exactly would be in the box. Obviously I hoped for a dual CPU model but this was not the case. Nevertheless, still a nice project.
The model I got, and will use for this article, has the following specifications:
- 2.66Ghz Quad Core Nehalem (W3520)
- 6GB of DDR3 1066Mhz (3x2GB)
- Hitachi 640GB HD
- GeForce GT 120 512MB
- 18x DL SuperDrive
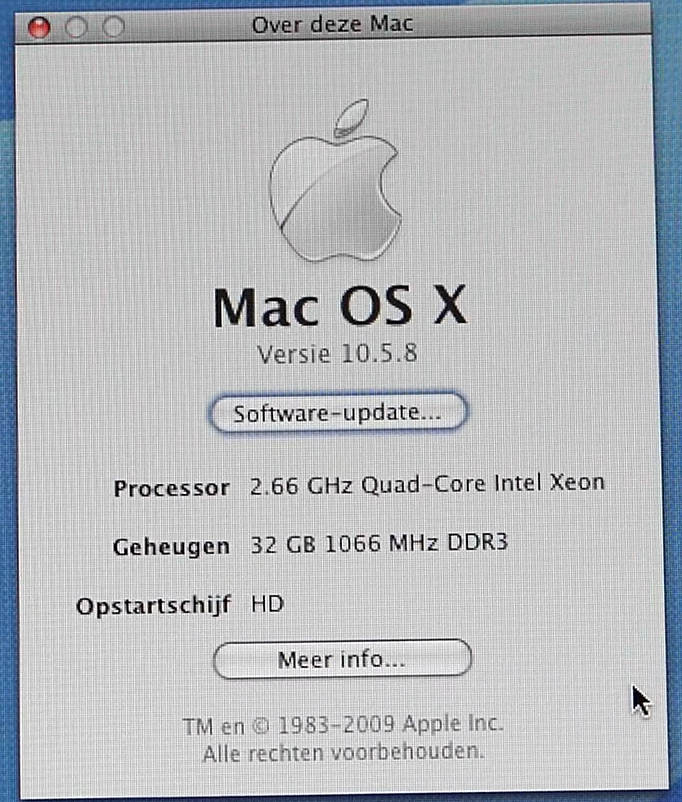
From software perspective, it was still running Mac OS 10.5.8, better known as Leopard.
Steps to go through
The steps I need to go through are as follows. There is a reason for each step, which I will clarify and the order is, in most cases, important as well. This is something I learned with previous upgrades on Mac Pro 4,1’s.
- Upgrade the memory (optionally)
- Install Snow Leopard (mandatory before you can go higher)
- Upgrade to El Capitan (max. officially supported on the 4,1)
- Update the 4,1 firmware to 5,1
- Upgrade to High Sierra (max. officially supported on 5,1)
- Upgrade the CPU (optionally)
- Create patched bootable Big Sur installation media
- Install a SSD (optionally)
- Clean install of Big Sur
- Upgrade the video card to a Metal-supported model
First thing I did when I got the hardware, was to clean out all the dust and dirt which the machine collected over the years.
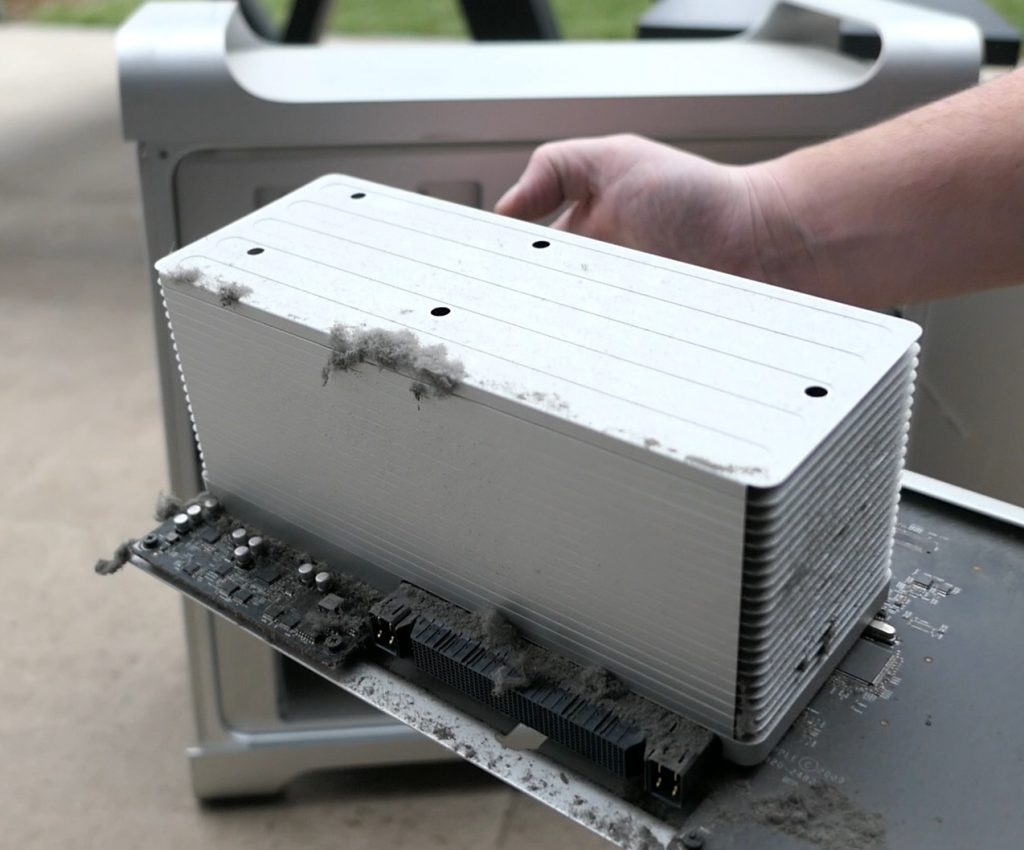
After that, I did a first boot of the Mac Pro to see if it was working. Luckily all seemed fine and we can start with the whole process.
Step 1) Upgrade the memory
Although this is an optional step, with the 6GB the machine came and definitely with the 3GB which would have been standard on this model, you would need to be patient without the upgrade. The memory upgrade, as long as it is below a maximum of 48GB, can just be done without any software adjustments and you will benefit from it immediately.
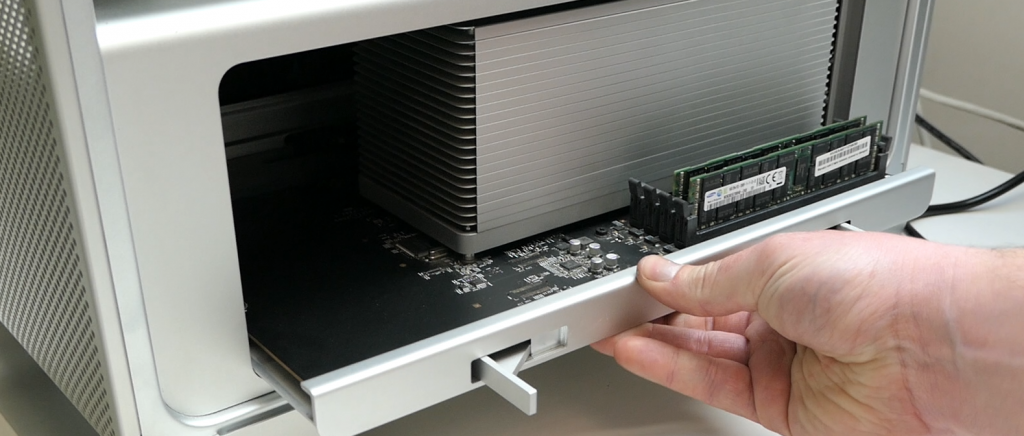
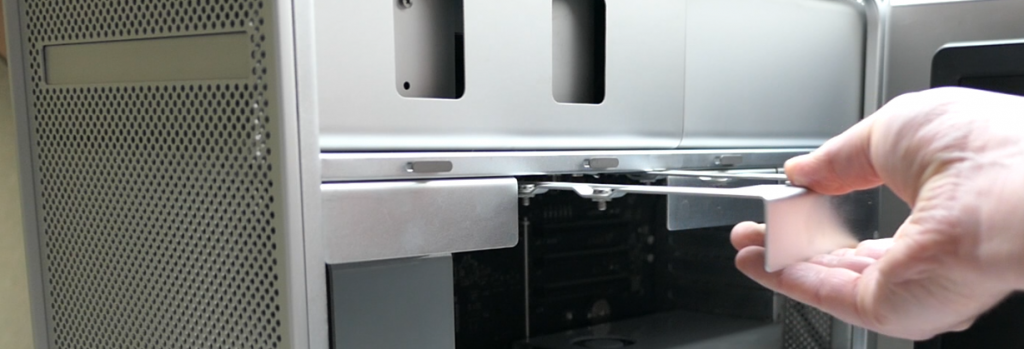
We simply need to slide out the CPU try on the bottom of the case and replace the memory dimms with the newer ones.
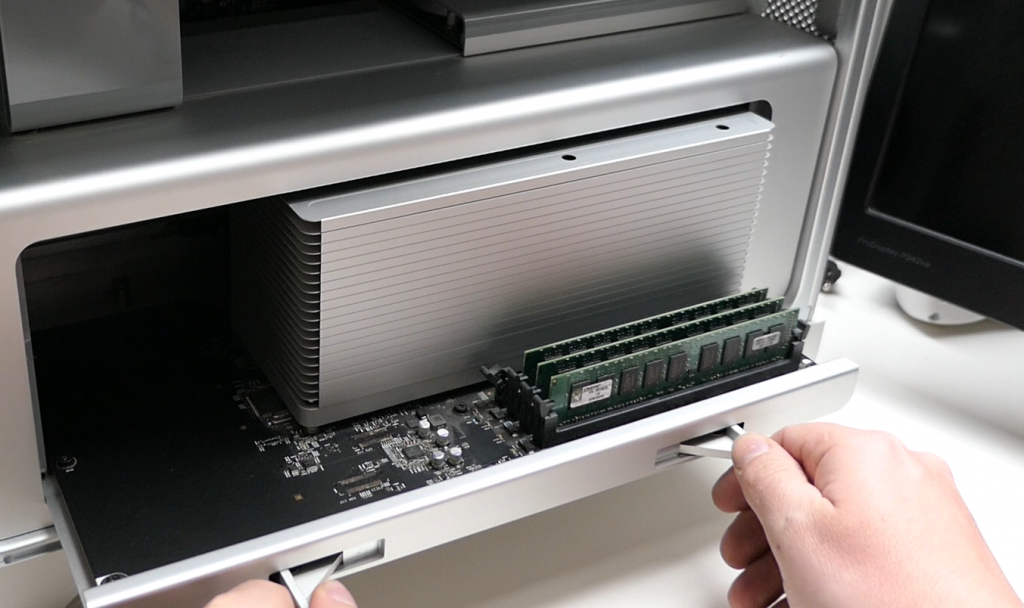
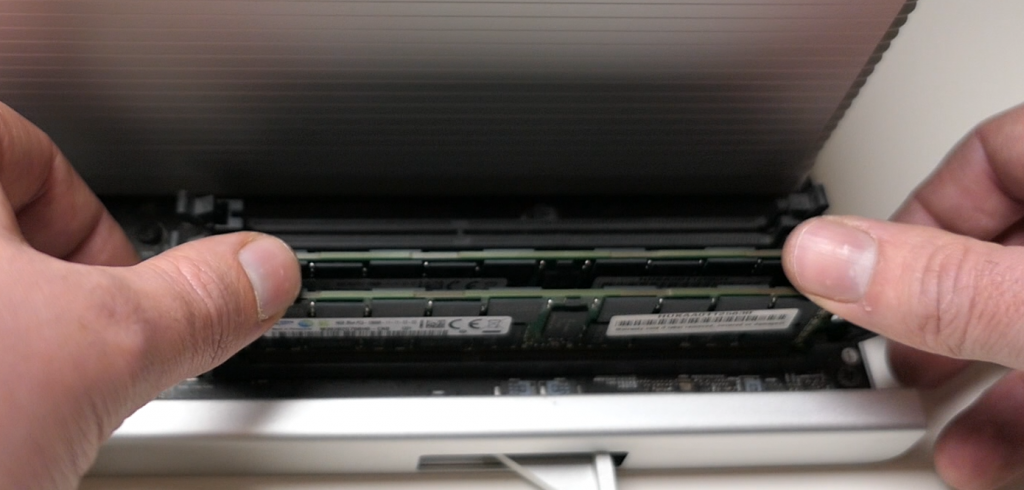
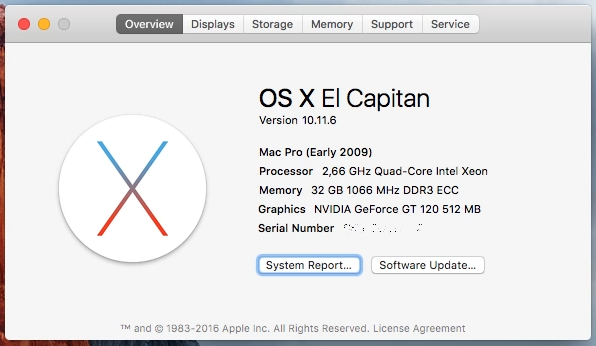
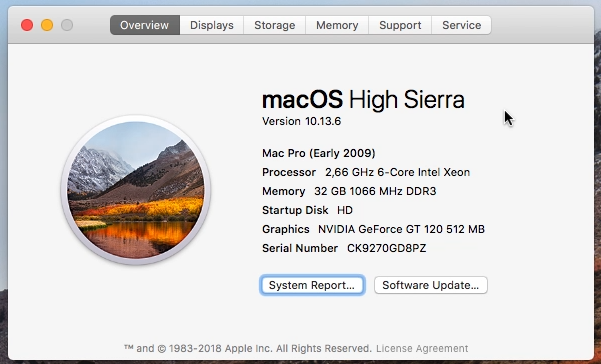
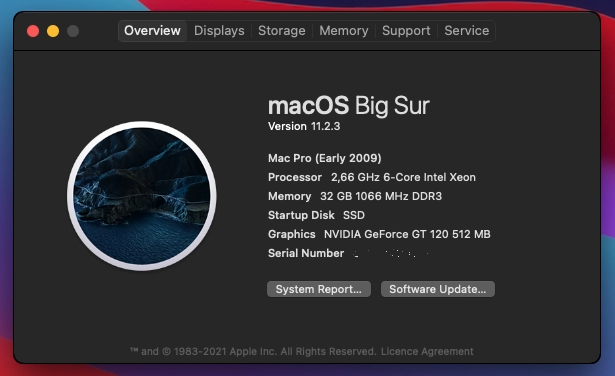
After doing this, in my case I replace the 3x2GB with 2x16GB, About this Mac showed the following:
As you can see, the upgrade was a success and this also shows what our starting point is for the software version.
Step 2) Install Snow Leopard
Before we can move forward, we need to upgrade the installed version (10.5.8 or Leopard) to Snow Leopard (10.6). Unfortunately it is not possible to do a direct upgrade from 10.5.8 to El Capitan (10.11). Historically, the Snow Leopard upgrade was a paid upgrade, maybe it is related to that. It was also the last version to be supported on the Power-based Mac Pro’s.
Fortunately, I do have the DVD media for it but if you do not, the internet is your friend…
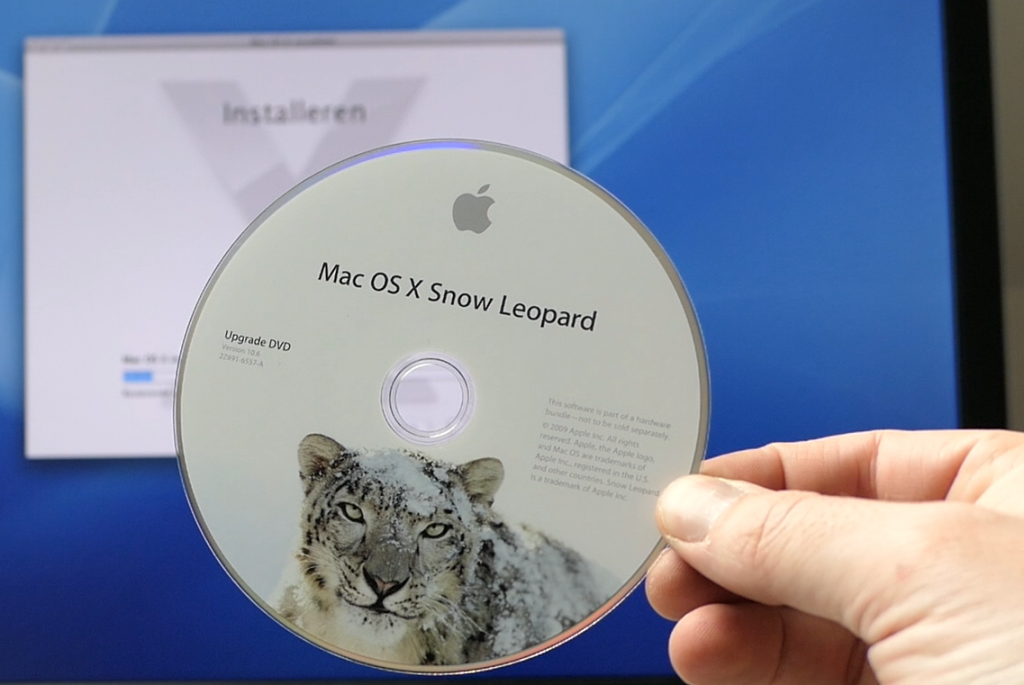
The upgrade is painless. You simply need to insert the media, start the installer and follow the instructions:
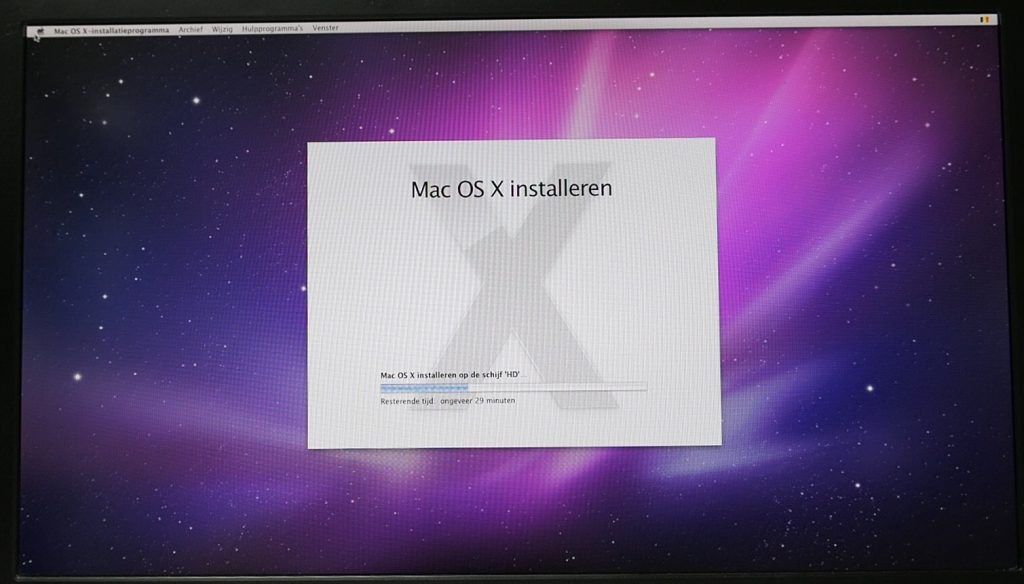
Several reboots later, we are greeted with a nice introduction video which came with 10.6 (which looks pretty nostalgic right now). About this Mac shows the following:
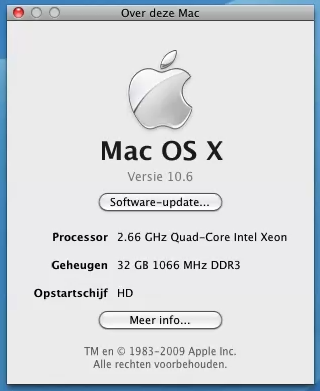
Step 2 is complete and we can move on to the next one.
Step 3) Upgrade to El Capitan
Now that our system passed the mandatory intermediate upgrade to Snow Leopard, we can jump ahead and continue to the latest officially supported release for the 4,1. As the name of step 3 suggests, this is El Capitan or 10.11.
I copied the installer for El Capitan over to the machine using SCP but you can also download it on the machine itself using the following link Apple provides: https://support.apple.com/en-us/HT211683.
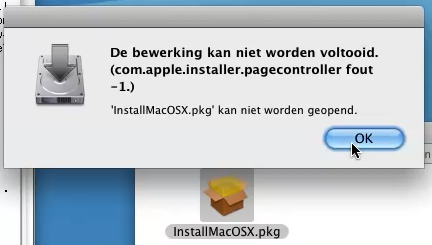
Unfortunately when I tried to run it, I got to see the following error: “com.apple.installer.pagecontroller error -1”:
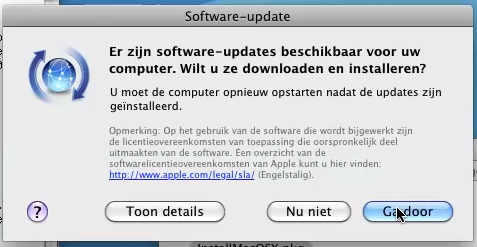
After some searching, I found a solution. To remove the error, you first need to run Software Update and install all updates.:
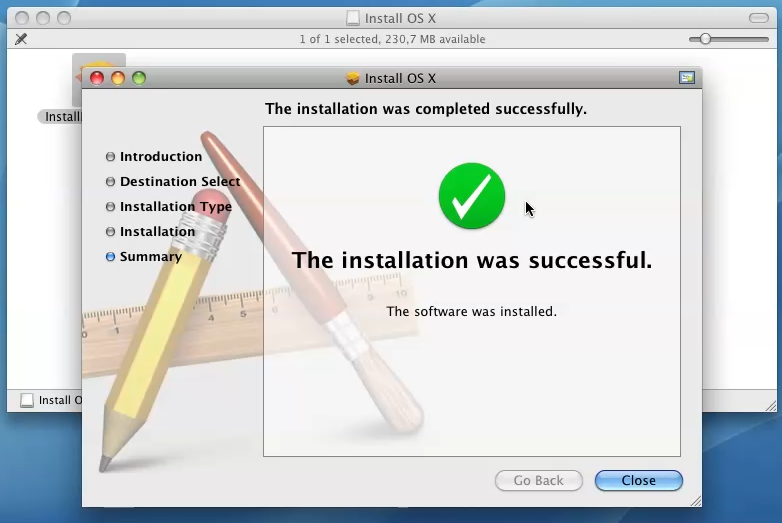
After being patient once more and going through a reboot, the InstallMacOSX.pkg installation works fine without the error:
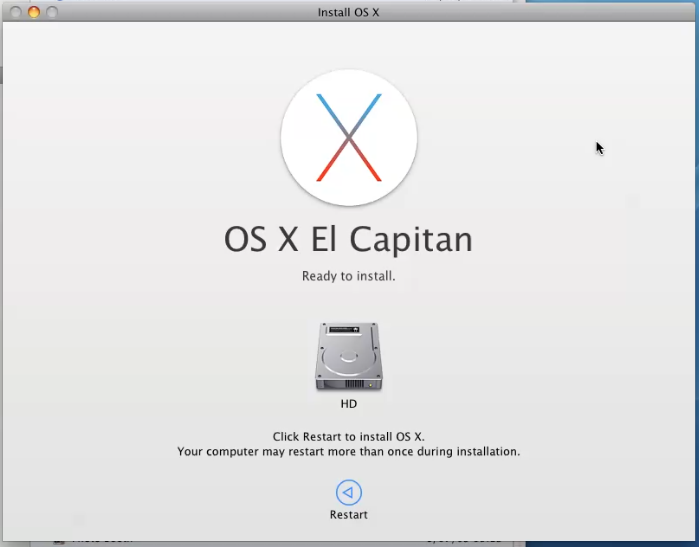
Once this is completely, I went to Applications and ran the “Install OS X El Capitan” app. This prepares your system, reboots and completes the rest of the installation of El Capitan:
As you noticed so far, patience is a must for this process. Especially since I’m still using the original hard disk. But after some more of that, the system eventually boots up with El Capitan installed, as is visible in About this Mac:
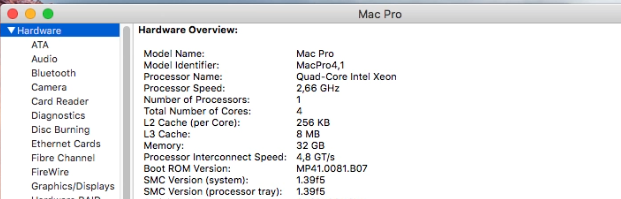
System Report shows the same:
Step 3 is complete. This is theoretically the latest supported version of OS X or Mac OS for a Mac Pro 4,1.
Step 4) Update the 4,1 firmware to 5,1
The hardware of a Mac Pro 4,1 which is also known as the Early 2009 is very similar to the hardware of it’s successor, the Mac Pro 5,1 also known as Mid 2010. Hence, it is possible to run the same firmware on the 4,1. This makes it think that it’s a newer Mac and next to supporting newer OS versions, it also adds the required support for newer generation CPUs.
In the meanwhile (2024/09), I noticed that the method below is not fully working anymore. I created a separate post to cover the steps to do in order to work around this: https://jensd.be/2453/apple/apple-mac-pro-41-firmware-upgrade-to-51-in-2024
Disable SIP
We need our Mac Pro 4,1 to be on El Capitan before we can do this but first we need to disable SIP (System Integrity Protection) as this would prevent this firmware from being installed.
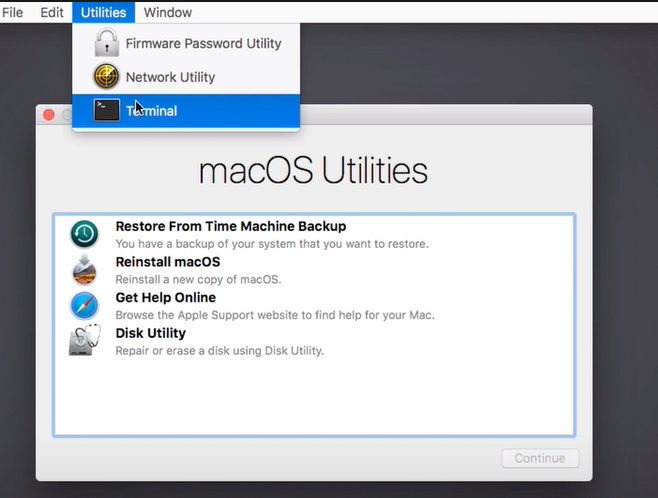
To do so, shutdown the machine and turn it on while holding command + R on the keyboard:

If all goes well, this should bring you in Recovery mode and you will see a screen as follows. Here you need to open a terminal by navigating to Utilities – Terminal on the top bar:
In the terminal, type: “csrutil disable” and press enter:

As instructed, restart the machine by navigating to the Apple icon (left-top) and clicking Restart.
Upgrade the firmware
Now that SIP is disabled, we need to download two files. The first is the firmware itself, which is supplied by Apple. You can download it from here: https://support.apple.com/kb/dl1321?locale=en_US. The second is a tool to perform the upgrade using the first file. There are several of these tools but I have been using the tool from Netkas: http://forum.netkas.org/index.php/topic,852.0.html (link at the bottom of the first post).
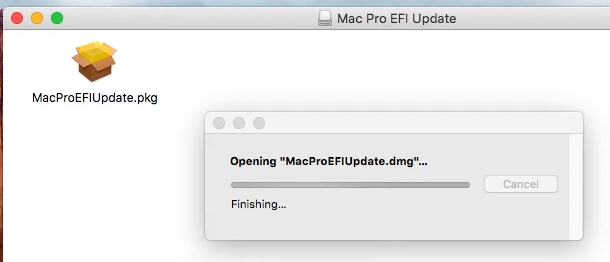
Once downloaded, put both files in the same directory (or on the Desktop), then double click the MacProEFIUpdate.dmg to mount it.
Next, right click on the firware updater tool and choose Open:
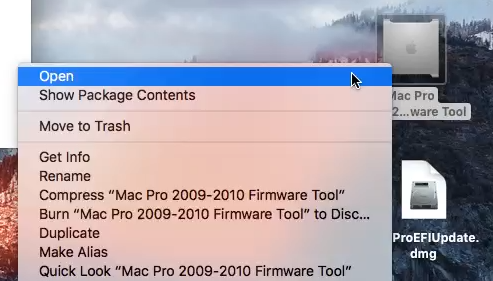
In the tool, choose “Upgrade to 2010 Firmware”. After providing credentials, the tool will give you the next instructions to follow:
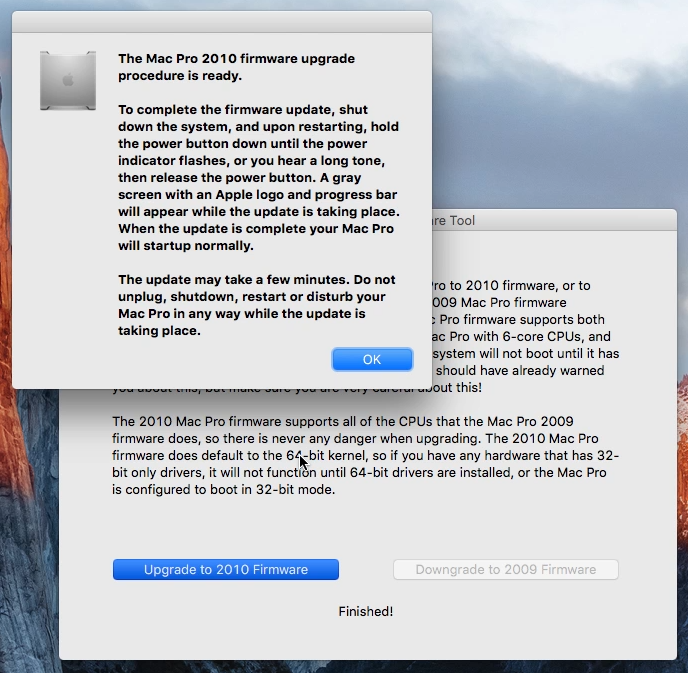
So, as instructed, shut down your Mac and hold down the power button. Keep holding it as the power light will start flashing. Only release it as soon as a progress bar (a bit thicker than your normal OS X boot progress bar) appears:
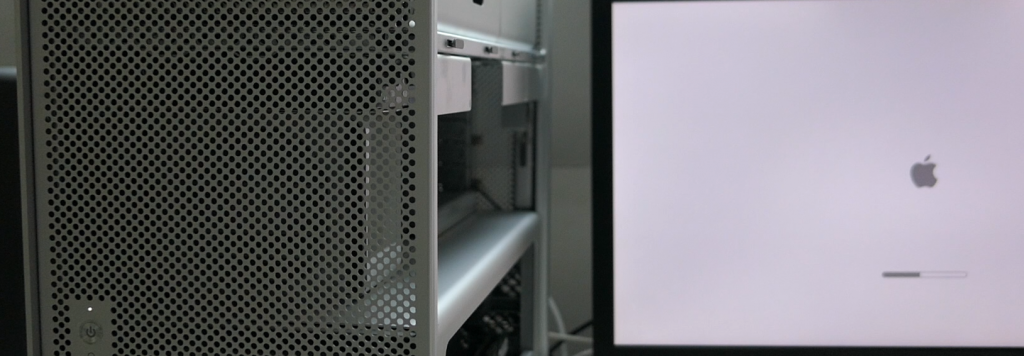
When the firmware update is complete, the DVD tray will open, then will go back inside as OS X eventually boots.
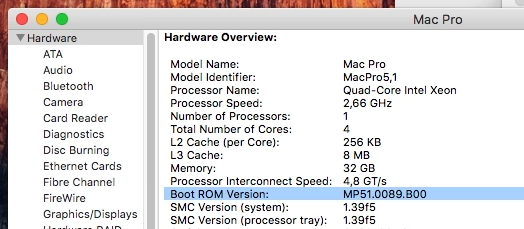
After completing this process, when looking at System Report again, we can see that our Model Identifier has changed from 4,1 to 5,1:
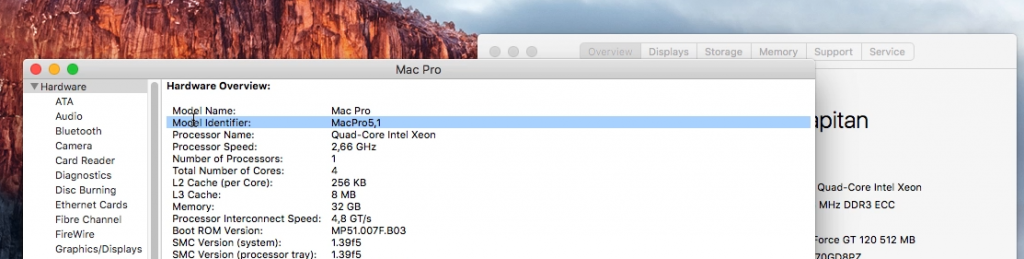
As you can see, compared with the screenshot at the end of Step 3, the Boot ROM Version has also been changed.
Step 5) Upgrade to High Sierra
Now that our Mac Pro thinks it’s a real 5,1, we can upgrade it to the maximum supported version for that hardware. This is High Sierra or 10.13.
As with the previous upgrade to El Capitan, you can download the installation files from Apple: https://support.apple.com/en-us/HT211683.
Once downloaded, simply launch the Install macOS High Sierra application. As you will see, this requires another firmware upgrade:
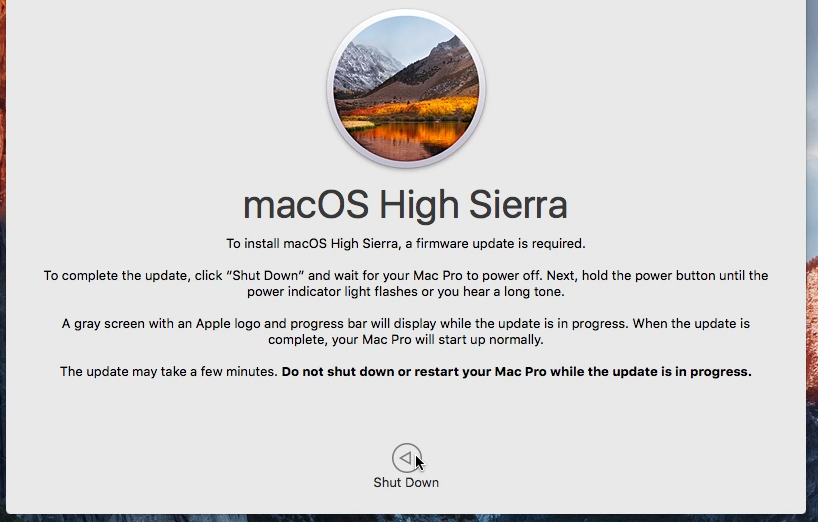
From the instructions, we can see that this is exactly the same process as when we upgraded the firmware from 4,1 to 5,1. So we need to shut down the machine, hold the power button until we see the progress bar, then wait for the update to complete.
After completing this process, when having a look once more at System Report, we can see another, newer, firmware version has been installed:
If all went well, when the Mac rebooted, the High Sierra installer should have popped up again and asks you to continue. If it didn’t, you can simply relaunch the installer app:
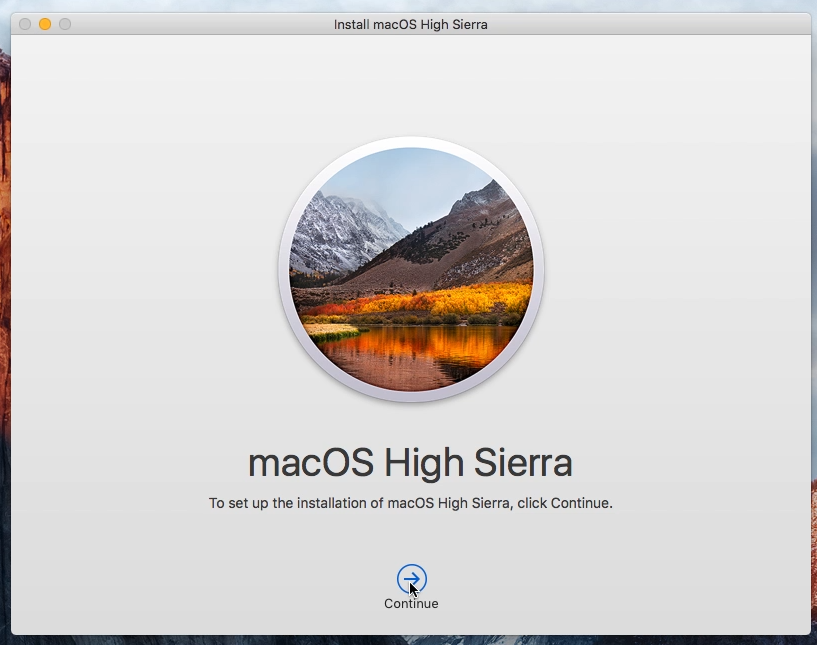
Simply follow the instructions and, once more, be patient to let the upgrade to High Sierra take place.
After the system reboots and answering some questions regarding privacy and new features, you should end up with High Sierra. We can see the same in About his Mac:
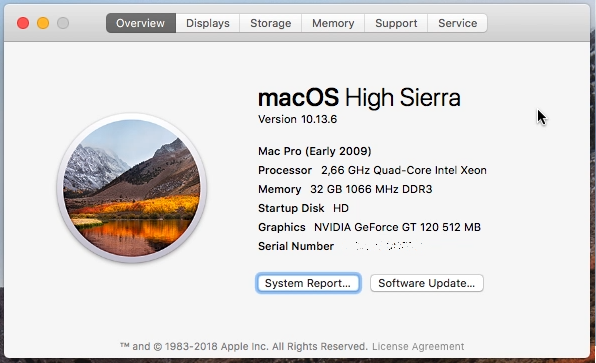
At this point, your Mac Pro 4,1 is thinking it’s a 5,1 and is running the latest supported software for that hardware.
Step 6) Upgrade the CPU
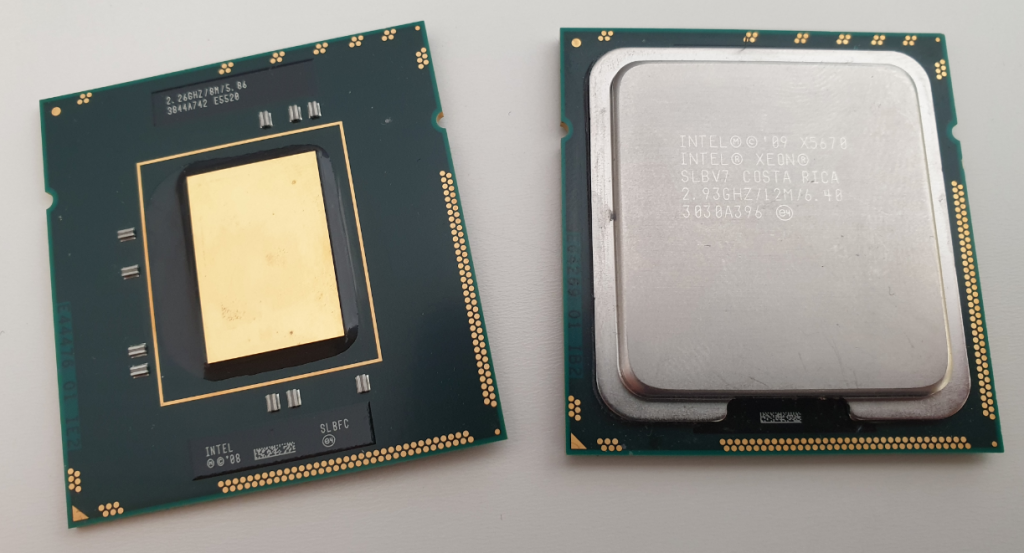
This step is optional but it’s a rather easy and cheap way to boost the performance of the old machine. The 4,1 came originally with Intel Xeon Nehalem CPU’s (W35, E55, X55). Since we upgraded the firmware to 5,1, this also adds support for the newer generation of these Intel CPUs called Westmere. This means we can safely upgrade our Xeon W3520 to a Xeon X56xx. The most powerfull CPU or CPUs which you can install in the 4,1 and 5,1 is the Xeon X5690.
Lidded vs. delidded
Dual CPU Mac Pro 4,1’s are coming with two de-lidded CPU’s. This means that the top metal protection has been removed. So if you want to replace the CPUs in a dual CPU Mac Pro 4,1, you can either remove the lid from your replacement CPUs or extend the heatpads and connectors for the fans. Delidding is not easy (don’t ask how I found out), so in a previous dual CPU Mac Pro 4,1 upgrade I went for the second option.
For the single CPU Mac Pro 4,1, there is better news as it comes with a lidded CPU. The same applies for the 5,1 in both single and dual CPU configurations.
Upgrading the CPU
As mine is a single CPU edition and I have a bunch of X5650’s laying around, I’ll replace the CPU with one of those. You can easily find these second hand for around €5-10.
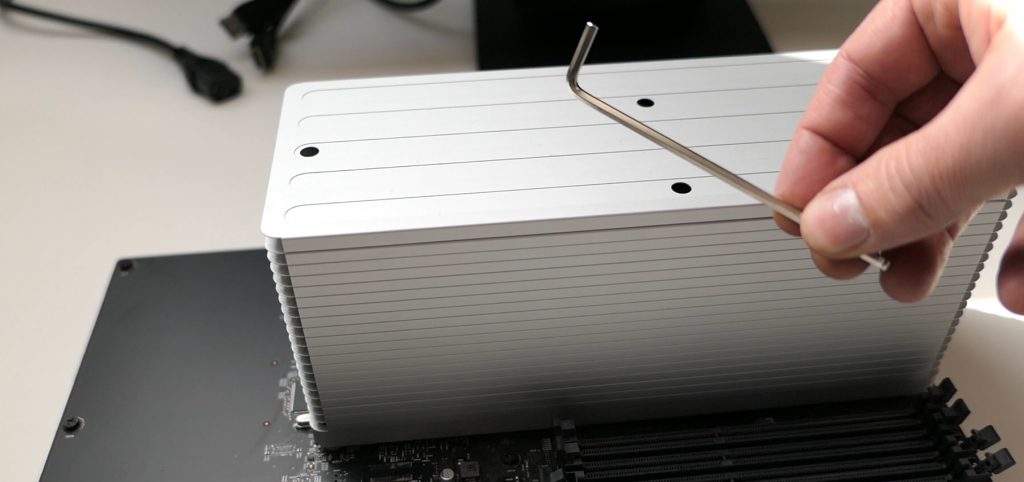
First, we need to remove the CPU board as we did for the memory upgrade. Then we can remove the heatsink by using a hex key:
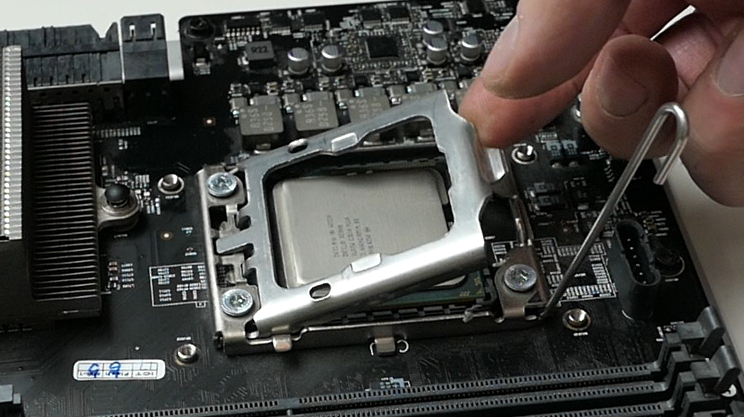
After untightening all screws that hold the large gray heatsink, you can carefully lift it up. Beneath the heatsink, you will find the CPU (which will probably be covered in old thermal paste). To remove the CPU, simply lift the lever on the left side and get the CPU out:
After that, you can just swap it with the new CPU, apply some thermal paste and carefully re-install the heatsink:
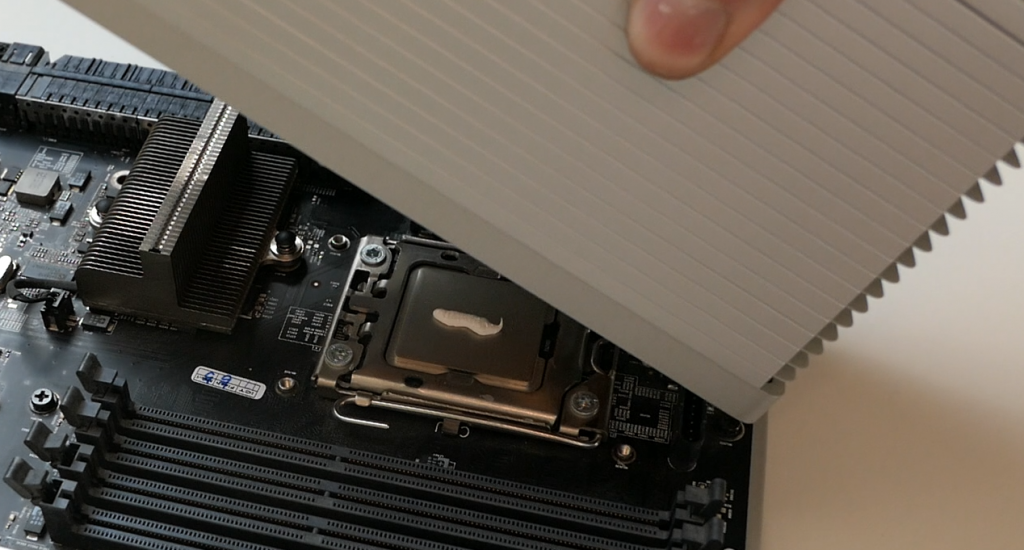
When the heatsink is back in place, re-install the memory and re-insert the board in the Mac Pro:
That’s basically all it takes to upgrade the CPU. Definitely worth the hassle if you ask me…
This is how About this Mac looks like after the upgrade:
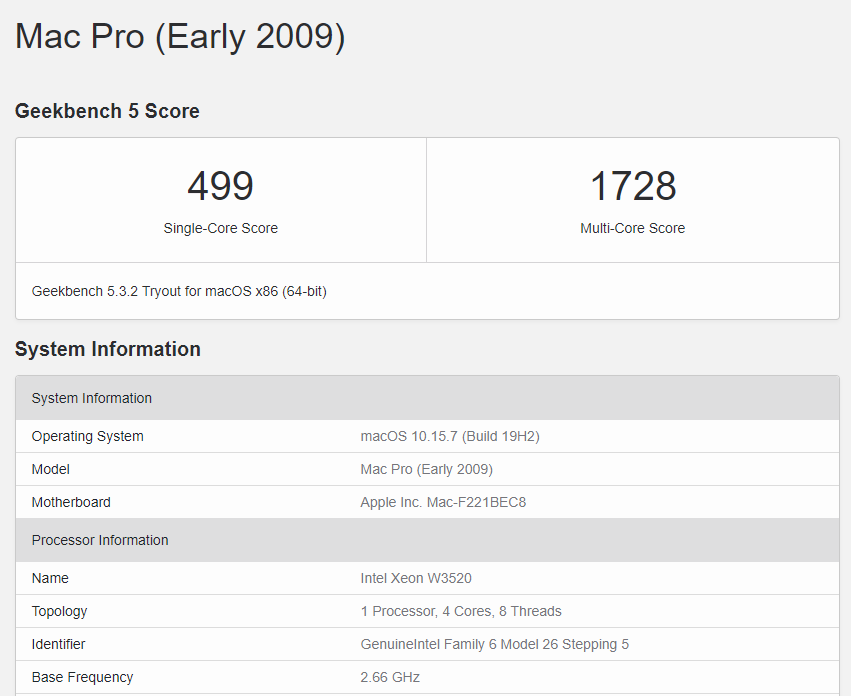
As our Xeon X5650 has the same clock speed as the W3520, the only difference we see is the amount of cores.
Taking a look at the benchmarking results in Geekbench after this upgrade shows the differences even more clearly. These are the results before the upgrade:
And this is the same after the upgrade:
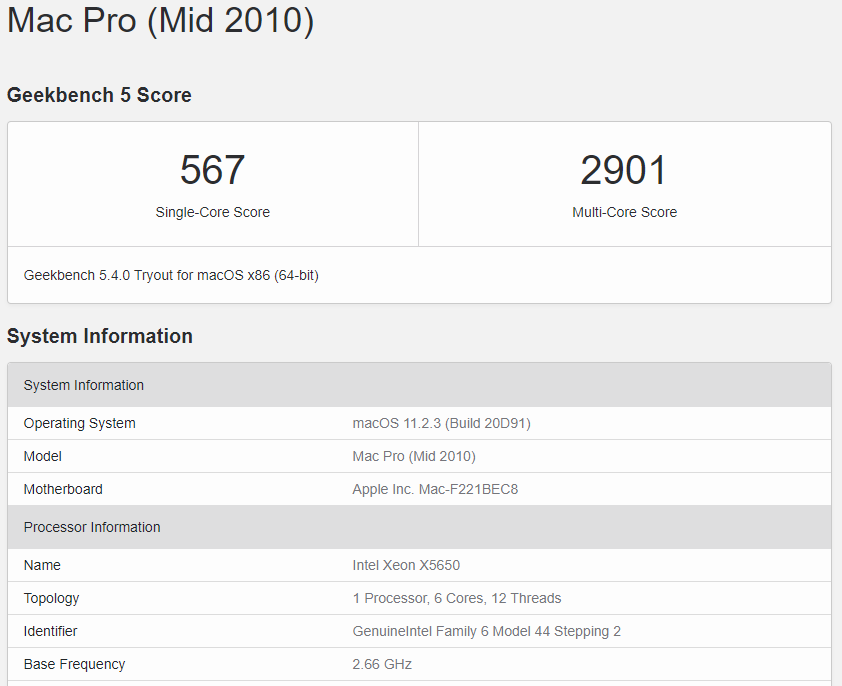
Not bad for a €5 upgrade I would say…
Step 7) Create patched bootable Big Sur installation media
As mentioned before, the latest supported version for a Mac Pro 5,1 (or a FW upgraded 4,1) is High Sierra. There are basically two methods in order to install the (currently) latest OS X version, Big Sur, on the hardware.
The first is to install the OpenCore bootloader. This tricks the software in thinking that the hardware (Model Identifier) is something different than it really is and allows you to pass any checks which are present in the installer.
The second method, which I will use, is to created patched installation media for Big Sur. This will patch the installation files to pass a hardware check if if it would be restricted by Apple on this hardware.
There are several (open source) initiatives to allow/patch the Big Sur installation media to run on unsupported hardware and pass the hardware checks. My preferred method is to use the Micropatcher method (https://github.com/barrykn/big-sur-micropatcher). Together with the GUI tool that is available (https://github.com/moosethegoose2213/automator-for-barrykn-micropatcher) this is an easy and user friendly method.
Newer version of macOS: Sonoma
In the meanwhile, macOS Sonoma has been released. Another method, involving OpenCore, is available to install the latest version of macOS Sonoma on a Mac Pro 4,1 or 5,1. I did a separate post that covers that version of macOS, so have a look at it over here if you are interested.
Metal support
One thing that needs to be discussed before you consider upgrading to Big Sur (or anything that is Mojave or higher) is Metal support. Since Mojave, Apple made it mandatory to have a graphical card that supports Metal. Although it is possible to patch the system to pass the installation check and to run Mojave or newer with a non-Metal GPU, it is unworkably sluggish in practice. So if you want to upgrade the software from High Sierra, keep in mind that you will probably regret that if you do not have a Metal-supported graphical card.
More details can be found in step 10.
Prepare installation media
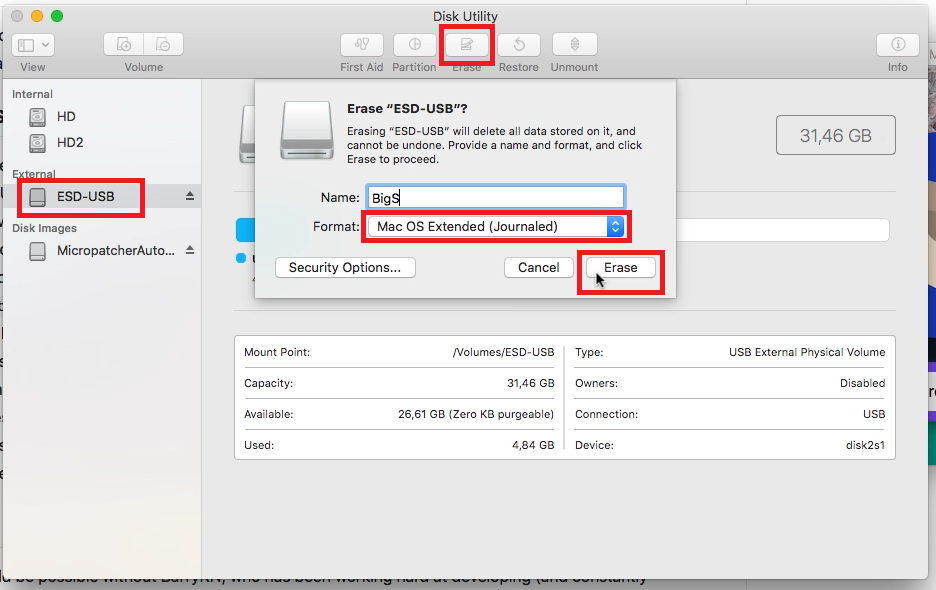
Before we start, we need to prepare the installation media. You will need a 16GB USB key (or larger) and format it as Mac OS Extended (Journaled). To do so, first insert the USB drive into your Mac, then open Disk Utility.
In Disk Utility, on the left side, select the USB drive, then click Erase on the top menu and choose Mac OS Extended (Journaled) as Format. Optionally give a clear name so it’s easier to identify the USB drive:
Patching installation media
After we prepared our USB drive, we can run the MicropatcherAutomator from Github (https://github.com/moosethegoose2213/automator-for-barrykn-micropatcher/releases/download/v2.0/MicropatcherAutomator.dmg). Once downloaded, open the archive and move the application to your desktop. Then right click it and choose Open:

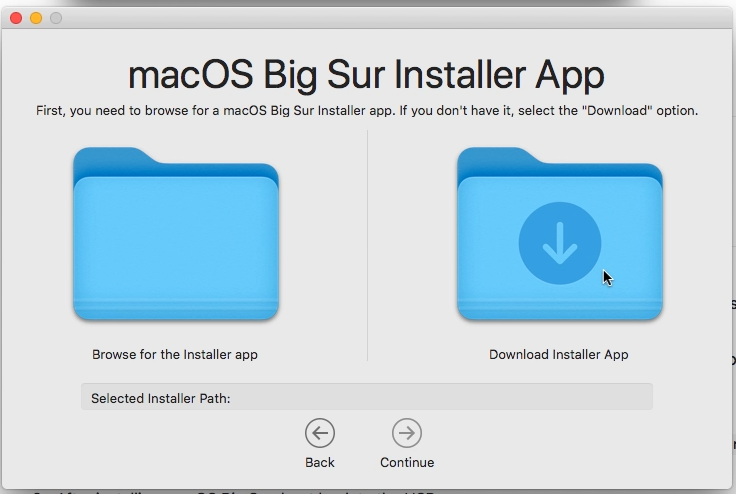
In the tool, click Continue, then choose to Download the Installer App:
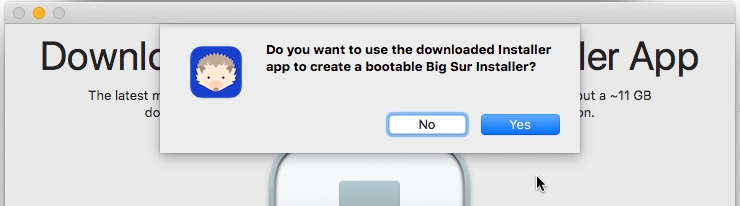
After the download completes, continue to create the bootable installer:
After some time, for me it took almost 40 minutes, the installation media is created and you can use it to install Big Sur on your Mac Pro 4,1.
Step 8) Install SSD
Before we will use the installation media, I will install a SSD in the system. Again this is an optional upgrade but it greatly increases performance for a relatively small price.
The Mac Pro can host four 3,5″ drives. Since most of the SSDs come in a 2,5″ format, it’s a good idea to install it in an enclosure that makes it suitable for installation in a 3,5″ bay. Make sure to double check and read reviews about the enclosure so it matches the physical format and pin compatibility of a standard 3,5″ drive.
I chose to use an enclosure from Icy Box which exactly does that:

After installing the SSD inside the enclosure, you can mount one of the free brackets to the new enclosure:
As you can see on the photo below, the SATA power and data connections and the size of the enclosure itself are a perfect match with a regular 3,5″ disk:
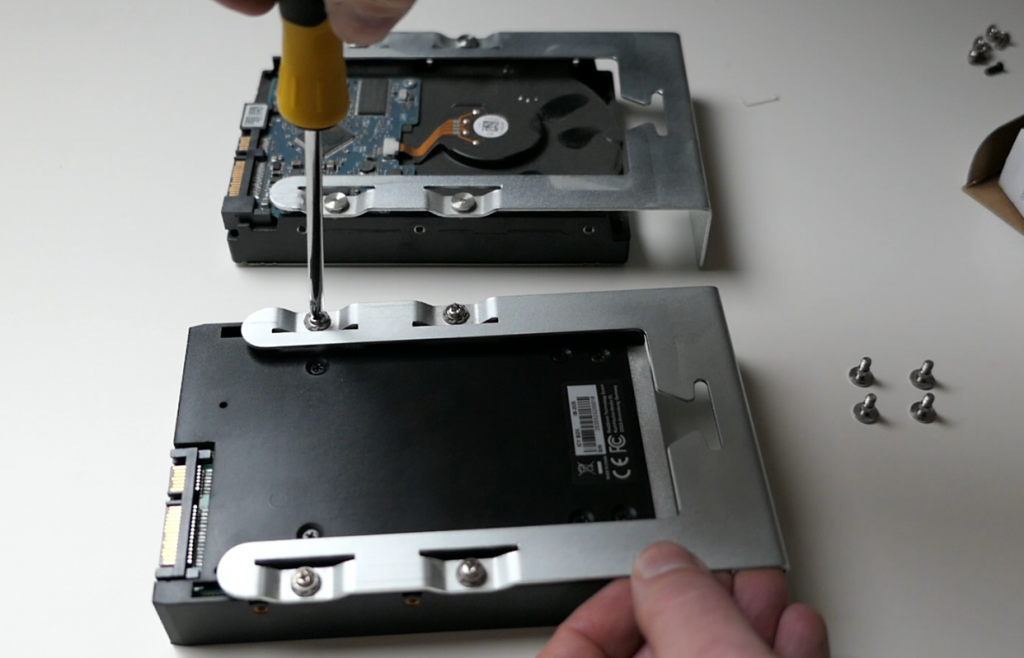
Obviously we need to insert the bracket with enclosure and SSD back in the Mac Pro and then we are ready for our next step where we will install Big Sur on that fresh SSD.
Step 9) Clean install of Big Sur
We already created the installation media in step 7 and with or without SSD installed, it is now time to perform a clean installation of Big Sur. So far I was re-using the massively upgraded base installation which was already present on the Mac Pro when I got it so it won’t hurt to do this properly and clean now.
We start by inserting the USB drive to the Mac, then start it while holding the Option key:
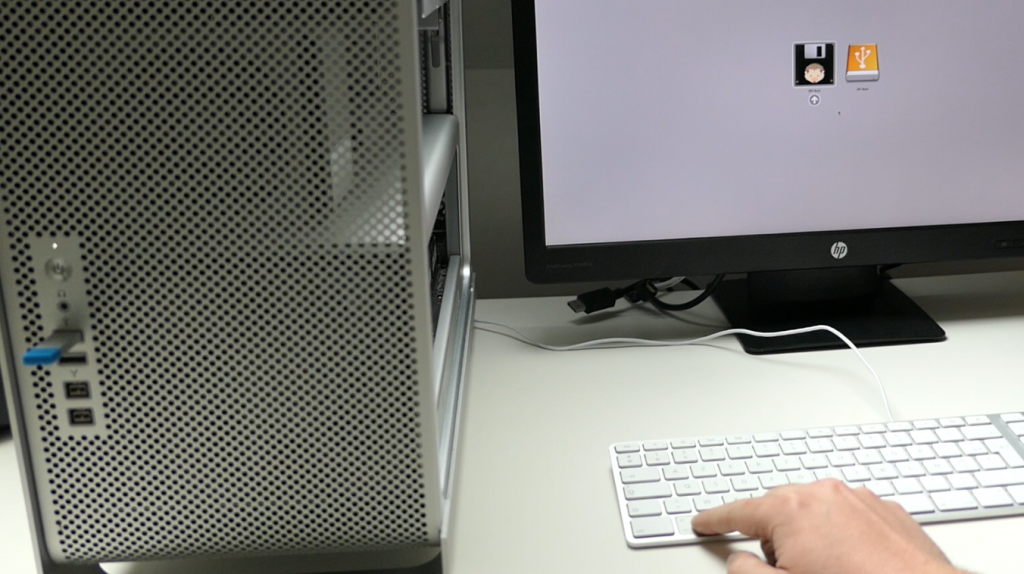
If all goes well, you should see the two of the USB drive’s bootable options (EFI boot) appear in the bootloader. First choose the right one (USB logo). The system will immediately shut down again. After that repeat the process to boot while holding the Option key and choose the first one (disk icon).
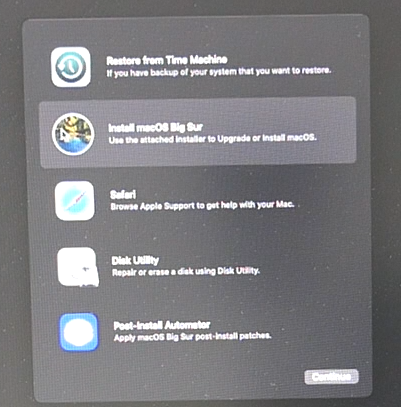
After some time, the Installation should start and you are presented with a screen as follows:
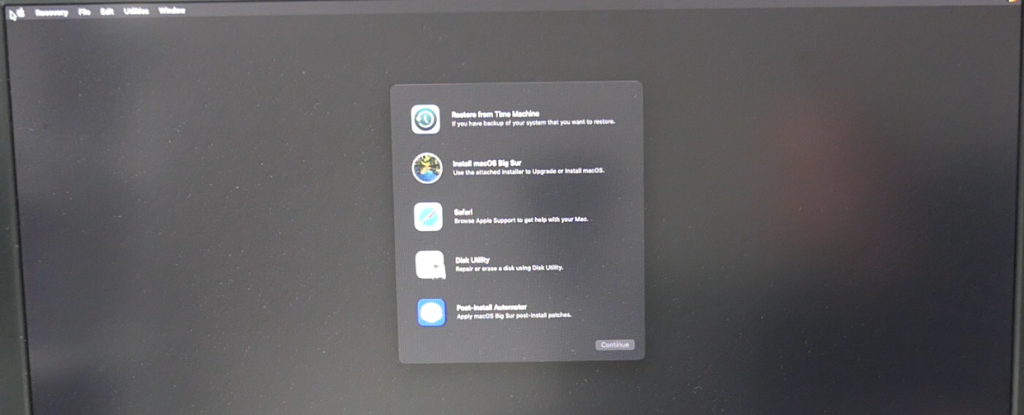
Here it is a good idea to first launch Disk Utility in order to prepare your hard drive or SSD for the Big Sur installation.
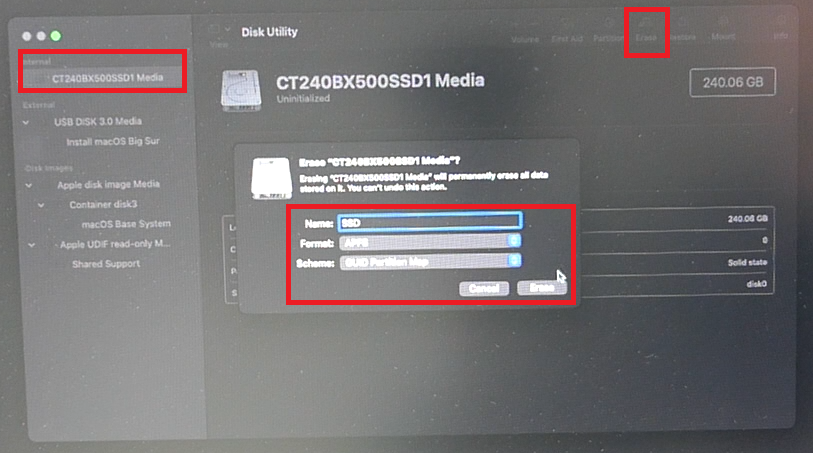
In Disk Utility, select the target disk on the left (SSD in my case), click Erase in the top menu and choose APFS as format. Give the disk a proper name which works for you and click Erase:
Once the disk is prepared, exit Disk Utility and choose to “Install macOS Big Sur” from the main menu:
After another nice portion of waiting therapy, Big Sur should start and once you have answered the questions about the various (new) features and settings, you should be presented with a fresh Big Sur desktop.
About this Mac becomes a classic already so this is how it looks at this stage:
Unfortunately anyone that made it this far without a Metal-supported GPU, will immediately notice that this is not really workable.
Step 10) Upgrade the video card to a Metal-supported model
As mentioned before and as becomes painfully visible now that our machine is upgraded to Big Sur, its needed to have a Metal compatible video card in order to make Mac OS useable and feel fluent. Fortunately there are several options to upgrade the GT120 to a Metal supported graphical card.
Boot screen
In general there are two options if you want to upgrade the video card to a Metal-supported model. The first option is to get a card that has a compatible BIOS that works with the EFI-based Mac Pro. This would mean full support from boot till OS. The drawback of this option is that those cards, even if they are flashed with a compatible BIOS aftermarket, are much more expensive.
Second option is to go for a standard PC card. The drawback here is that you will loose support for the boot screen. That means that the Mac Pro will only start to display something as soon as it started Mac OS. This works more than fine for daily usage and, as you can guess, is a much cheaper option. To work around this a little bit, you can install the OpenCore bootloader which does extend the visual support during boot time.
Power consumption
One more thing to keep in mind is the power consumption of the video card. As we know, the amount of power that modern graphical cards require is getting higher and higher. Taking into account the age of the Mac Pro 4,1 and 5,1, it was well prepared for that but some cards might be too much for the system and power supply.
The motherboard had two 6 pin power connectors, each of them can theoretically supply 75W of power. The PCIe slot itself can do another 75W. If you decide to go for a card that requires an 8 pin connection, you can easily find an adapter cable from 2x6pin to 8 pin.
What card to choose?
As you can see above, there is a lot to consider when choosing a graphical card for your Mac Pro to replace the GT120 and that’s just the top of the iceberg. In depth information can be found here: https://forums.macrumors.com/threads/gpu-compatibility-list-for-cmp.2174600/
My recommendation would be to go for something in the AMD Radeon RX5xx range with the RX580, combined with a 2x 6pin to 8 pin, giving the best performance without too much modifications.
For this build, I chose to get a RX560 as currently (March 2021) prices of graphical cards are going nuts. The RX560 is more than performant enough for the daily work on a Mac Pro and as a bonus, it has enough with the power supplied through the PCIe connector:
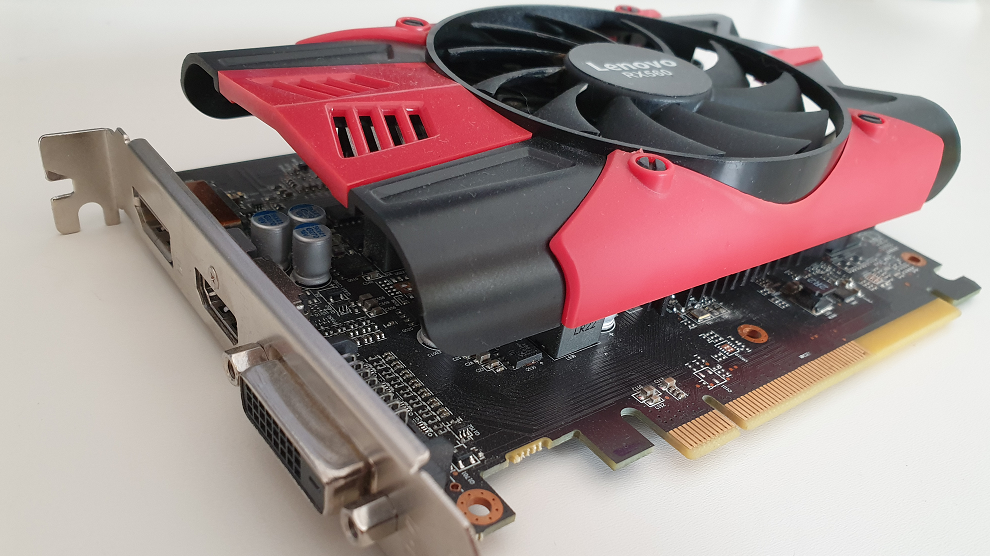
To upgrade the card, we can simply remove the metal bracket (held with two thumb screws) on the side of the PCIe slots, then remove the GT120 and replace it with this RX560 in the same slot.
On the next boot, we can immediately see that the monitor only turns on at the last stage of the boot process but after that, all works as normal.
And, to keep the traditions of this post, this is how this looks like in About this Mac:
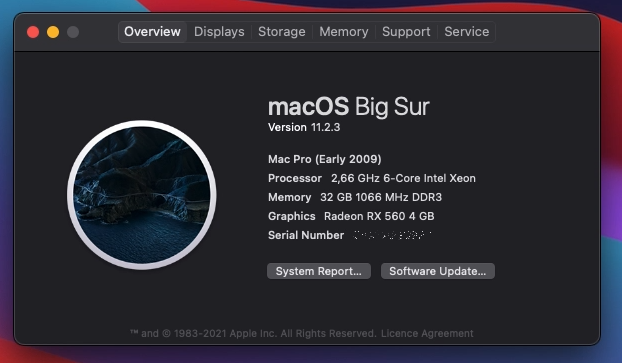
With this final upgrade, the Mac Pro 4,1 feels performant, fluent and quick for most of the daily tasks. Video editing could probably use a better videocard, like the RX580 and the same goes for gaming.
Hopefully this will help you in the process of extending the life of one of the many Mac Pro 4,1 and 5,1 out there, which are still more than worth it these days.
I just bought a 2009 MP 4,1 and want to maximize Everything on it ( Is there a published List for doing this?) & Also want to put OSX, Ubuntu & Windows 10 on it (as I like learning linux & have some windows programs that I need). Do you have a suggestion on best way to set up for loading these OS’s ?
For hardware compatibility I think the MacRumors forums, which I refer to for the video card, are the best source of information.
For your multi-OS install, I recommend to first install macOS, then install OpenCore and Windows/Linux. The main reason to use OpenCore is because Windows is writing files to your bootrom on a regular basis (certificates) and there have been people which had this IC to wear out and fail. (There is plenty of info on MacRumors, including some posts from myself on the topic as well)
If you want to learn Linux, it might be better to spin up a VM (or two) on macOS on Windows as this makes things more flexible and easier to break without worries.
Thank you for the instructions. But, what about Xserve 3,1 2009? Is it possible to change firmware to MP 5,1? How will it work?
Not 100% sure but I do not think that would work. The 4,1 and 5,1 are hardware-wise 99% identical, that’s why this works.
But Xserve use the same processors Nehalem and other hw quite the same.
How it will be noted in “about Mac”? As MP 5,1 or still XS 3,1
Hello,
What a wonderful writeup. I am new to this. I just acquired Mac Pro 4,1 too. Trying to connect it to a dell monitor U2719DC. having a hard time. Do you know what cable can I buy to connect to this monitor
Thanks
Thanks for this very helpful guide. Just wondering why upgrading to a metal GPU is the last step, and is there any reason not to do that before installing Big Sur? (In case it makes any difference, I’m planning to use OpenCore, mainly because I used it to install Big Sur on my MacBook Pro 9,2 and everything is working great, including system software updates.)
As soon as you replace the GT120 with a non EFI-compatible card (like that PC RX560 I used), you won’t see any boot screen. Hence it is difficult to boot the installer from USB etc.
Using OpenCore works around this and allows you to install a non-modified Big Sur installation as well. Only it’s not always the easiest to install. I guess it’s a choice which you need to make between a patched installer and a patched bootloader :)
Ah, I understand; thank you.
I’m a bit confused about GPUs. Why does Apple list one particular RX560-based card as compatible with Mojave, but only says others “may be” compatible? Shouldn’t they all be compatible? And why do *none* of them list Metal support in their specifications??
This is the cheapest one I could find from Canada, where I am: https://www.newegg.ca/yeston-radeon-rx-560-rx560d-4g/p/27N-0042-00087?Description=amd%20radeon%20rx%20560&cm_re=amd_radeon%20rx%20560-_-27N-0042-00087-_-Product It should work, right? Many other RX 560 cards say they require a 6-pin power connection, but I’m trying to keep things as simple as possible since I’m mainly using the cMP for audio work.
Probably the RX560 Apple lists, has EFI and thus also boot screen support. RX560’s for PCs do not but they are usually a lot cheaper. No need for one with a separate power connector. The PCIe slot ahould be able to give enough for it. Good luck with the upgrade.
Thanks again for this great resource and for your advice.
The upgrade to Big Sur (using Open Core) went OK and the setup is working — with my old non-metal video card. The performance is almost acceptable for my purposes, except there’s no playhead visible in Logic or GarageBand, which I’m guessing is a result of no video acceleration. Unfortunately those apps are the main reason I want to upgrade to Big Sur!
But when I install the RX560 card, things are not good. The Open Core bootpicker appears and it automatically starts booting from the Big Sur internal drive. There’s a lot of verbosity and it looks like it’s going to work, but eventually the screen goes blank, the computer’s main fan kicks into high, and if I leave it for a while things get pretty warm in there. I guess there’s still some kind of video signal because my monitor doesn’t go into standby mode, but nothing on the screen.
I don’t know if this is relevant, but there’s video only on the DisplayPort, no signal at all on HDMI or DVI. But this is also true with the old card under Big Sur. (In High Sierra I had displays working on the miniDisplayPort and on the DVI port simultaneously.) But I can live with that.
The RX560 is confirmed working in my neighbour’s Linux rig.
Any ideas what could be going wrong or what I could try next?
I don’t know how to edit or reply to my earlier comment (10/11/2021) so this is an update to say that I finally succeeded in getting my MacPro 5,1 to run with the RX560. The trick was to rebuild the EFI file with the RX560 installed. That required first booting into High Sierra with the RX560, which was a bit tricky because there’s no boot screen.
I think this problem is probably unique to the Open Core Legacy Patcher method and doesn’t occur when using the method shown here. I think when Open Core builds the EFI, it only installs support for the graphics hardware that it finds or assumes to be there based on the model identifier.
Anyway, it’s been running stably for almost a week now and Logic Pro is working great. Thanks so much to jensd — I just saved a lot of money by not having to get a new computer!
I might try the processor upgrade next if I can find a cheap X5690.
Hello,
I’ve been having problems with my MacPro4 (mid 2010) and came across your video. I am planning to do all the upgrades you have shown in this fantastic video, but as my Mac is already at High Sierra will this upgrade will work, or is there a step I have to by-pass?
Thanks for great content.
Jacqui
You can just start from where I started after upgrading to High Sierra :)
Thank you for the great video and blog post guide. I want to upgrade a dual CPU Mac Pro 4,1 which as you point out comes with delidded chips. You write that on a previous upgrade that rather than risk delidding the new chips you chose to “extend the heat-ads and connectors for the fans”. Can you explain exactly how this is done?
It’s been a while but if I remember correct, the connector for the fan is clipped in the heatsink. You need to remove it from there and remove the clips that hold it in place.
That way you can insert it in the connector on the CPU board separate from the heatsink (as that one will be slightly higher, causing the connector to not make contact).
Also, as you mention, I added another layer of heat-pads on the ones already there (for the VRMs) so it fills the gap from the higher CPU (lid).
Putting the heatsink back is a bit of fiddling as you need to put that tiny connector for the fan back and make sure it makes contact, then fix the heatsink.
One additional hint: don’t tighten the screws too hard to begin with. But in case you notice issues with memory modules not being recognised, tighten them a bit harder. This always helped for me.
Good luck with the swap. Would love to find another dual CPU 4,1 or 5,1 and document this properly :)
heat pads not heat-ads
Hi, I have read thru your text and my 4.1 early 2009 does not have the exact same specifications. I have 2.66 GHz Quad-Core Intel Xeon, and the grafics card is ATi Radeon HD 5770 1024 MB. Will it still work to upgrade to 5.1?
It should work fine to patch it to 5.1.
Keep in mind that the ATi Radeon HD 5770 is not Metal compatible so best to not go higher than High Sierra.
Everything went well up to the Big Sur upgrade. After what looks to be about 80 percent installed the screen will go dark, come back on with a message “Your computer restarted because of a problem. Press a the key or wait a few seconds to continue starting up.” The apple logo and progress bar pop up briefly before going dark again. Then the message pops up again and the same process happens again. Any suggestions?
I have already upgraded my MacPro4.1 some time ago to a 5.1 with Mojave, and also installed a Radeon RX 580. This makes it not possible to boot up with the Option key. Do you have a solution for this? What is the easiest way to upgrade to Big Sur?
There are basically two options:
– temporarily install the GT120, which does show a boot screen (if you still have it)
– install OpenCore: https://dortania.github.io/OpenCore-Legacy-Patcher/
I did a post about installing Monterey on unsupported macs, you could do that as well. In that case, first patch your current installation in order to have a bootloader :)
The post is here: https://jensd.be/1589/apple/install-macos-monterey-on-unsupported-models
I have my early 2009 running 5.1 and High Sierra. I understand I really need new CPUs to run Big Sur but is my RAM okay? I currently have 20GB of DDR3 1066MHz ECC installed in 4 banks X 4GB and 4 X 1GB. My graphics card is a NVIDIA GeForce GTX 680 which says it supports metal.
My Processors are 2 x 2.26 GHz Quad-Core Intel Xeon. I’d like to buy:
CPU-Speed: Intel Xeon X5690 3.46GHz
CPU Cores: 8-Core —> 12-Core
Advise is appreciated
You don’t need to upgrade the CPU to run Big Sur, RAM and GPU should be fine too although you might need to patch for Monterey (Big Sur should still be fine).
Upgrading to the X5690’s will be the best you can get.
Hi! Very well done !!
I have a problem . I flashed my 4.1 to 5.1 a while ago ( maybe 2 years) and I experienced problems with safari yesterday. I tried to download and replace safari but then safari won’t open … tried to reinstalled high Sierra and I realized am 4.1 now ….
System (high Sierra) doesn’t boot but on recovery …
What should I do now , and most importantly in which order ??? Should I erase the system , make a Linus bootable USB ?
I have a 2009 Mac Pro. The processor has already been upgraded to a 3.32 ghz quad core Xeon. Is it still safe to do the firmware update?
Doesn’t cause any issues as far as I know. It just adds support for a wider range of CPUs but the currently supported ones will keep working.
Hi, Thanks so much for your helpful writeup and video. I have just got to Step 9 but when I hold down the option key only the Mac OS Installer (hedgehog disk icon) is showing and no other option. Has something gone wrong with making the installation media? Should I try reformatting the USB and trying again?
Make sure to select All Devices in Disk Utility and Erase the drive itself, not just one volume on it.
Also make sure you have the right options set for Erasing.
I did make a dedicated post on installing Big Sur, so you might find some more details over there: https://jensd.be/1376/apple/create-macos-usb-installer-for-installation-on-unsupported-models
Hi!
I followded your instructions carefully. My 4.1 was already a 5.1 mit a Metal-Card, SSD and already running Mojave. The BigSur-Bootstick is successfully prepared. EFI-boot worked. SSD is APFS-formatted. But ist stii says: The Update can´t be installed on my machine. What did I miss?
Kind regads:
Jan from Hamburg
Thank You for this. This is awesome!
I’m following the steps to the T. But I seem to be stuck. For some reason the computer won’t Flash. I can see the progress bar come on for s split second, then it goes away snd starts with a normal restart. Ive tried multiple times. Even tried reinstalling OS 6 to El Capitan.
Any ideas?
Hi there,
I would like to know what and how you have fixed this problem as I have it and need your help please.
I purchased an early 2009 Mac Pro with nothing on it. I want to upgrade it to use it for music production. What are my next steps to catch up with this article?
hi, Tried to upgrade my 5,1 to Big Sur using your patcher tool as per your video. it does the creating fine, but always ends in an error, which I have copied below
Password:This application is a GUI for the BarryKN Micropatcher.
Thanks to MinhTon, MacHacJac, BenSova, Jackluke, iPixelGalaxy, BarryKN, ASentientBot, and others
bigsur Chosen!
Creating Bootable Installer. DO NOT CLOSE.
Erasing disk: 0%… 10%… 20%… 30%… 100%
Copying to disk: 0%… 10%… 20%… 30%… 40%… 50%… 60%… 70%… 80%… 90%… 100%
Making disk bootable…
Install media now available at “/Volumes/Install macOS Big Sur 1”
disk0 was already unmounted or it has a partitioning scheme so use “diskutil unmountDisk” instead
Volume on disk0 failed to mount; if it has a partitioning scheme, use “diskutil mountDisk”
If the volume is damaged, try the “readOnly” option
createinstallmedia failed! Please try again…
do you have any advice on why this is so?
Hi my macpro 2009 flash to 5.1 loaded successfully after the last restart is just shut itself down. Always when I restart during startup
Hi Jan, thanks for such an informative and complete post, really appreciate it.
Does the upgrade to High Sierra re-enable SIP or does this need to be done manually?
Jens, I’ve updated my mid-2012 MacPro with a new 3.33 6 core CPY, RX580 GPU, 64GB RAM, and BT4.2 card. The only problem with the upgrade is my GPU doesn’t provide EFI support, so: no Recovery screen. The boot screen only shows up to offer my login screen. Is there some way I can use the USB routine to install Big Sur? How might I do that?
If your system works fine right now, you can try to upgrade instead of doing a fresh install. Just launch the installation from the created USB drive from within macOS.
Only, if something goes wrong, it will be pretty hard to recover without an original/supported EFI GPU.
Hi Jens
Thanks for sharing this process with us.
I have gotten to the point where I am booting from the usb-drive, but the progress bar have been stuck at 45% for long time. I have tried three times, but still only just under half way.
How long would it normally take to get to the actual installation screen ?
– Christian B, Denmark
Hi Jens,
Can you help me out concerning the intallation of BigSur? I am trying to reboot with the option key pressed down but the two options that I get are my ssd and the floppy with the installer. No usb icon. What now ?
Cédric, Belgium
I would try to recreate the USB drive. Start with erasing the drive first (make sure you select to show all devices and select the top entry for your USB drive).
If that does not help, simply try another USB drive. I noticed that some USB drives appear as an external hard disk instead. It looks like Macs have more troubles booting from those.
For me, I got all the way to rebooting and holding the option key. I only get a choice of the usb, and not my ssd. What is missing?
In other words, I only see the “Install macOS Big Sur” floppy disk option. I don’t see the usb option as shown in your screen shot of video.
i purchased a 4.1 recently , and have been reading about the upgrade , today i stumbled onto your page and you seem the apropriate source to drob a question..
I am not a mac user so terminology may not always be 100% accurate.
Been trying to install any version of OS X , with no luck upto now , but here comes the strange part , from what i have seen on other pages and tutorials i do indeed have a 4.1 nehalem dual CPU setup.
But on one of the installers i was able to startup system in fo and it states it is a 3.1 , clearly the internals look nothing like the 3,1 that i looked up.
Do you know if there was an inbetween model with 4.` hardware and 3.1 firmware , and if so , can it be flashed to 4.1 (and 5.1 subsequently)
this really has me stumped , but perhaps you know something about this
As far as I know, there is no way to downgrade to 3,1 firmware nor able to upgrade another model to 4,1.
Maybe try to give in your serial number into everymac.com? This should give you a proper identification.
Other than that, hardware-wise the 4,1/5,1 have the typical CPU/memory tray while the 1,1/2,1/3,1 do not.
Hi Jensd ;)
Nice job, I upgraded my single CPU Mac Pro 4.1 with new Xeon CPU, SSD and waiting for Ram arrival (4*16 GB from a HP Server that should work, event it’s UDIM as I will replace all 4 slots)
I bought a used RX 560 GPU who should arrive mid of the week, I. wonder me if I can just add this GPU and keep the GT120? Do you think that MacOs will recognize the 2 GPU cards? It can be useful when using OpenCore Legacy Patcher as it will, or should, add configuration for the will known GPU and for the new one ?
Right or not ?
Regards
Emmanuel (from France)
Vooral de combinatie van praktische tips en technische uitleg maakt het artikel enorm waardevol, zowel voor beginners als voor gevorderde gebruikers.
Venez nous rendre visite Telkom University Jakarta