
Windows 11 has been released some time ago now and comes with some new hardware requirements like the need for TPM 2.0 and secure boot. Also, some older processors are no longer supported even though they should be perfectly capable of running the OS. In case your system does not meet one of these requirements, you will not be able to install Windows 11 in a supported way. This article explains you how to work around those limitations and install Windows 11 on an unsupported machine. The methods used here also work for the 22H2 update.
Update for Windows 11 25H2
As Microsoft released their 2025 update of Windows 11 by now, the instructions to upgrade to the latest (25H2) version are different. I documented these in a separate post which you can find over here:
Below you can find the article for 23H2 as reference but keep in mind that some things might no longer work since 25H2 is released.
YouTube Video
If you are interested, I also created a few YouTube video from this blogpost. If you prefer classic text, you can just follow the rest of this article:
For upgrading your current Windows 10 installation to Windows 11
For a fresh install or dual boot
Introduction
Although I do understand the reason for some of these new hardware requirements, I feel that some of them should’ve been something configurable or optional. Especially if you have a bit of an older but high-end system, it feels bad that you will run behind just because of these requirements. And although Windows 10 is not end of life yet, you will probably run into compatibility issues in the near future anyway.
As mentioned above, I was first using and explaining another technique to get around the hardware checks. This was done by combining the Windows 10 installer together with the Windows 11 installation files. In the meanwhile, I found out about an easier method that no longer requires downloading Windows 10 and which causes less issues.
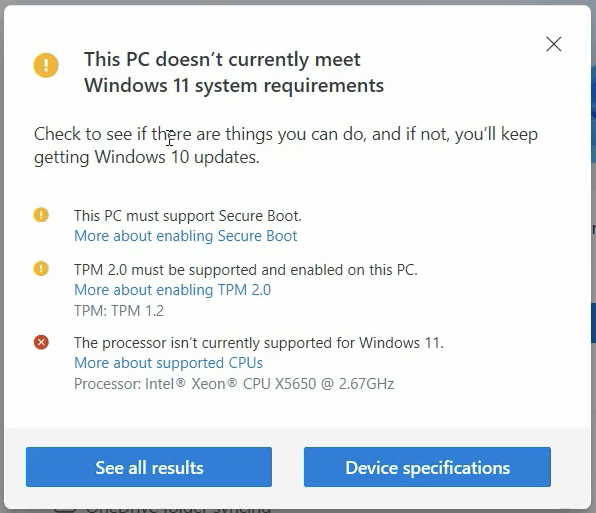
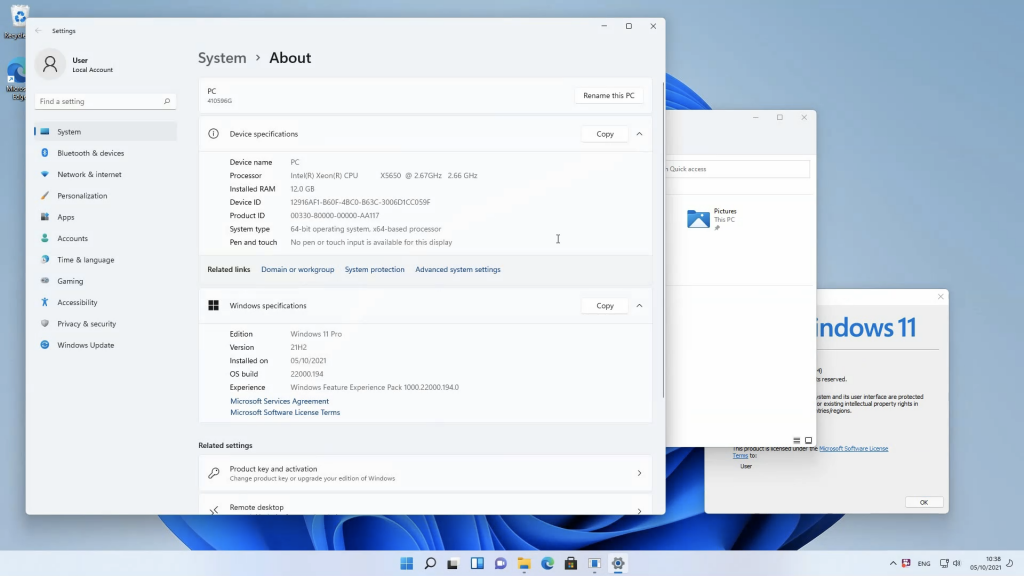
For this article, I’m using a PC with a CPU which is officially not supported, the machine also does not have TPM 2.0 and does not support secure boot:

Using the PC Health Check tool, I could see the following:
There are a few options or methods to get Windows 11 installed on your unsupported hardware:
- Upgrade: where you will upgrade your current 64-bit (not supported on 32-bit) Windows 10 installation to Windows 11. All your applications and files will be preserved
- Fresh install: where you remove the current installed operating system (Windows 10 or other) and replace it by a fresh and clean Windows 11 installation
- Dual boot: where you add Windows 11 next to the current installed operating system (Windows 10 or other) and you can choose which to boot when you start your PC
License and activation
Regardless if you are running Windows 11 on supported or unsupported hardware, you will be able to activate it using any valid Windows 7, Windows 10 or Windows 11 product key. Just make sure that the version is a match with the key (Home/Pro).
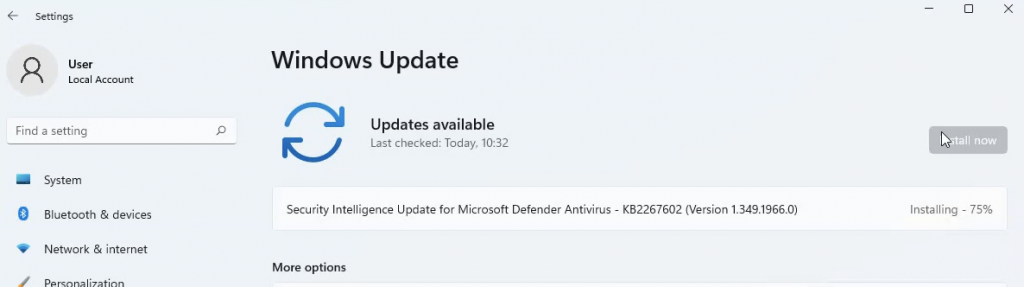
Updates
There’s a lot of discussion regarding updates for Windows 11 on unsupported hardware. So far I have been running Windows 11 for a few months on unsupported hardware and updates are coming in exactly as they would on supported hardware. Nobody, except Microsoft, is able to tell if it will stay that way. If you want more info on this, have a look here as well: https://youtu.be/_ECCgzne2UI
The 22H2 update unfortunately doesn’t seem to be offered to systems already running Windows 11 on unsupported hardware. There is a workaround for that, which I covered in a separate post. You can find it over here: https://jensd.be/1860/windows/upgrade-to-windows-11-22h2-on-unsupported-hardware
Performance
Same as for the updates, performance is a great point of discussion for unsupported hardware. I’ve been testing and comparing performance between Windows 10 and Windows 11 on the same hardware. The conclusion was that there is no real/measurable performance difference. Have a look here as well if you want more details: https://youtu.be/6zkAxYOe_IM
Creating the bootable Windows 11 USB installer
The first step, regardless which of the above three methods you plan to use, is to create a bootable Windows 11 installer USB drive.
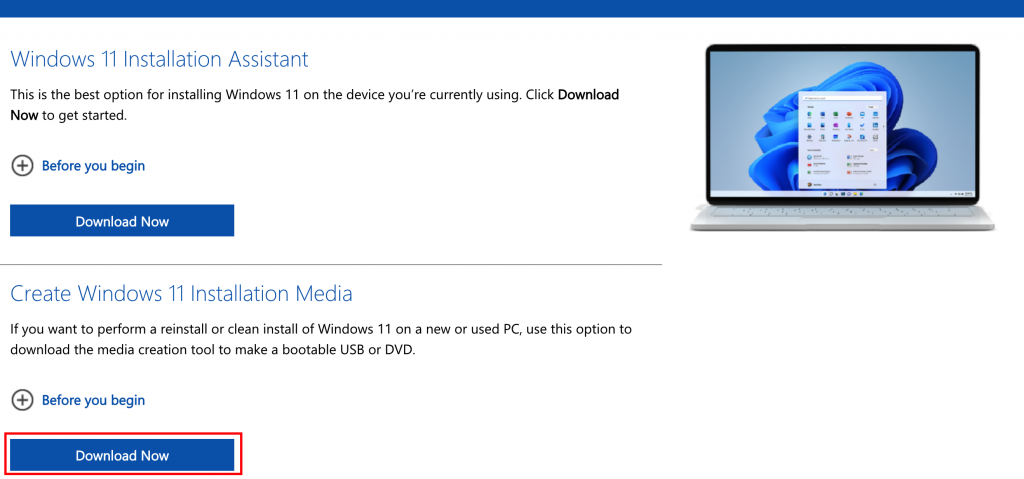
The easiest way to do this, is by using the Media Creation Tool. This can be downloaded from Microsoft’s website: https://www.microsoft.com/software-download/windows11
Once we have the tool downloaded, we can insert the USB drive which we will use. It has to be at least 8 GB in size. Then start the Windows 11 Media Creation Tool.
After the initial “Getting a few things ready” wait and accepting the license, choose the language and click Next:
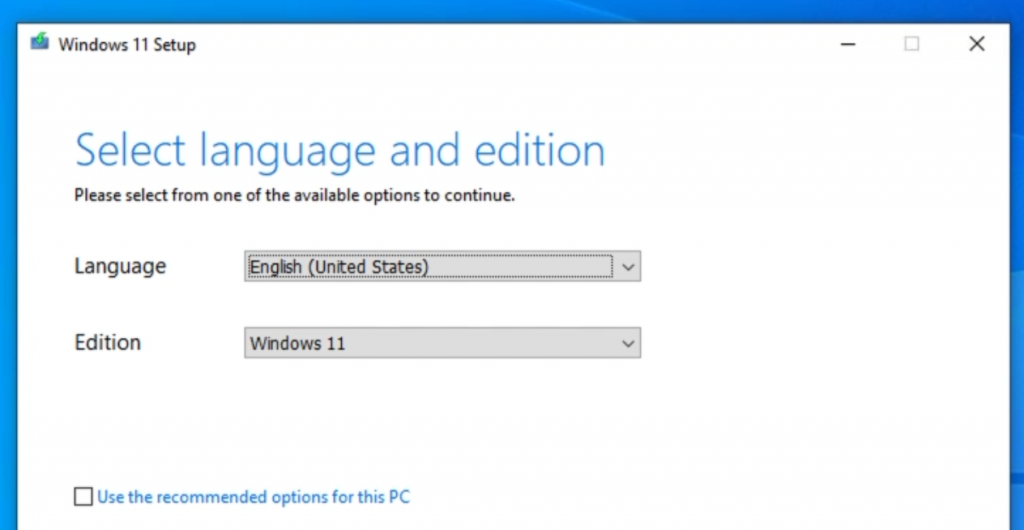
For an upgrade, the best is to leave the “Use the recommended options for this PC” as having a language mismatch will not allow you to upgrade.
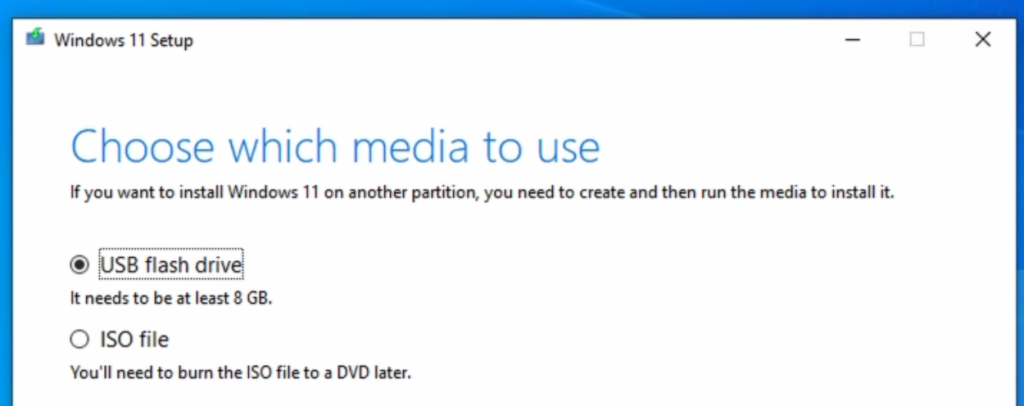
In the next screen, select to use a USB flash drive and continue with Next again:
Finally, select the USB drive which you inserted and start the process by clicking Next.
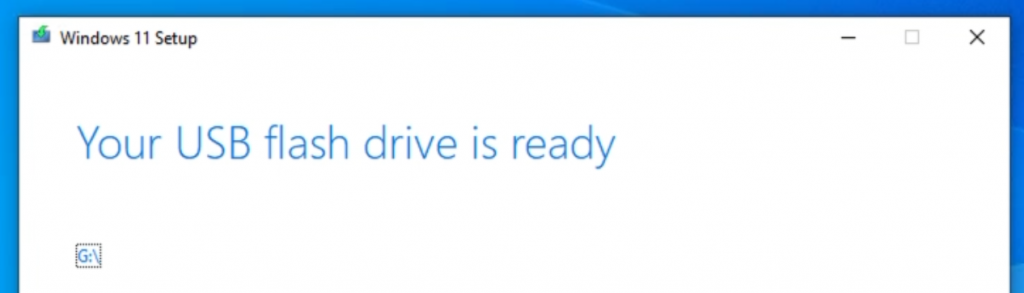
After some time and the tool has downloaded all files and copied them to your USB drive, you should see the following:
Method 1: Upgrade
Now that we have raw installation media, it is time to decide which of the mentioned methods you will use to get Windows 11 on your machine.
The first method that I will explain is how to upgrade your current 64-bit Windows 10 installation to Windows 11. Here you will keep all your installed applications and files and your current installation of Windows 10 will be upgraded to Windows 11.
Make sure to take a proper backup of your files before going through this. Although it works fine in most cases, you never know.
Another thing, as I mentioned briefly above, that has to be checked beforehand, is the language. The installation media’s language has to be a match with the currently installed OS.
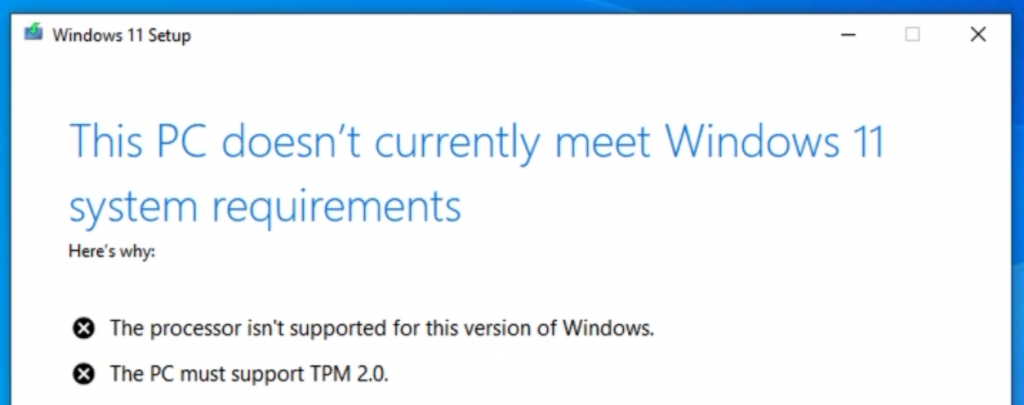
If at this stage, without any further modification, you would run the upgrade, you would see the following issue:
To overcome the hardware checks when doing an upgrade on unsupported hardware, we need to replace a single file. The file is located in the sources subfolder of the USB drive, called appraiserres.dll. You can download the modified appraiserres.dll file from here: https://jensd.be/download/appraiserres.zip and copy it to the sources folder on the USB drive, and confirm to overwrite the file:
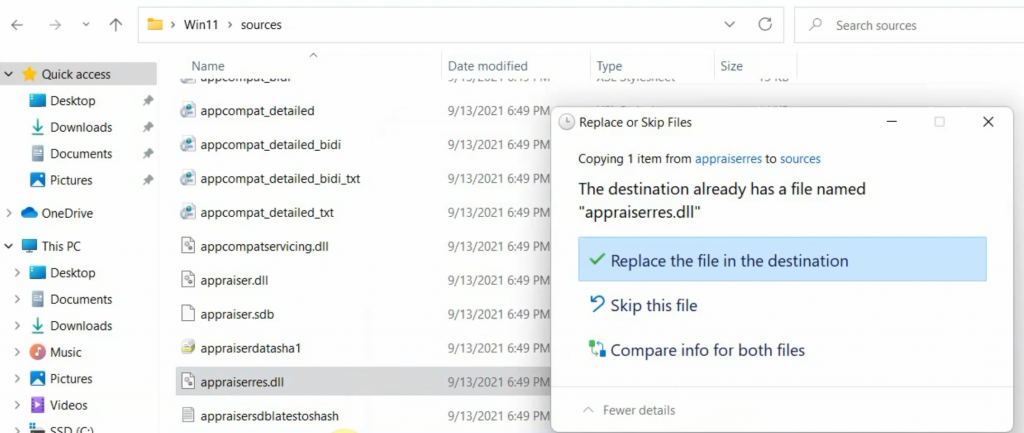
To double-check, make sure that the file size of appraiserres.dll in the sources folder is now 192 kilobytes.
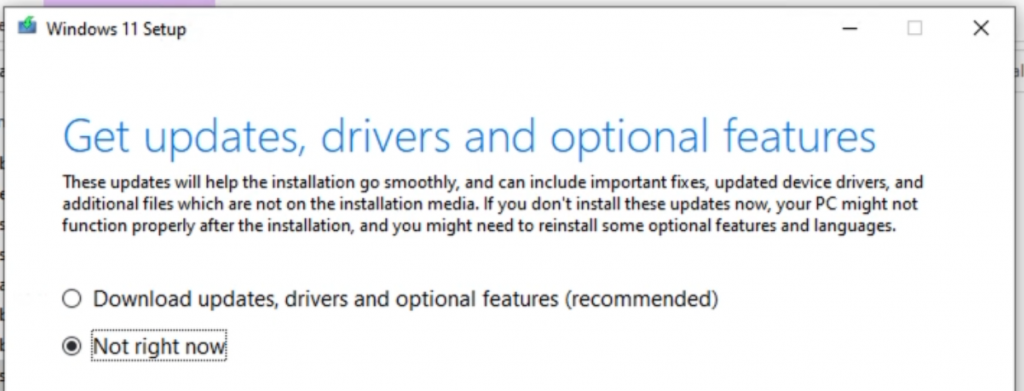
After replacing the file, there is no longer any hardware check… Now just run the upgrade as you would do on supported hardware. Run setup.exe from the root folder of the USB drive. Make sure to go to “Change how Setup downloads updates” and check “Not right now”:
Alternatively, you can also disconnect your PC from the internet during the upgrade. It looks like in some cases that can help if you experience problems with upgrading.
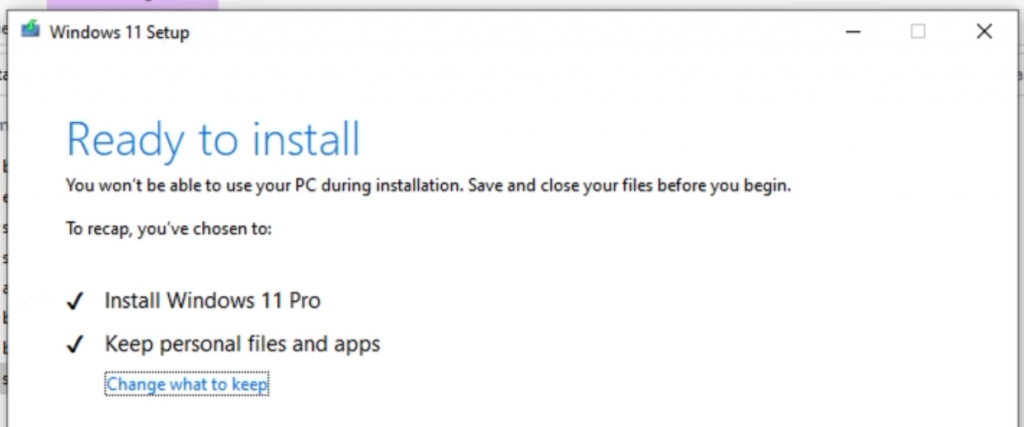
The rest of the steps should be pretty straightforward. Click yourself through the questions and at the following screen, click Install:
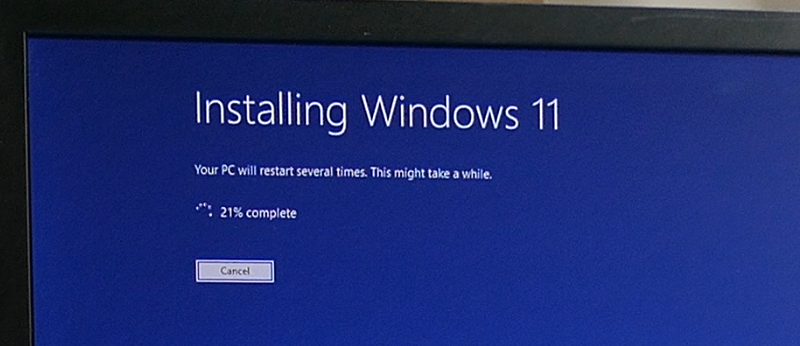
Once you do, the upgrade will take place and your current installation will become Windows 11:
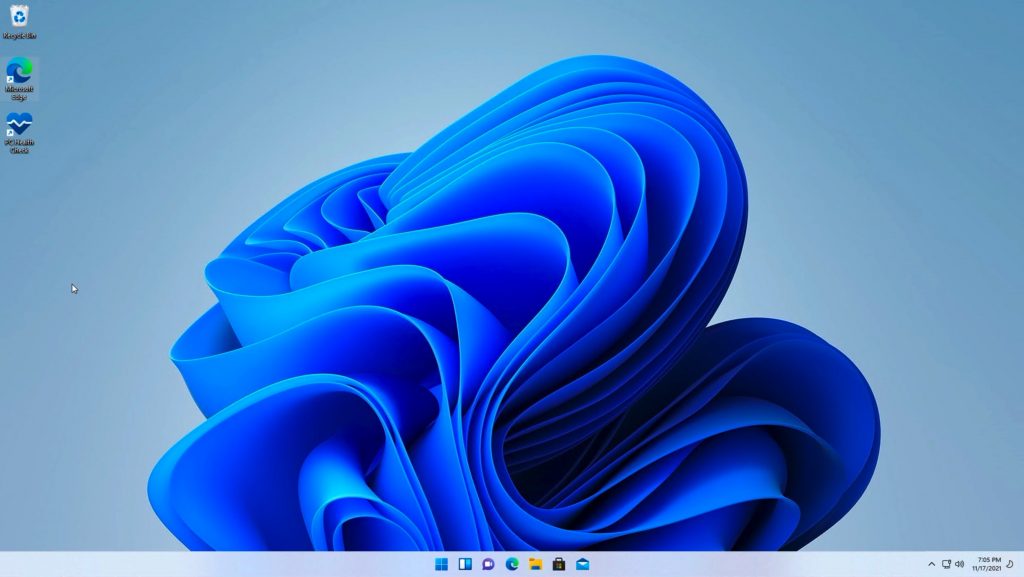
After some patience, and logging in, followed by some more patience, you should be greeted with your freshly upgraded Windows 11 desktop:
Method 2 and 3: Fresh install and Dual boot
The next method, if you didn’t choose to upgrade, is to do a fresh install or dual boot. The steps to go through this, and especially the workaround for the hardware checks, are roughly the same for these.
Additional preparation for a dual boot
For a dual boot, you will run Windows 11 next to your currently installed OS. In order to do so, you first need to reserve space. Hence we need to shrink the volume that has your current installation. Obviously you need enough free space to do so. Around 60GB is the minimum you will need.
This can be done with Disk Management. Start Disk Management by clicking the start button or Windows key and type diskmgmt.msc, then press Enter.
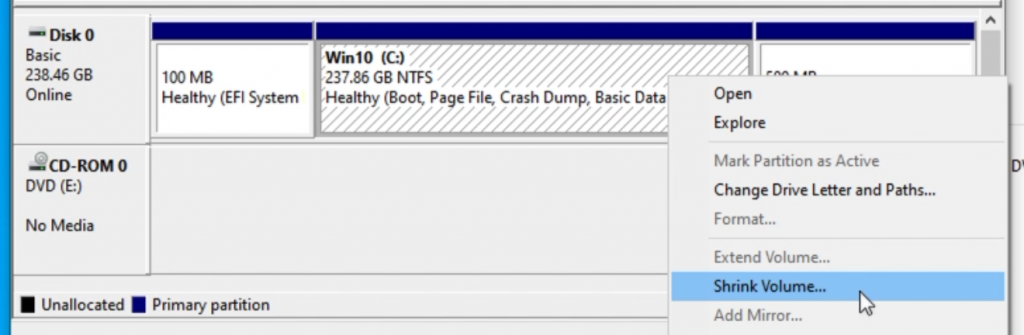
In Disk Management, right click the volume of your current OS installation and choose Shrink Volume…
In the dialog, choose how much smaller to male the original volume (C:). I chose to make it around 100GB (105.000MB) smaller:
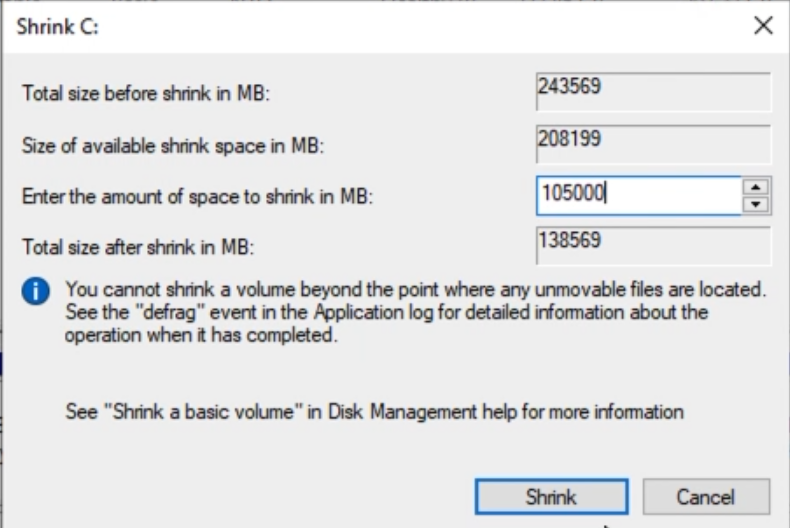
After clicking Shrink, the volume is made smaller and the space that is freed is marked as Unallocated in Disk Management. Right click this space and choose “New Simple Volume”:
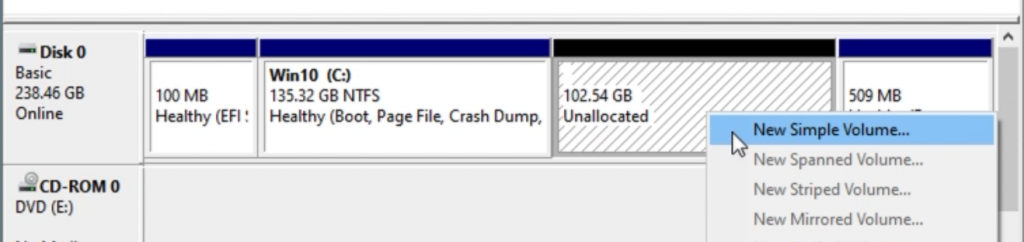
Click through the dialog and give the volume a name you will remember. I chose for Win 11:

At this point you are ready to continue with the next steps.
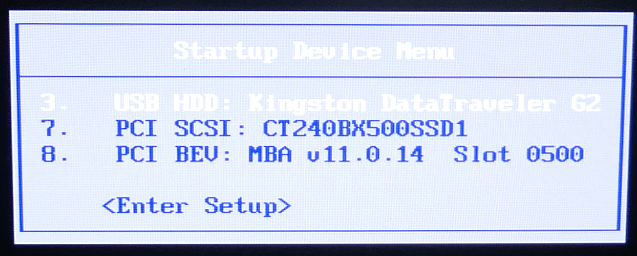
Boot from the USB drive
In order to do the install, change your BIOS settings or press the key (F10 or F12 typically) to choose a temporary boot device and boot from the USB drive:
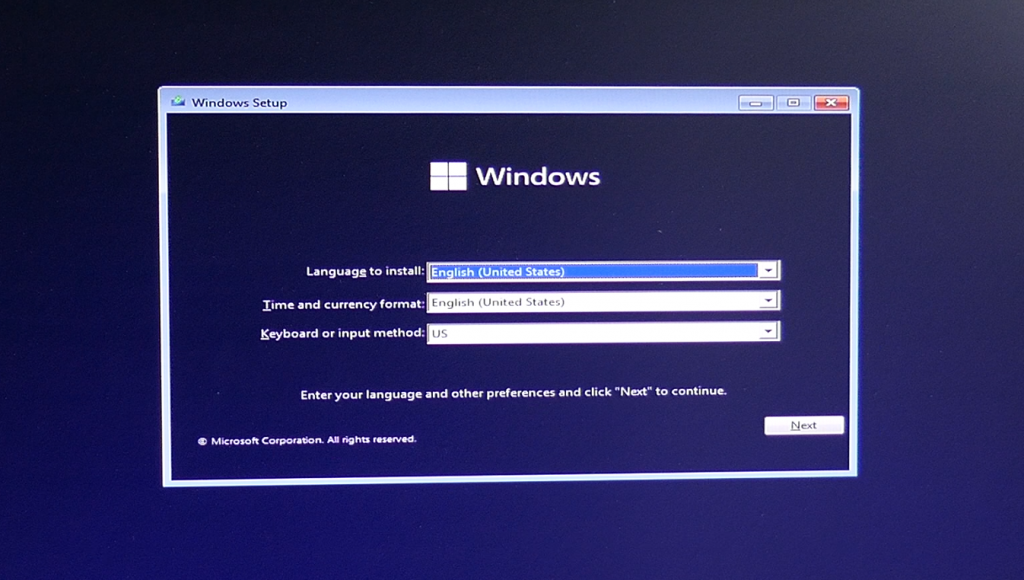
Once the installer has started, select the language, region and keyboard layout:
After clicking Next, before clicking “Install Now”, the time is there to take the necessary action to work around the hardware check. Otherwise we will get a message that this PC is not supported for Windows 11.
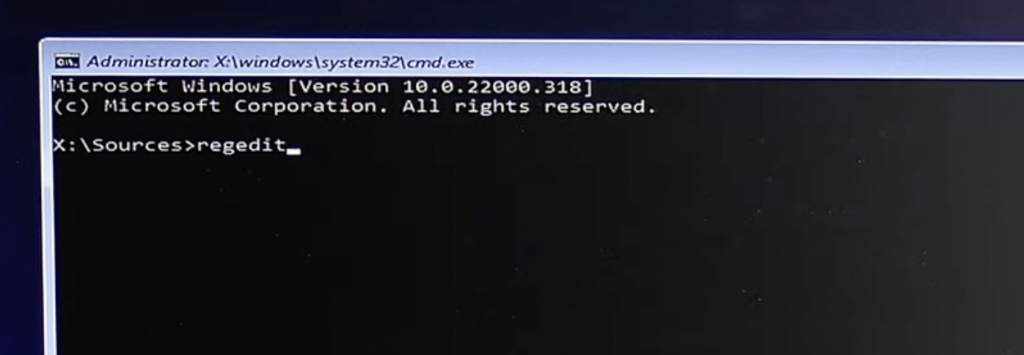
To do so, press Shift + F10 to open a command prompt. On some laptops, this will require you to press Shift + Fn + F10 if the F-keys are not default).
In the command prompt, type regedit and press Enter, to open the registry editor:
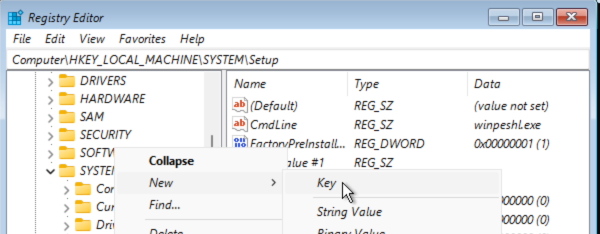
In the registry editor, navigate to: Computer\HKEY_LOCAL_MACHINE\SYSTEM\Setup and add a new key there called LabConfig. To do this, right click on Setup and choose New > Key:
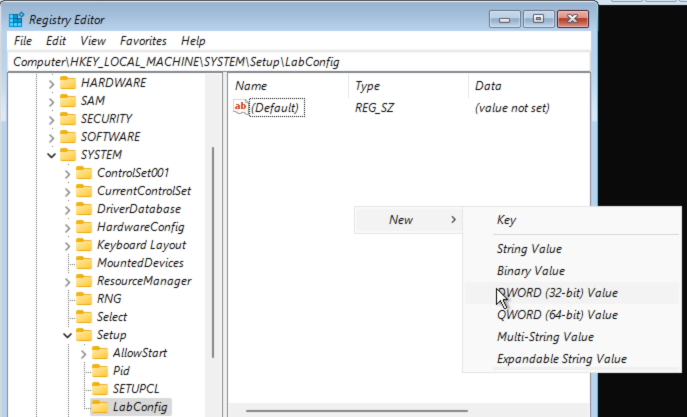
Give it the name LabConfig and in the key, right click and choose New – DWORD (32-bit) Value:
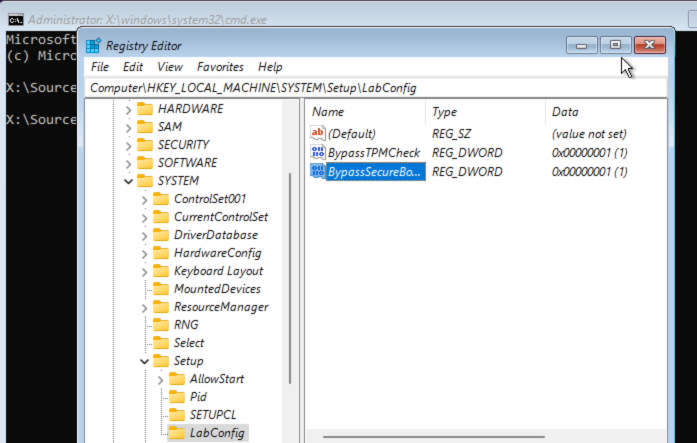
Give the name BypassTPMCheck to this DWORD. Repeat these steps a second time but nowgive the name BypassSecureBootCheck. Then double-click on each of these two DWORDs and change the value to 1. As a result, you should get the following:
Now that’s done, we can close the Registry Editor and the command prompt we opened and continue with the install by clicking “Install Now”
In the next screens, choose: “I don’t have a product key”, if asked. It can be added later. Accept the license and choose for: “Custom: Install Windows only (advanced)”. You should end up with the “Where do you want to install Windows?” dialog eventually:
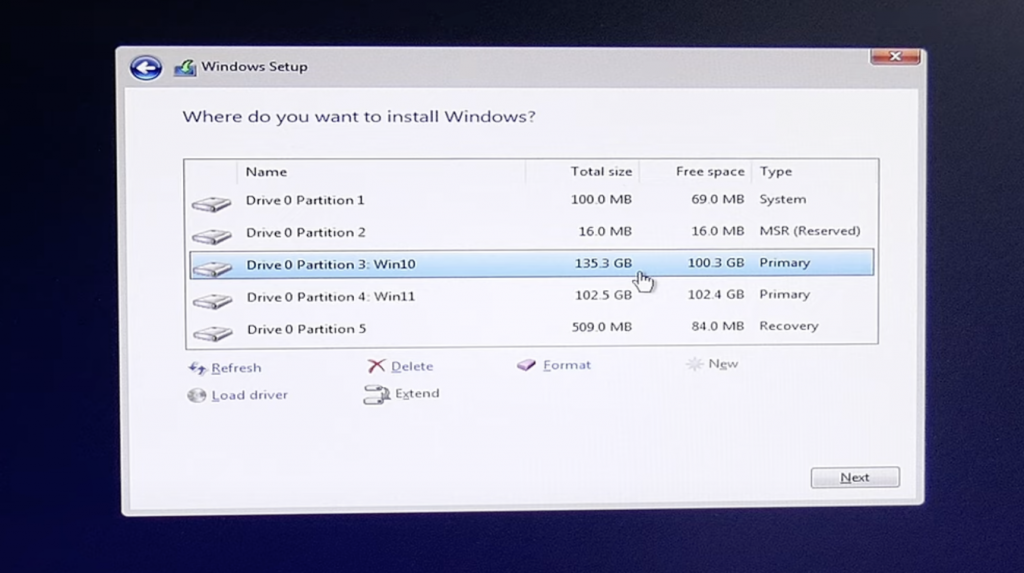
Here things are slightly different for a fresh install or a dual boot.
For a dual boot, you can see a similar layout of the drive here as we saw in disk management. We have the volume called win10 which has our currently installed Windows 10 and the volume which we created before called win11. So this is the one we need to select, then click next.
For a fresh install, we can simply remove all current volumes one by one. You could create a new one yourself but just selecting the whole drive and clicking next is fine. The installer will do the necessary.
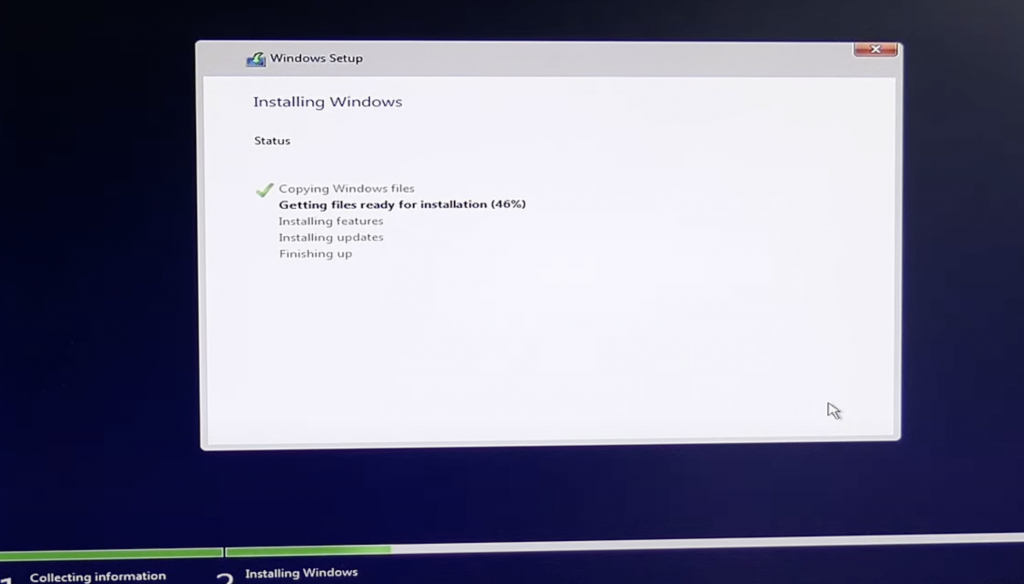
From here things are the same again. Files are getting copied and the installation continues.
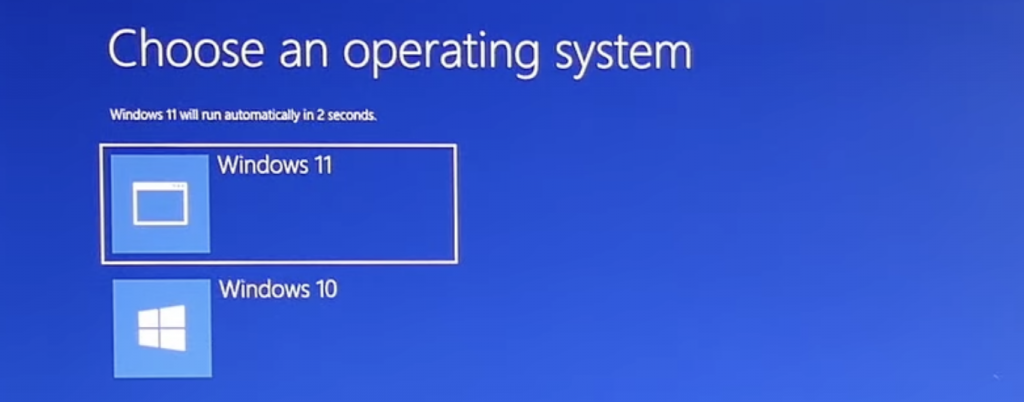
The computer will eventually restart and for a dual boot you will start to see the option to choose which version of Windows to start:
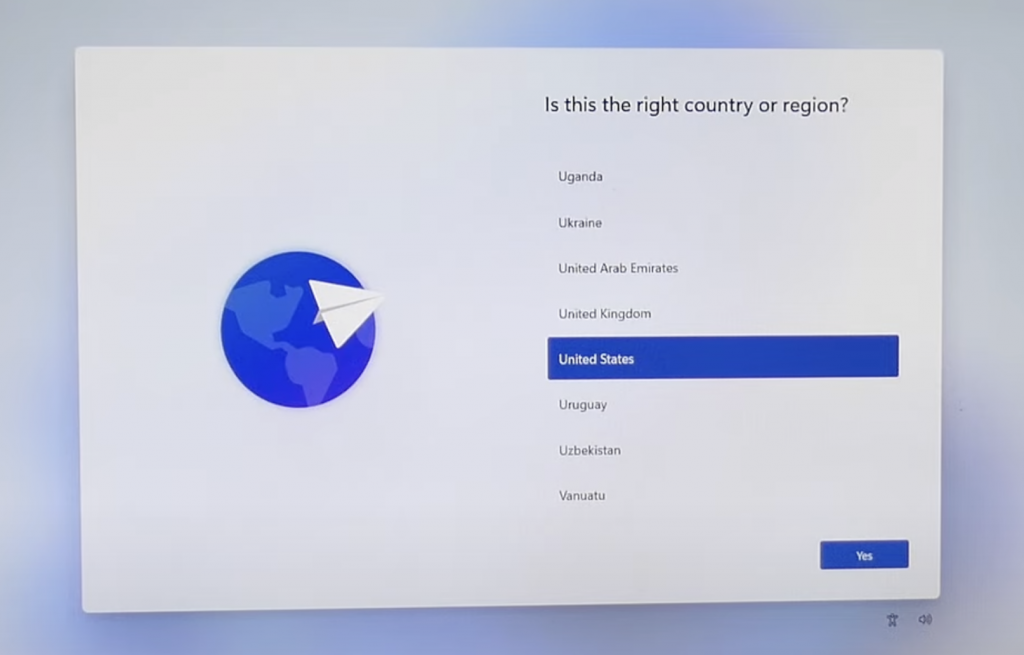
After some more patience, you should end up with the following dialog, where we need to select our location and keyboard layout:
Eventually we need to give a name to our PC, which results in another reboot. When the PC comes back, the wizard or dialog continues.
Just follow the rest of the steps to complete your Windows 11 installation. Once done, you need to have some more patience and eventually you should end up with a fresh Windows 11 desktop:
As you can see in the above screenshot, this runs just fine on the incompatible hardware.
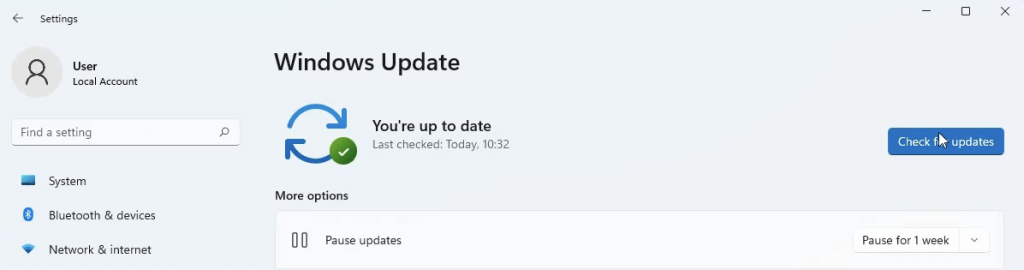
Updates seem to work fine as well:
Hope this helps you in getting Windows 11 installed even if it is officially not supported…
Performance on unsupported hardware
In case you’re interested how the performance will be on unsupported hardware, I did a video on that as well. So feel free to have a look if you’re interested:
Tried to follow your steps but it dont give me options to select windows version
If you have an activate version and/or a key in the BIOS, it will select the version matching that key.
Hey, great work. Does this work for upgrading an existing Windows 10 system or new install only?
You can run setup.exe from the USB drive (after going through all the steps) instead of booting from it.
This will allow you to do an upgrade. Just make sure you are not installing updates in this process (it’s an option).
It will show Windows 10 everywhere but if you did this right, you will end up with Windows 11.
Updated the article to have this info in it as well. Good luck with the upgrade.
i need your help i have followed every step and when i go to boot its not getting detecting windows11 it coming up with a list of windows 10 os
Windows 11 will see the install.swm and install2.swm as *.wim files ?
Correct, the installer finds them and knows how to handle
My USB was created on a 10 Home edition machine. Can I select 11 pro or am I restricted to Home ?
Create/edit sources\ei.cfg with:
————————————
[Channel]
Retail
————————————
Doesn’t really matter on version you created it but if you want to use the license key on the same machine, the version has to match. If it is for another PC, it has to match that one instead.
Thanks. I noted the 11 media installer version has an install.esd that is about 3.5gb and doesn’t require splitting. Perhaps drop that into the 1 USB sources folder instead of splitting the larger one ?
What if I’m replacing the ESD file with win file and it succeeds do I still need to split the files?
You can replace install.esd or install.wim with the same from Windows 11. If it fits your USB drive is probably formatted different but as long asbit works, you should be good.
I WANTED TO ASK THAT AFTER INSTALLING THE WINDOWS 11 WOULD MY FILES LIKE WORD FILES , IMAGES , VIDEOS WOULD BE DELETED ?
In case you want to keep everything, you need to upgrade instead. There is a small section about that and also a video included where I do exactly that, step by step.
I don’t see W11 in the list. When I select W10 I get the error: This upgrade path is not supported. Please close Setup and relaunch from the root of the media or go back and pick a different installation choice.
Not sure what went wrong but looks like you missed a syep or did something different.
My fault. I used the setup in the source map.
Note: Setup crashed as soon it was checking for updates. When I switched that of everything was ok.
Thanks.
Followed your steps until CMD, but it always says:
[ERROR] Can’t open “g:\sources\install.wim” read-only: No such file or directory
ERROR: Exiting with error code 47:
Failed to open a file.
Any fix?
Most likely your drive letter is different from g: check in explorer which one matches with the Windows 11 ISO
Well the one made by Media Creation Tool is f: but I already tried to change the g: to f: it still doesnt fix it
You need the other drive letter, from the mounted ISO. Make sure you double-click the ISO first, so you get a new drive letter in explorer. That’s the one you need to use as. source.
Hi There
About to try use this method. Thanks so much. Just a quick question. Will this installation keep all of my files? Or will i need to backup and copy everything back onto my laptop.
The method covered in the article is doing a fresh install. But in case you want to upgrade, I did a video on that procedure as well: https://youtu.be/u1FmfJpJsKw
Didn’t find time yet to pour this in a separate article though.
On this method it stops at 31% of done
It will lose data or not
In case you want to keep your data, you can do an upgrade. Check the video that I mentioned at the bottom of the article. Should show you all you need. Always a good idea to take a backup anyway before doing such actions though.
getting erro :: windows could not set the offline locale information : error code : 0*800000001
I am also getting the same error, any help ?
I tried this method but didn’t work. First time I tried windows 10 source folder had install.wim, replaced it with windows 11 install.swm(splitting). Threw an error. Scond time the windows 10 source folder install.esd. Replaced it with install.wim(splitting). Not sure why it changed from .wim to .esd, will try again. Should the split “install” file be in “.wim” format “.swm” or “.esd”??
The destination file needs to be .swm (splitted wim).
The Windows 11 Media Creation Tool creates install.esd at about 3.5GB and would not require splitting. What are your thoughts about deleting that fril from the Windows 10 USB and replacing it with the Windows 11 equivalent ?
Replacing install.esd on a Windows 10 USB drive created with the Media Creation Tool with the same file from a USB drive created with the Windows 11 tool. So in short: it should just work. The installer can use install.esd, install.wim or install.swm files.
Hi sir, is it possible if i copy windows 10 home and windows 11 at same drive D (windows on C), and use your method and install direct from D?
Not sure, in theory that should work, just let your BIOS boot from that drive then to start the installation.
hi, i have one all the steps but when was installing in my macbook pro, it is shwing me to choose language to select, time format etc but I am nit able to choose as mouse pad/arrow is not visible anywhere and looks like stuck , do you have any solution?
Most likely the drivers for your keyboard are missing. Have a look at the article I wrote for the MacBook Air 2019. Had the same problem there: https://jensd.be/1011/windows/install-windows-10-on-a-macbook-air-2019-2020-with-t2-chip
Hi jensd
I completed the steps exactly as your steps but when I tried a fresh install, every time the result was for windows 10??? Wonder why?? Would appreciate some advice. Thanking you!! John E
Since wimlib doesnt work I decided to use FFSJ will this still work and do I just do the same steps as you do when you transfered the splitted file to the USB?
Don’t think that will work. As Wimlib does more than just splitting the data in the file. I don’t think a regular split of the files will be recognised by the installer.
See my reply on your previous post regarding Wimlib. You’re missing a step somewhere I believe.
Hi. Can I use an NTFS USB Drive on Media Creation Tool? You said “the Media Creation Tool formatted the USB drive with FAT32”, but I only have an USB Drive with NTFS only. Thanks for your reply.
I believe it will get re-formattes by the tool to FAT32. So no manual action you need to do before.
Pingback: Fix issue with empty Windows Security app after upgrade to Windows 11 | Jensd's I/O buffer
Hi Jens,
you have a lot of interesting videos on YouTube. I felt like installing Windows 11 using the two ISO files. Everything went according to plan until the very end until it was working on updates. I have followed all the instructions in https://support.microsoft.com/en-us/windows/get-help-with-windows-upgrade-and-installation-errors-ea144c24-513d-a60e-40df-31ff78b3158a and also the links the refer to.
I have some photos of the installation process you can have. Get them here https://www.dropbox.com/s/ewcongi7az27987/Downloads.zip?dl=0
Let me know if there’s an easy solution but don’t spend more than 5 minutes.
Regards
Jorgen
Not much I can say to be honest IRQL not LESS not EQUAL usually has something to do with drivers.
You could try to run the update while being disconnected from the network/internet and prevent it from downloading (driver) updates.
Other than that, maybe check event log to see if it gives you a pointer to which device (and driver) caused the BSOD. Not sure if you can see that in your regular event log for a BSOD that happened during upgrade.
You could also try to do a fresh install if you’re up for it as there won’t be any conflicts with existing drivers in that case.
Hey Mate, ‘sup. I have the ‘Frankenstein’ USB but I have not installed yet. My HDD is partitioned into C: and D: I have Windows 10 on C: Can I install Windows 11 on D:?? In other words can I have both OS(s) on my HDD. I have 3 terabytes to play with.
I converted my flash drive from FAT32 to NTFS and then copied the file. Do you think this will work or must I split the file?
What to do for the Error 0x800000001 while installing this way
Thanks for your favor, I appreciate that, but I need your help here.
after writing your code in command prompt, it shows me this message (This app can’t run on your PC)
To find a version for your PC, check with the software publisher.
how can I fix this.
do you have an idea?
Most likely you’re running a 32 bit version of Windows currently. Can you try with the 32 bit version of Wimlib instead, that should work.
MSI GV62 i7-7700HQ/8GB/1TB GTX1050 niewspierany procesor i7 7700hq 7th
tpm 2.0 ok , gpu ok
MSI GV62 i7-7700HQ/8GB/1TB GTX1050 unsupported cpu i7 7700hq 7th
How to install Windows 11 Polish version on my msi laptop using windows 10 install
help me
The article is the exact answer to your question… Did you try that?
Ok, he will try, but I have a question whether you can install update in Polish language pl
I’m all compatible besides CPU not
Will everything work on my laptop for MSI games
If you upgrade, the language needs to be the same as the current installed system. If you do a fresh install, it doesn’t matter, you can create the USB drive on whatever language the system had. Only both ISO’s have to be the same language obviously :)
Good luck with the process!
I have one more question if I have already made a pendrive from Windows 10 en 64 bit I do not remember the version Is it a clean version of Windows 1909 for example if version 21h1 or a clean version of Windows 10, yes I ask you
Can I copy files from my Pendriva from Windows 10 installation and change on the HDD disk in Installing Frankenstein Windows 11 Catalog on the hard disk update so I ask and thank you for your help
For now, I still think or update Windows or not, this is my decision my laptop
have nice day
hi i waiting for an answer , have nice day admin
And thank you for help me, I wish you a nice day , bye
It says that ‘install.wim’ is read only, how can i change it?
That probably means you have something wrong with the paths and you have the mounted ISO as destination.
Double-check the command and compare with the article.
Upgrading win10 to win 11 on Mac Pro
Maybe this has been ask already but after the cmd prompt splits the install.wim file the created swm files now reside in ESD-USB > sources folder but in the accompanied video the swm files are located in ESD-USB > sources > migration > install.swm & install2.swm
Why am I seeing differently and further the migration folder only has wtr folder and assorted files within it but your example the migration folder has other many folders and files.
And to clarify I’m using setup.exe within the altered win 10 created usb to perform an upgrade which I’m preferable to an not a fresh install.
Thank you in advance for your advice.
The files are really in ESD-USB\sources. It might look confusing on the video but there is no need to work with any other directory than \sources.
If you’re upgrading using setup.exe there isn’t really a need to create a USB drive as you can leave the files on your HD. This also means that you don’t need to use Wimlib. (see the video about that for more details).
Do all computer components work after installing Windows 11 on lenovo 230x tablet?
I tried on an ASUS computer and was able to install WIN11 but not all components are working and it is not possible to update drivers.
I upgraded from windows 10 to windows 11 in an unsupported device and it upgraded successfully and working absolutely fine. Now I am unable to have video calls and camera option is not showing in device manager. Also camera access is allowed in privacy and security settings. I wanted to know the solution for this. I also searched for camera drivers but I couldn’t find. Is this happening to me or people who followed the same method. Here are the videos that I followed.
(1. Upgrade to Windows 11 on unsupported hardware
2. Fix empty Windows 11 Security or Defender App).
Model: Dell Inspiron 3558
Processor: Intel(R) Core(TM) i3-5005U CPU @ 2.00GHz 2.00 GHz
Installed RAM: 4.00 GB
System Type: 64-bit operating system, x64-based processor
hi hello and have nice day
good job , congratulations , and thanks you
Thanks for the logic have done it easily and differently just created bootable windows 10 USB via Windows 7 Boot USB Creator ( It’s a Microsoft tool) after i finished then deleted the install.wim then replaced it with windows 11 install.wim from sources folder. Everything works perfect
This post and the instructions for creating an installation disk for Windows 11 using the Windows 10 installer worked perfectly, both times I tried it. Install could not have been easier! After installation I was able to get Microsoft Updates and Windows 10 self-activated I guess using my Windows 10 license associated with my Microsoft account. So, running unsupported on a 10 year old Gigabyte GA-880GA-UD3H motherboard with an AMD FX-6350 and 32GB of RAM. Not really much different from Windows 10 as far as performance, but looking forward to trying the Android subsystem for Windows 11 before Microsoft might lock out unsupported devices.
Also, Windows 11 plays well in my multi-boot Windows environment with Windows 7, 8.1, 10 and now 11 each on their own partition across 2 disks sharing common program directories for 90% of my applications.
I did this for my iMac 2015 27” and it worked very well. My one error was setting up windows first in a dual boot setup. Set up Mac first was the better way, because I accidentally overwritten some boot files and had to do it over again. Question: I tried this same usb on a windows laptop and it failed to boot. What should I change differently?
The USB drive should also work on a “normal” PC. I used this method a few times without issues. Was the boot order set correctly?
Hi, Just a quick question and doesn’t look like it has been asked here. Will automatic Windows updates work fine after you have installed Windows 11 on an unsupported PC?
First of all, Thank you so much for posting all of these How-To’s!!! I did the mac Monterey on 2 old Macs and it as super easy! But for some reason I’m having issues with this one. I cannot for the life of me get the windows 11 ISO to mount, I keep getting an error message. I’ve tried deleting it and starting over but same results. Thanks
Great tutorial. Q i have…when trying to install win11 from usb, I make it thru copying windows files (100%) on the windows set up screen, the its prompting for “insert windows installation disk 2” that i cant figure out how to make it past. Any suggestions???
Pingback: Create a bootable Windows 11 installation USB on macOS | Jensd's I/O buffer
Eduardo Rodrigues
First I want to thank you for the video.
I have the same computer as yours and love it and don’t have plan to get away from it yet, I want to do the same dual boot but! I’m get confused when you delete all those partitions, I want to keep my recovery from Windows 10, is this possible in case I don’t want the windows 11 and keep my windows 10 as is it? And do I have any problem in my windows 10 if I delete the other partition with windows 11?
many thanks Eduardo
Why can’t i delete my appraiserres file?
That probably means you’re trying to delete it from the mounted ISO rather than from the copied files in the folder on the desktop.
Thank you so much! Worked perfectly on my ThinkPad W520. One just has to follow the instructions (carefully) and it WORKS! Even Windows Updates, although it does take some time to download all the required/needed files. Great work!!!
I used the approach in your first video (using Win10 ISO and Win11 ISO files) to test install this on a Windows 10 Pro running in a VM but, unfortunately, the install wouldnt continue and said that “this app can’t run on your PC”. I tested the install again using my host PC (without proceeding pass the initial start up) and that message never came up. So, the issue only happens when doing the install in a VM. Do you know what I can do to resolve that? I want to first test Windows 11 a VM.
Thanks!
T.C.
Nevermind my post above. Just discovered the VM I was using is 32bit. I will test with a 64bit instead.
Thanks for the great work!
Can you delete the registry files after a successful fresh install?
Never tried that but 99% sure this won’t be a problem. Those keys are only looked at during installation
I used all the registry hacks and they worked, but after playing around with the BIOS settings they aren’t needed at all (at least on the Dell I have – Optiplex from 2015)
On a Dell I flashed the newest BIOS, enabled UEFI, Secure boot and TPM.
Did a fresh install with no issues.
Followed your post on installing Win 11 – all good.
I did the following on a Dell Optiplex 3020:
Updated the BIOS to A20 from the Dell support page>
Changed the Boot Seq. to UEFI>
Enabled USB boot support
Disabled Legacy ROM>
Enabled Secure Boot>
Proceeded to install Win 11 from USB Media Creation Tool
(Used a clean ssd that was formatted and converted to GPT)
On the first install screen pressed Shift-F10
Only had to do the Bypass TPM Check in the registry>
Exited out of the registry and clicked Next in the install Win 11 screen.
Loaded up no problem.
Pingback: Is Windows 11 Better Than 10?
Upon doing more fiddling with the BIOS settings I enabled TPM, even though the Dell Optiplex doesn’t have one installed on the Motherboard.
Plugged in the Media Creation USB with Windows 11 and it installed with no Registry bypasses needed.
Haven’t yet tried to do and update to Windows 10 to 11 but it should also work.
Hey give it a try and pass it along.
Thanks for your great tutorials.
Perfect !!
After research, nothing solution to solve my problem: most sites with examples don’t working for me.
Fortunately jensd.de with this blog provided me the good procedure.
It’s working very well
Thanks a lot
Pingback: Upgrade To Windows 11 On Unsupported Hardware
Hoi Jens, ik kreeg tijdens de start van setup.exe een we’re having trouble determining if your PC can run Windows 11 melding. Ik was wel aan het testen op een PC die in principe voldoet aan de eisen van MS. Op je youtube is de meest recente commentaar over dezelfde error, misschien is het gedaan met deze workaround. In ieder geval nog niet lang dan. Ik zal nog eens testen met mediacreator maar ben ben vrij zeker dat ik dutch versie heb omdat media creator tool dezelfde versie voorstelt.
Correct, de methode waarbij je de file wist werkt niet langer. Je kunt de file wel vervangen door een exemplaar die altijd een positief resultaat teruggeeft. Heb dit aangepast in mijn posts en ook een apart artikel geschreven ivm. upgrade naar Windows 11 22H2: https://jensd.be/1860/windows/upgrade-to-windows-11-22h2-on-unsupported-hardware
Pingback: Upgrade to Windows 11 22H2 on unsupported hardware | Jensd's I/O buffer
When I try to copy your modified appraiserres.dll to the sources folder, I get a pop message that says there is not enough room to copy the file. I do not get the option to overwrite.
You are probably trying to copy the file to the mounted ISO and not to the copy of the files in the folder on your desktop.
Pingback: Install Windows 11 on a Mac Pro 1,1 or 2,1 | Jensd's I/O buffer
I used the first method to upgrade to Win 11 and it works perfectly. Vaio PC Intel(R) Core(TM) i7-3537U CPU @ 2.00GHz 2.00 GHz runs just as well as Win 10. I turned off things like notifications and animations just to help save some resources.
Thank you
The 22H2 updates are being successfully installed as at 19/07/23.