
It’s fairly easy to create bootable USB installation media for Windows 11 when using Microsoft’s Media creation tool from Windows. Unfortunately this tool is not available for macOS. This post explains you how to do this without using a Windows-based PC or VM and without using BootCamp assistant. This can come in handy when trying to install Windows on your Mac or PC or when there is simply only an Apple Mac available and you need to boot the Windows installer for various reasons. The media will work to install Windows 11 on both a Mac or regular PC.
YouTube Video
If you are interested, I also created a YouTube video from this blogpost. If you prefer classic text, you can just follow the rest of this article:
Introduction
This article is fairly similar to an earlier one I did on doing the same for Windows 10. In the meanwhile, I also took some more time to try and experiment to find an easier method. So far the same method, as I will discuss here as well, seems to be still the best.
With that, I mainly refer to the filesystem support on macOS. Both ExFAT and FAT32 are supported out of the box. As the installation ISO contains a file that is larger than 4 GB, ExFAT would sound like a logical choice as FAT32 does not support files over 4 GB in size. Unfortunately, I noticed that having the USB drive formatted as ExFAT causes a lot of PCs to not be able to boot from it. Hence we will still choose FAT32.
To overcome the issue with the large file, we will need to use a tool, Wimlib, which is able to split this file in two parts. More about this later.
Download the Windows 11 ISO
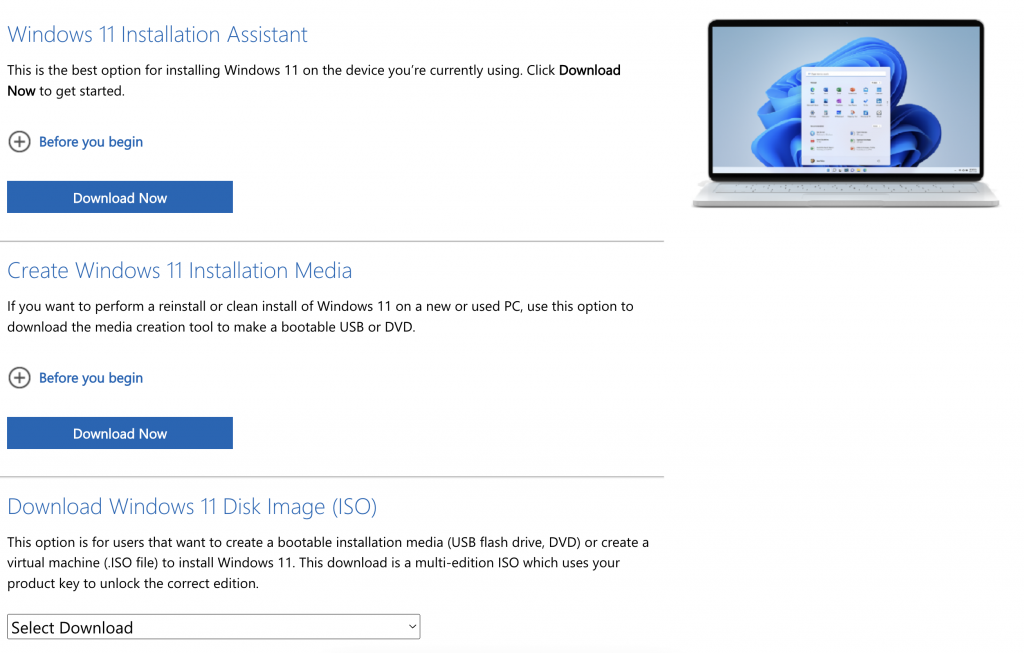
Let’s start by downloading the ISO from Microsoft. This can be done from: https://www.microsoft.com/software-download/windows11. On that page you can find a few options to download Windows 11: Windows 11 Installation Assistant, Windows Media Creation tool and the Windows 11 Disk Image (ISO):
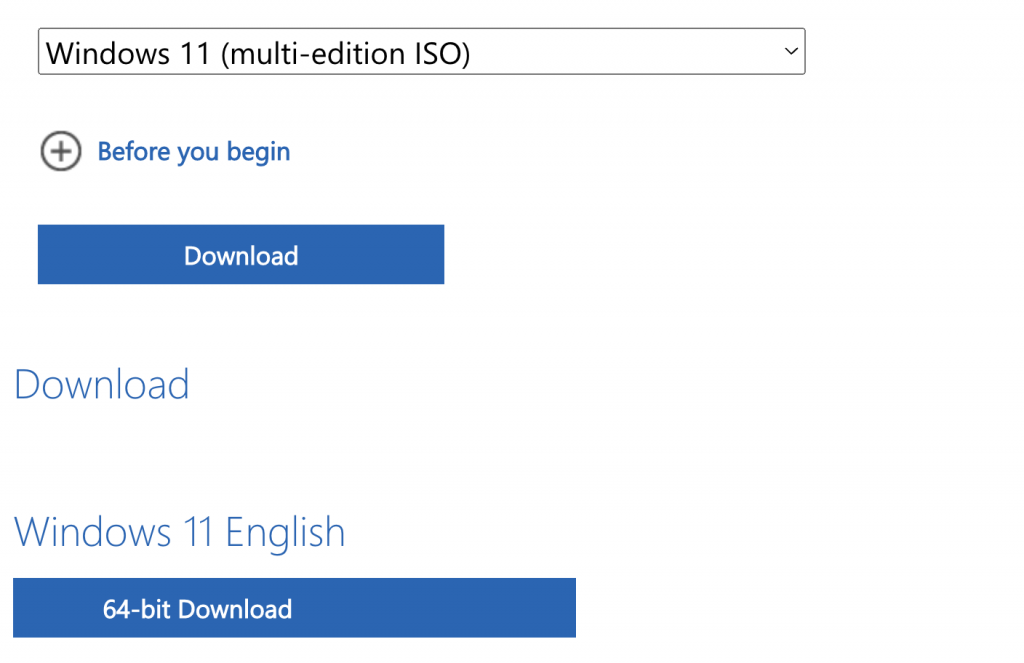
We will go for the 3rd option, to download the ISO. In that section, select the only option that is available from the dropdown: Windows 11 (multi-edition ISO), then select the preferred language, click the “64-bit Download” and wait for the download to complete to get the .iso file on your Mac:
Prepare the USB drive
While the ISO is downloading, we can prepare our USB drive. You will need one that is at least 8GB. Insert the drive in your Mac and start Disk Utility.
In Disk Utility, choose to show all devices:

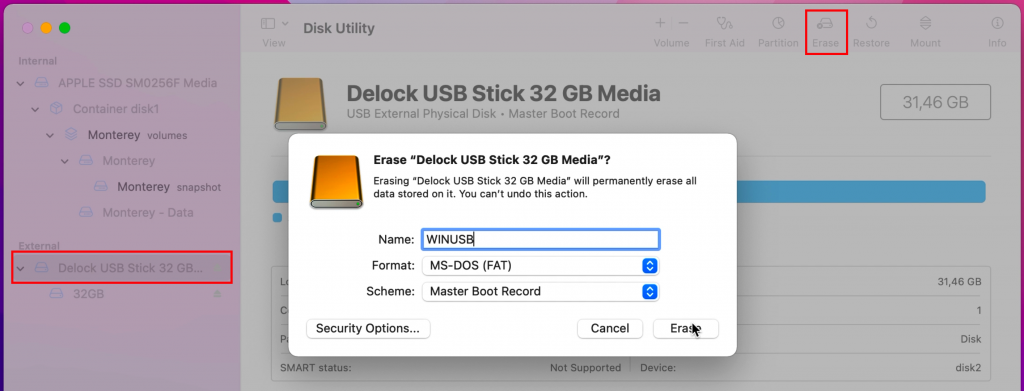
Then, on the left side, select your USB drive from the list. Make sure to select the full drive and not only one of the Volumes under it. Then click Erase on the top right menu. In the dialog, enter a name for the drive (WINUSB here), choose to format as “MS-DOS (FAT)” and “Master Boot Record” as scheme. Finally click “Erase” to complete the process:
As with the file system, I did try to go through this process while using GUID but that resulted in the installer not being able to find the necessary files during installation.
Copy all smaller files to the USB drive
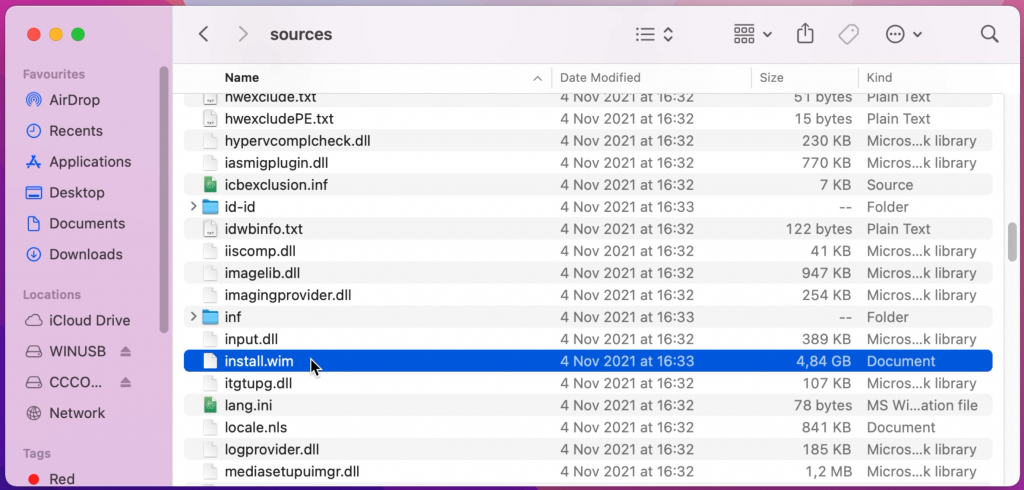
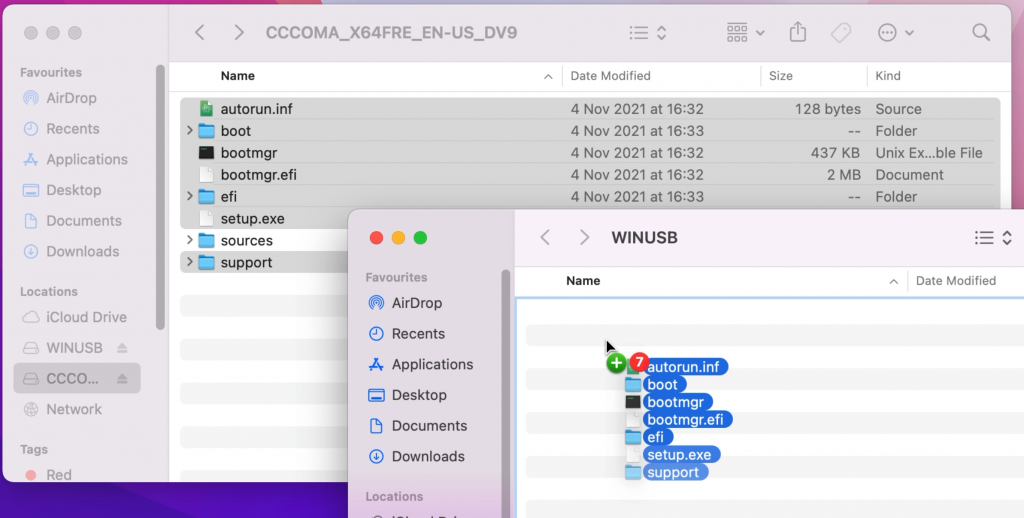
After the previous step, our USB drive is prepared. Once the ISO file is download as well, double click the ISO file to mount it. Then open it in Finder. As you can see, the sources folder contains one large file: install.wim which is over 4GB and will not fit on the FAT32-formatted USB drive:
We will take care of that later so for now, copy all remaining files to the USB drive using Finder.
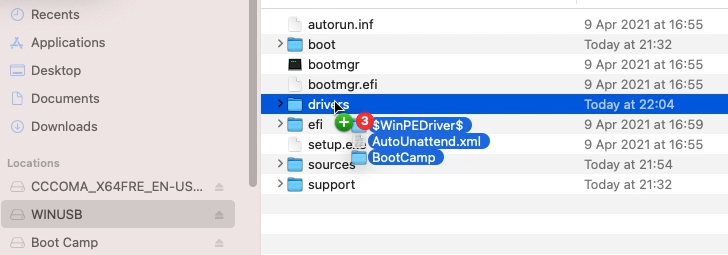
Open both the mounted ISO and USB drive open in Finder. Then I typically start by copying all separate files and folders, except for the sources folder from the ISO to the USB-drive
Once that is done, create a new folder and call it sources:
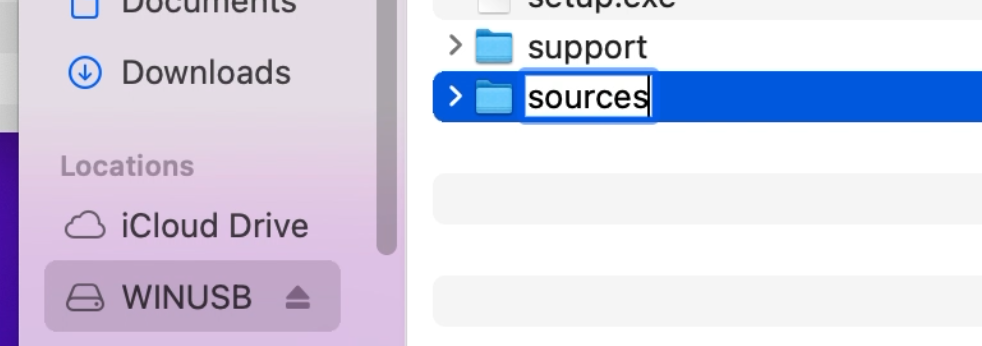
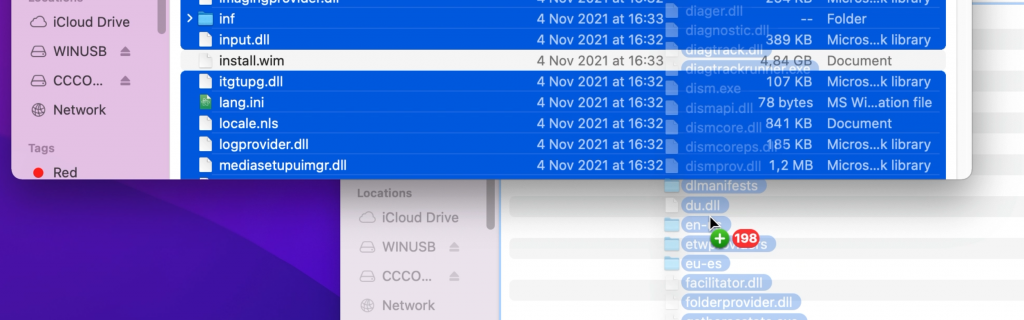
Next, copy all files from sources on the ISO, with the exception of install.wim, to the USB drive:
Prepare to split install.wim
So far things were pretty straightforward and if it wouldn’t be for that large file it would be a piece of cake. Unfortunately we have to work around that by splitting the file in two parts, smaller than the limit of our file system on the USB drive.
To accomplish this, we can use Wimlib (https://wimlib.net/). This is a tool that is developed to work with, and modify, .wim files. The easiest way to get this installed on your Mac is by using Brew (https://brew.sh/).
So, as just mentioned, we start by installing Brew. As is instructed on the Brew website, copy and paste the mentioned line in a terminal and execute it.

jensd@jensds-iMac ~ % /bin/bash -c "$(curl -fsSL https://raw.githubusercontent.com/Homebrew/install/HEAD/install.sh)" ==> Checking forsudoaccess (which may request your password). Password: ==> This script will install: /usr/local/bin/brew /usr/local/share/doc/homebrew ... ==> Next steps: Runbrew helpto get started Further documentation: https://docs.brew.sh user@users-iMac ~ %
When asked, enter your user’s password and confirm if the Xcode Command Line Tools need to be installed:

On an M1-based Mac, you might need to go through an additional step to add brew to the PATH before you can use it:

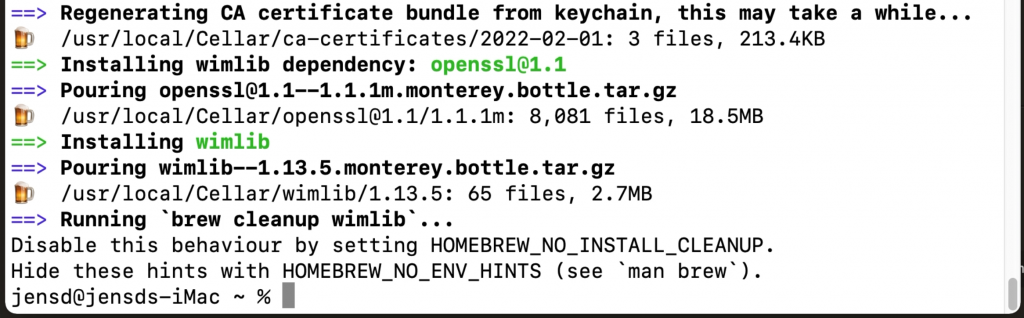
Once Brew is installed, we can use it to install Wimlib:
user@users-iMac ~ % brew install wimlib
 ==> Downloading https://ghcr.io/v2/homebrew/core/openssl/1.1/manifests/1.1.1k
...
Split install.wim and get it on the USB drive
Now that we have Wimlib installed, we can use it to split the large install.wim file and copy it to our USB drive. In the same or a new Terminal session, execute the following:
jensd@jensds-iMac ~ % wimlib-imagex split /Volumes/CCCOMA_X64FRE_EN-US_DV9/sources/install.wim /Volumes/WINUSB/sources/install.swm 4000
Splitting WIM: 4584 MiB of 4584 MiB (100%) written, part 2 of 2
Finished splitting "/Volumes/CCCOMA_X64FRE_EN-US_DV9/sources/install.wim"
In the command above, we told to execute the wimlib-imagex tool (part of Wimlib) and passed some arguments:
- “split” to indicate that we want to split this larger file
- “/Volumes/CCCOMA_X64FRE_EN-US_DV9/sources/install.wim” which is the source file to split. Keep in mind that the name under /Volumes depends on the ISO name so you need to adjust this accordingly. Just do ls /Volumes from the terminal to see what is there.
- “/Volumes/WINUSB/sources/install.swm” the destination of where the split files should end. As with the ISO name, here WINUSB is the volume label I gave to my USB drive when erasing it with Disk Utility. Adjust this as well when you chose something different earlier.
- 4000 the max. size of the destination file, so the file will be split in a part of 4000MB and the rest.
After this command completes, you can see that now two files were created on the USB drive:

The Windows 11 installer knows how to deal with these and will just work fine.
That should be all you need to create a bootable USB drive for Windows 11 installation.
(Optionally) download Windows 11 drivers for your Mac
If you plan to use the USB drive, which you created with the above steps, on a regular PC then you can skip this step. If you, on the other hand, plan to use this for installation on a Mac, it is a good idea to go through these additional steps.
The goal of this is to fetch the necessary drivers for use on Mac. As I did from Windows in a previous article, I will use Brigadier for this. Brigadier, which is basically a script, works just from macOS directly as well.
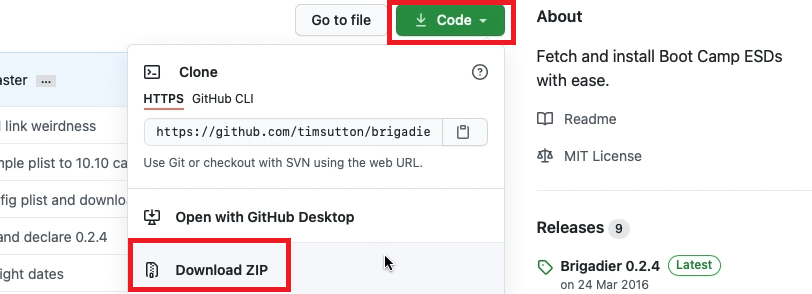
From the author’s Github page: https://github.com/timsutton/brigadier, click the green Code button then choose to “Download ZIP”
Once the file is downloaded, open a fresh Terminal session and navigate to the “brigadier-master” in your Downloads folder, then simply execute it using ./brigadier:
jensd@jensds-iMac ~ % cd Downloads/brigadier-master
jensd@jensds-iMac brigadier-master % ./brigadier
Using Mac model: iMac13,1
...
Expanding flat package...
Extracting Payload...
Extracted to /Users/user/Downloads/brigadier-master/BootCamp-041-84821/WindowsSupport.dmg
user@user-iMac brigadier-master %
As you can see in the output, executing brigadier automatically detected the model identifier of the mac which we executed this on. If you want to download the required drivers for another model, you can simply pass it using the –model parameter. The files got downloaded as a subfolder of brigadier-master as WindowsSupport.dmg
All that is left to do is to navigate to the folder using Finder, then to open WindowsSupport.dmg to mount it and to copy those files to the USB drive:
After going through the installation, executing BootCamp/setup.exe will install most of the required drivers or at least enough to continue the rest of the driver installation using Windows update.
Boot from the USB drive
As the final step, now that the USB drive is prepared, with or without additional drivers for your Mac, you can boot from it.
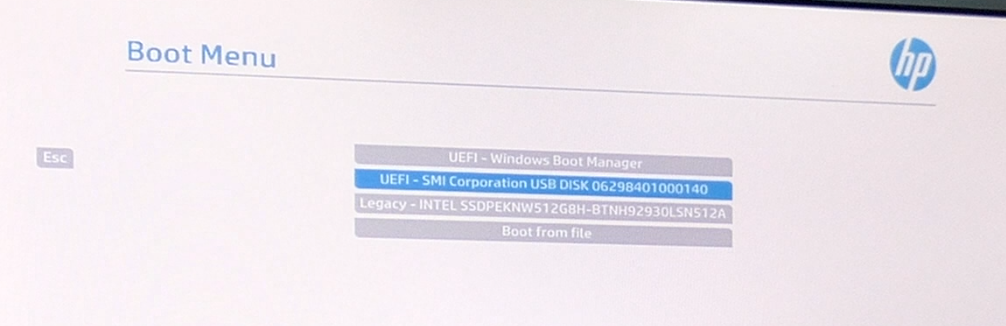
On a regular PC, this is usually done by pressing a key at BIOS time to bring up a boot menu (F9 or F11 is often used for this) or, for some older BIOS, by changing the boot order from the BIOS setup.
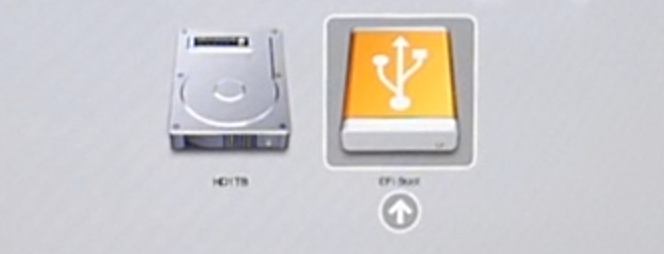
On a Mac, you can choose to boot from USB by holding down the Alt key on boot and to select the USB drive from the boot loader:
Install Windows 11 on unsupported hardware and Macs
If you plan to use this USB drive to install Windows 11 on unsupported hardware, which includes Intel-based Macs, then you will need to work around the hardware checks. You can find more information on how to do this in another article I did: https://jensd.be/1472/windows/install-windows-11-on-unsupported-hardware
In case you want to get Windows 11 on an M1-based machine, have a look at this article instead: https://jensd.be/1533/windows/windows-11-arm-on-m1-based-macs-with-utm
Pingback: Create a bootable Windows 10 installation USB on macOS | Jensd's I/O buffer
Thank you. Works fine !
Worked! thanks for putting this together.
thanks so much! used this guide for windows 10 bootable
It works,Thank you very much!
For me, I am not very familiar with the command line, I use WonderiSO tool to make Windows 11 installation disk, it is easy to use, and it can automatically split ISO files larger than 4GB.
see this answer:
https://learn.microsoft.com/en-us/answers/questions/741412/how-to-create-a-windows-11-bootable-usb-installati
Thank you!
Thank you! This worked for me. I was using an old Mac that had few options under High Sierra. I’m not confident using Terminal and command lines but the instructions worked. It was just hard to know when handbrake had finished doing its thing before moving on to the next bit at times as it took some time doing the tasks.
Another website helped when I encountered the next problem of the laptop not finding the driver(s) !! but again, it was eventually solved and now have windows 11 set up and running on my son’s new Lenovo :)
Thanks so much for writing this tutorial up and highlighting Wimlib!